-
-
-
-
- Still have questions? Submit a ticket to our support team. Contact Us Or Call Us
-
-
-


After starting a new project in FilmoraPro, you will be able to see only two tracks on the timeline. The video files will be displayed on the upper track and audio files on the lower. As you progress in your project, you can add an unlimited amount of new tracks to the timeline.

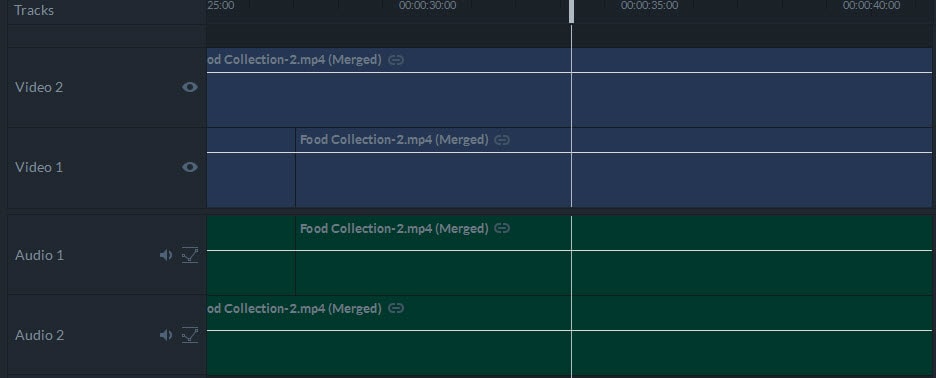
Tracks can either contain video or audio files, so a video file can never be added to an audio track and vice versa. You can place all visual content including planes, video clips and images to a video track. Audio tracks are located in the lower part of the timeline, while the video tracks are always positioned in the upper part of the timeline. How much of the audio tracks or video tracks you see can be adjusted by moving up and down the splitter that separates the video tracks from the audio tracks.
Working on large projects often means that you have to use a lot of different tracks. The tracks you add to the timeline won't always be visible, but you can use the vertical scroll bar on the right end of the video and audio tracks to locate the track you're looking for.
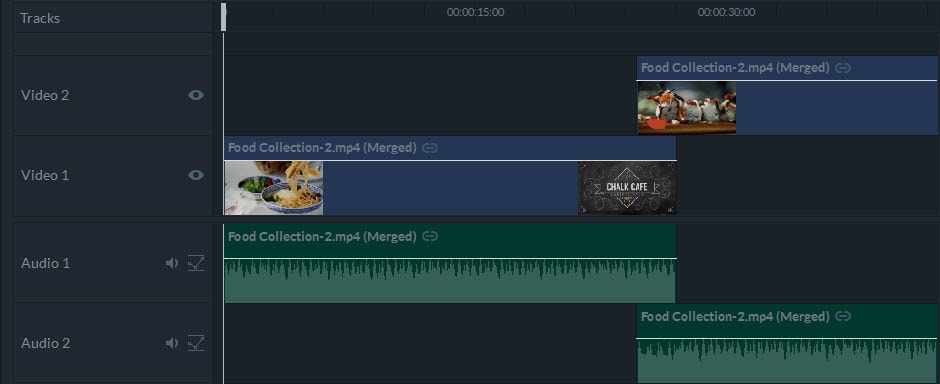
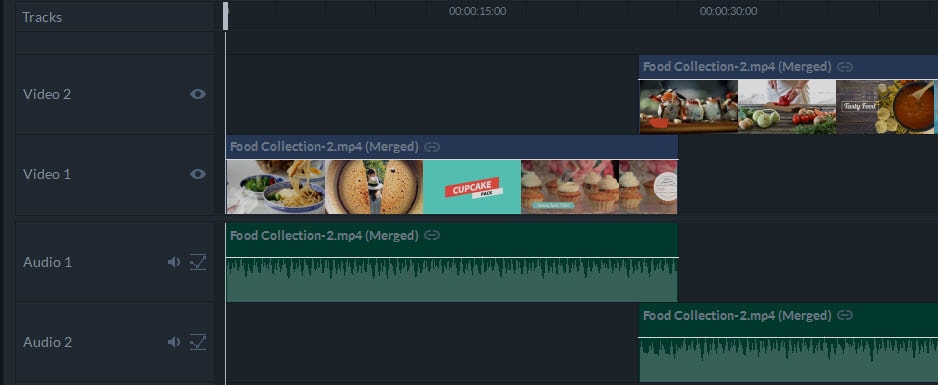
The number of clips you can place on a single track is not limited. The clips you add to a track are arranged one after the other, with or without gaps between them, and their order can be changed simply by dragging a clip to a new location on a track.
Video files usually contain an audio track. When you add a video clip to the timeline, its audio track will be displayed directly below it in the audio track. By default, these two files are linked and marked with a chain icon, so when you move a video clip, the audio will follow. Additionally, when you trim or cut a video clip, the audio will trim or cut at the same point.
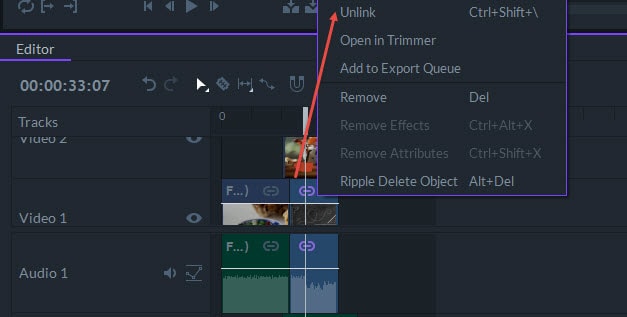
You can separate the linked video and audio by right-clicking on them and selecting the Unlink option from the menu. In order to link an audio and a video file back together, select the Link option from the right-click menu.
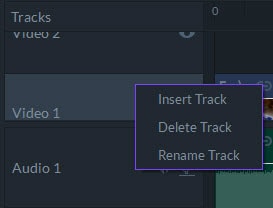
A new track can be added to the timeline by right-clicking on the track listing and choosing the Insert Track option from the menu. Select the Delete Track option from the right-click menu if you want to remove a track from the timeline. You'll be notified if the track you're deleting contains any video or audio clips since all media assets in a removed track will also be deleted.
All tracks on the timeline are named numerically, so the first video and audio tracks are going to be named Video 1 and Audio 1. The next video or audio track you add to a project will be named Video 2 and Audio 2. If you delete an Audio 5 track, for example, the numbering will be reset back to 4, and the next audio track will be named Audio 5.
You can easily give more descriptive names to all tracks by right-clicking on the track you'd like to rename in the track list and typing in a new name.

To reorder the tracks, you just have to drag a particular track up or down. But keep in mind that all the media assets you added to that track will also be moved.

You can toggle a track off or on by clicking on the mute icon that is located next to the track's name. In video tracks, the mute icon looks like an eye, while on audio tracks, the mute icon looks like a speaker without sound coming out of it. All media assets or properties will be saved and ready to use once you decide to toggle a track back on.
Video editing is a dynamic process that often requires you to quickly adjust to the demands of your project. At some points, you'll have to zoom in on the timeline to do more detailed editing while, at other points, you'll want to have an overview of all the clips you've placed on your timeline.
The Zoom slider that enables you to control the zoom level of the timeline is located at the lower left corner of the timeline.
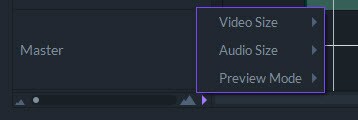
You can customize the appearance of the tracks by clicking on the small triangle icon that is located next to the zoom slider. You will gain access to three submenus that allow you to set the size of your audio and video tracks and to select the preferred preview mode. These options enable you to adjust the timeline according to the demands of your project. For instance, you can reduce the size of your video tracks while you're working with audio files to ensure that you can see the waveforms more clearly.
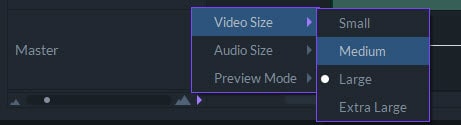
Video Size – There are four different sizes (Small, Medium, Large, and Extra Large) you can choose to display your video tracks in your timeline. The Medium option is selected by default.
Audio Size – Like the Video Size, there are four different sizes (Small, Medium, Large, and Extra Large) you can choose to display your audio tracks in your timeline. The Medium option is selected by default. The waveforms will not be displayed while the Small option is selected. The Large and Extra Large sizes are particularly useful for precise audio editing.
Preview Mode – You can control how the previews for video clips are rendered from this submenu.