-
-
-
- Still have questions? Submit a ticket to our support team. Contact Us Or Call Us
-
-
-
Animating with Keyframes
Changing the value of properties on a few positions in a clip can be achieved by adding a keyframe to the clip each time you change a property's value. After a keyframe is added to a clip, the new value will be stored on a particular frame as a keyframe. Adding several keyframes that have different values allows you to assign multiple values to the same property in a single clip.
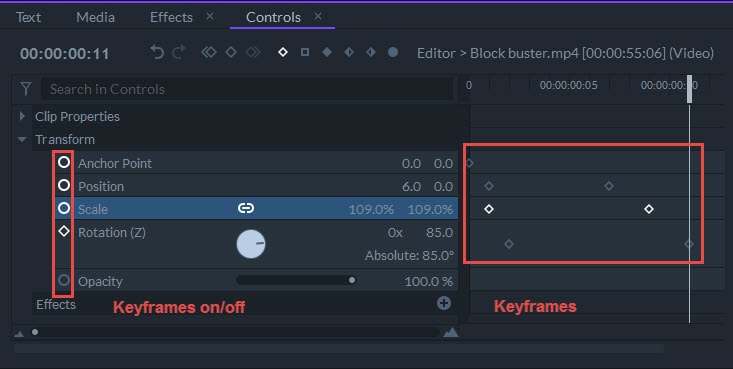
All changes you make to a property will apply to the whole clip unless the keyframing option is enabled. Inserting a new value of a property after you added a keyframe and moved on to another position in a clip will apply the new value to the entire clip.
Animating properties requires you to add a new keyframe each time you alter the property's value. You can activate the keyframe option for all properties by clicking on the circle that is located next to the property's name in Control Panel. The keyframe icon will turn white after the keyframing option is enabled and a new keyframe will be added at the playhead's current position on the timeline.
Each time you alter the property's value, that value will be saved at a particular frame to which the keyframe was added, which means that you can go from one keyframe to the next and insert different values. FilmoraPro will animate the new values of a setting in all frames between two keyframes.
When the keyframing option is enabled, each time you adjust the property's value at a new location in a clip, a keyframe will automatically be added to that frame. Each keyframe you add to a clip will contain the changed value of a property.
The software automatically interpolates from one keyframe value to the next, so that you don't have to animate every frame between two keyframes. If you place a keyframe to the first frame of a clip that positions it on the far left of the screen, and then you add another keyframe to the 24th frame of that same clip that positions the clip on the far right of the screen FilmoraPro will animate those 24 frames and move the clip from one side of the screen to the other.
Selected keyframes can be duplicated by holding the Ctrl (CMD on Mac) button and dragging the keyframe to the new location within the clip. The original keyframe will remain at its place while its copy will be added to the frame at the keyframe's new position.
If you added a lot of keyframes to a project, you may want to quickly jump from one keyframe to another. Clicking on the Previous/Next Keyframe buttons, located above the timeline in Control Panel will move the playhead between the keyframes created for the currently selected property. Double-clicking on a keyframe will automatically move the playhead to that position on the timeline.
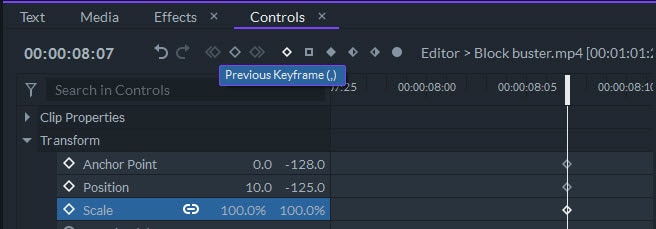
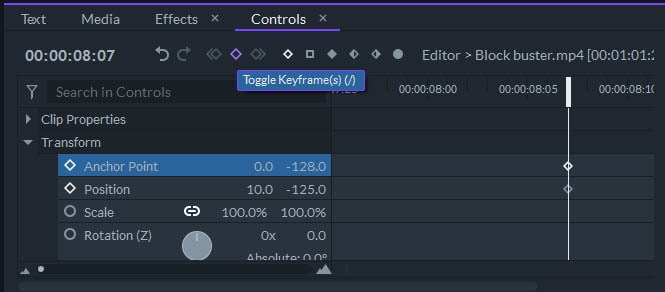
If you would like to add or remove a keyframe without changing the value of a property, you can easily do so by clicking on the Toggle Keyframe button that is located between the keyframe navigation arrows in the toolbar. If a frame already contains a keyframe, clicking on the Toggle Keyframe will remove that keyframe. Clicking on the Toggle Keyframe button will add a keyframe to a frame, using the settings of that frame.
Right-clicking on a keyframe on the timeline and selecting the Remove option will delete a keyframe you added to a clip.
After a keyframe is created adjustments to its behavior and its position can be made. Place the playhead to the same spot on the timeline at which the keyframe you'd like to edit is located and proceed to change its position or all other information stored in that keyframe. A new keyframe will be created if you attempt to edit a keyframe while the playhead is not correctly positioned. You can double-click on a keyframe to make sure that the playhead is at the exact same location as the keyframe you want to edit.
The Select tool can be used to select keyframes. The keyframe will become white when it is properly selected.
All selected keyframes can be easily dragged from one position to another, but they can only be moved horizontally. Moving keyframes from one property to another is not possible. In order to transfer the keyframes from one property to a similar property on another clip, you have to copy them and then paste them to a new clip.
Selecting three or more keyframes and then dragging them to the left or right while holding the Alt (OPT on Mac) keyboard button will scale their positions. However, scaling the position of keyframes may create sub-keyframes that don't exist on actual frames and they can't be edited before they are moved to a primary keyframe position.
How FilmoraPro animates the frames between two keyframes is determined by Temporal Interpolation. The Temporal Interpolation submenu that offers a number of different options can be accessed by right-clicking on the selected keyframe.
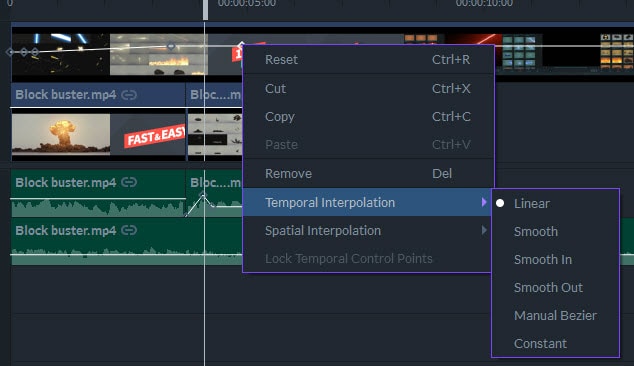
The Temporal Interpolation is depicted on a value graph as a curve and a steeper curve represents a more rapid interpolation. See The Value Graph for more information. The Temporal Interpolation of a clip's position property is represented by dots in the Viewer Panel, and each dot depicts a frame. Linear interpolation will be displayed as evenly spaced dots, since the rate at which the value change is constant for each frame.
Smoothed keyframes will cause the dots to accumulate near a keyframe because more frames are used to create a gradual change of values. That is why a dense cluster of dots indicates a relatively slow change in value, while sparsely distributed dots suggest a rapid change of values. The example below shows the linear temporal interpolation represented in the Viewer Panel.
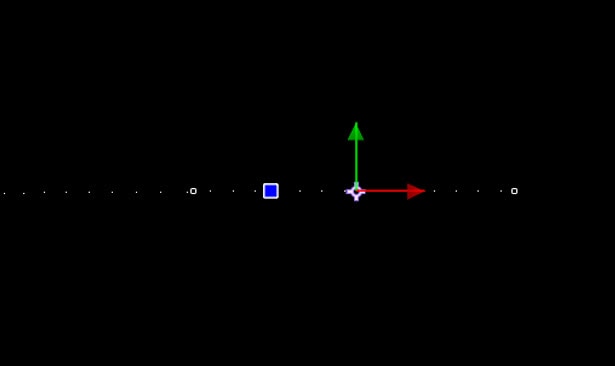
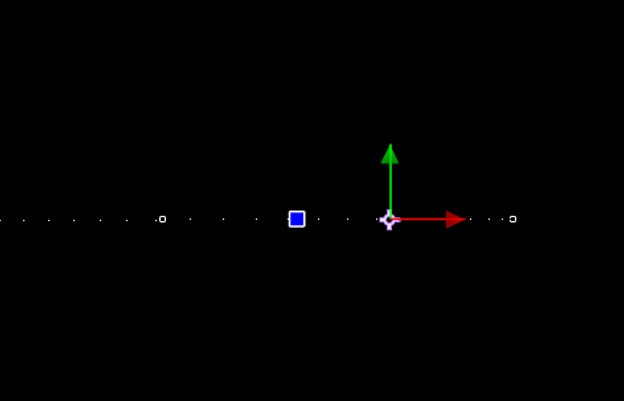
In the second example, you can clearly see that the dots are nearer to each other as the layer approaches the keyframe on the right. The layer in the second example is closer to the keyframe than the layer in the first example even though both images were created on the same frame. This happens because the change of value on the left side of the animation is bigger than on the right.