-
-
-
-
- Still have questions? Submit a ticket to our support team. Contact Us Or Call Us
-
-
-


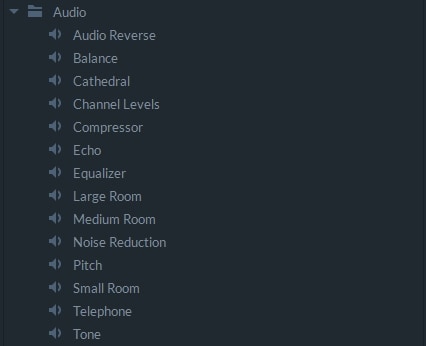
The sound is as important as video during the video editing process, and for that reason, FilmoraPro features a wide variety of audio effects that enable you to fine-tune each audio file you decide to include in your video’s soundtrack.
Enables you to play the selected audio clip in reverse. This effect doesn’t have any controls, as it simply plays audio files backward.

You can pan the audio from left to right within the stereo field of their projects. Once the effect is added to an audio clip, its properties can be adjusted from the Controls Panel. Choosing a negative value on the Balance slider will pan the audio to the left channel, while positive values pan the audio to the right channel. The default Balance value is set to zero, which means that sounds are equally distributed to both channels.
This audio effect simulates the acoustics of large venues, like cathedrals.

The overall volume of left and right audio channels can be adjusted separately by applying the Channel Levels effect.

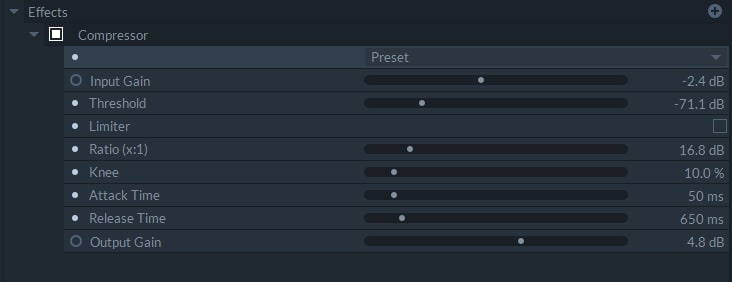
Sometimes the difference between the loudest and the quietest points in an audio file can be too large which can render the file useless. In these situations, you can use the Compressor effect to reduce the peaks in the audio while keeping the quiet parts loud enough so that they can still be normally perceived, and conversely, you can make faint sounds louder without pushing the peaks above acceptable levels.
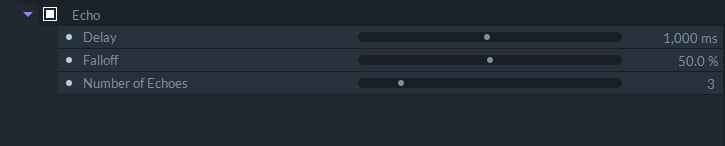
Adds echoes to the audio file to which it is applied. You can choose the number of echoes or how far removed they are from the original sound in the effect’s properties that can be accessed from the Control Panel.
Adjusting the strength of specific frequencies in an audio file is the reason why the Equalizer effect is frequently used during the audio editing process. Which frequency you’re going to highlight depends on the audio file you’re working with and on the effect, you’re trying to achieve. The Equalizer effect also contains a number of presets such as Bass Boost or Low Pass that can help you optimize it faster. However, you can customize each of the available properties by either inserting new values or by dragging the sliders of each of the options that the Equalizer effect provides.

The Master Gain feature enables you to alter the volume of an audio file. The overall volume of a clip can also be controlled by the Volume feature that can be adjusted directly from the timeline or from the Properties menu in the Controls Panel, so the Master Gain should only be utilized to set the base volume of a clip.
The sound files you import into a project often have a low gain, and in order to adjust them in accordance with the standards used on contemporary playback equipment, you should just monitor the default gain displayed by the software’s audio meters. If you notice that the file has peaked at any point, you can then proceed to alter the Master Gain level. If you have a dialogue file that peaks at -18dB and it is too quiet, you should raise the Master Gain to 9dB. This action will increase the overall gain value to -9dB which will make the dialogue more audible while leaving room for further volume adjustments if they are necessary.
Applying this effect to an audio file will simulate the ambient reverb of a large room. The reverb you’ll be able to create will last longer than the reverb created by the Medium Room effect.
The ambient reverb of a medium-sized room will be simulated.
Audio files often contain background noises that can significantly reduce their quality. The Noise Reduction effect offers a quick and easy way to remove or decrease noise levels in audio files you’re using in your projects.
After you add the Noise Reduction effect to an audio file, you placed onto an audio track on the timeline, position the playhead at the exact spot on the timeline where unwanted noise is located. Keep in mind that the existence of other interfering noises will lessen the effect’s capability to reduce the noise that is troubling you. Recording the atmospheric sounds of a room or any other filming location, before you record the dialogue may help you deal with all other noises that may interfere with a noise you’re trying to reduce.
Once you’ve positioned the playhead at the desired location, you should proceed to click on the Capture Noise Print button under the Noise Reduction settings, located in the Effects menu that is available in the Controls Panel. The software will then sample the audio file in order to detect and remove the noise.

After the software captures a Noise Print, more Noise Reduction options will appear on the screen. Even though in most cases a noise is removed immediately after capturing the noise print, you may want to use these additional options to tweak the noise reduction process.
After the software captures a Noise Print, more Noise Reduction options will appear on the screen. Even though in most cases a noise is removed immediately after capturing the noise print, you may want to use these additional options to tweak the noise reduction process.

Applying the Pitch effect to an audio file can help you counter the pitch change that occurs after you alter the playback speed. You can also use it to create high and low pitched sounds.

This effect recreates the ambient reverb of a small room. The generated reverb is shorter than the reverb produced by the Medium Room effect.
FilmoraPro’s users can add the sound of a telephone ringing to the soundtrack of your video.

You can apply a continuous tone at a constant frequency to the audio file you placed on the timeline. The Preset menu offers a number of different tones you can choose from, while the Type feature lets you choose between Sine and Square options. As you increase the tone frequency it becomes progressively more difficult to distinguish between Sine and Square types.