

Are you ready to get creative with FilmoraPro? Here is an overview where you will learn how to use FilmoraPro. We will create a new project, import media, basic editing, and export this project.
Get to Know FilmoraPro First
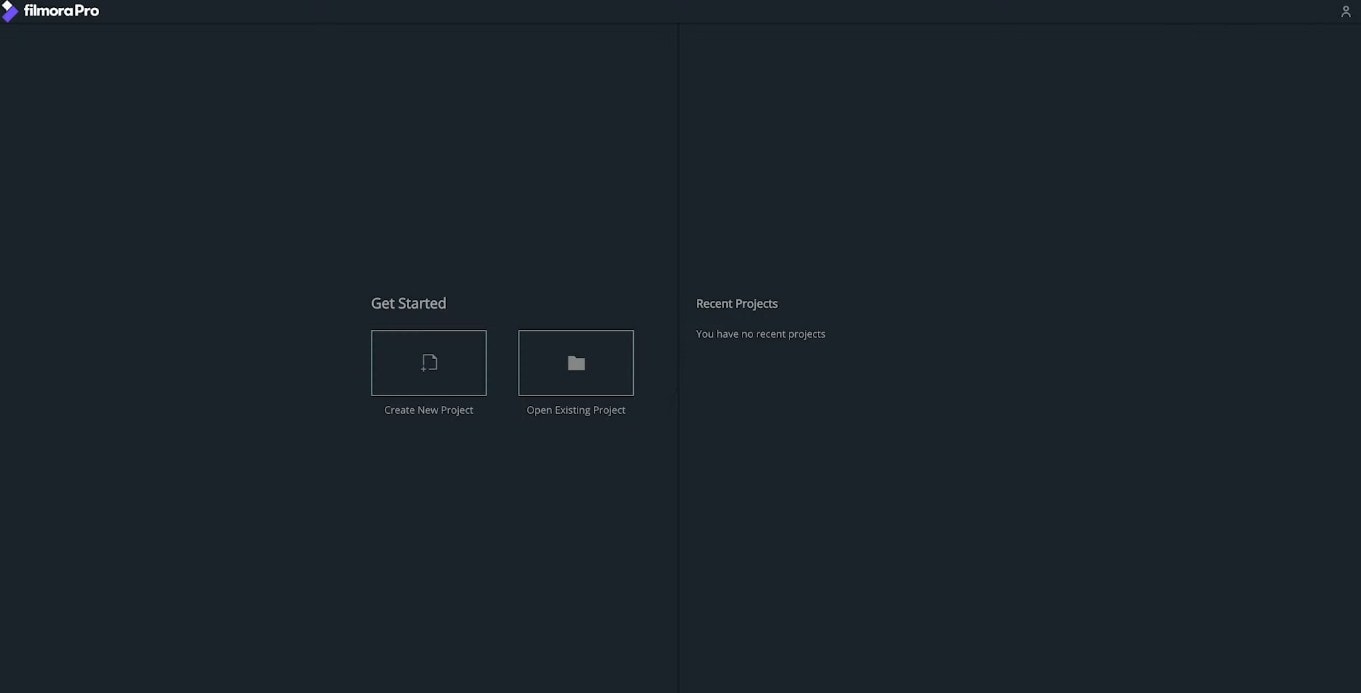
The first thing we see when opening FilmoraPro is the home screen. We can click here to open a project that we’ve been working on before. But it is better if we start with a new project. Click on the other icon which states Create New Project. We will be directed to the Edit screen. This screen has various panels that we can use in our editing process. But for today, we will just be looking at a few of them.
Import the Files
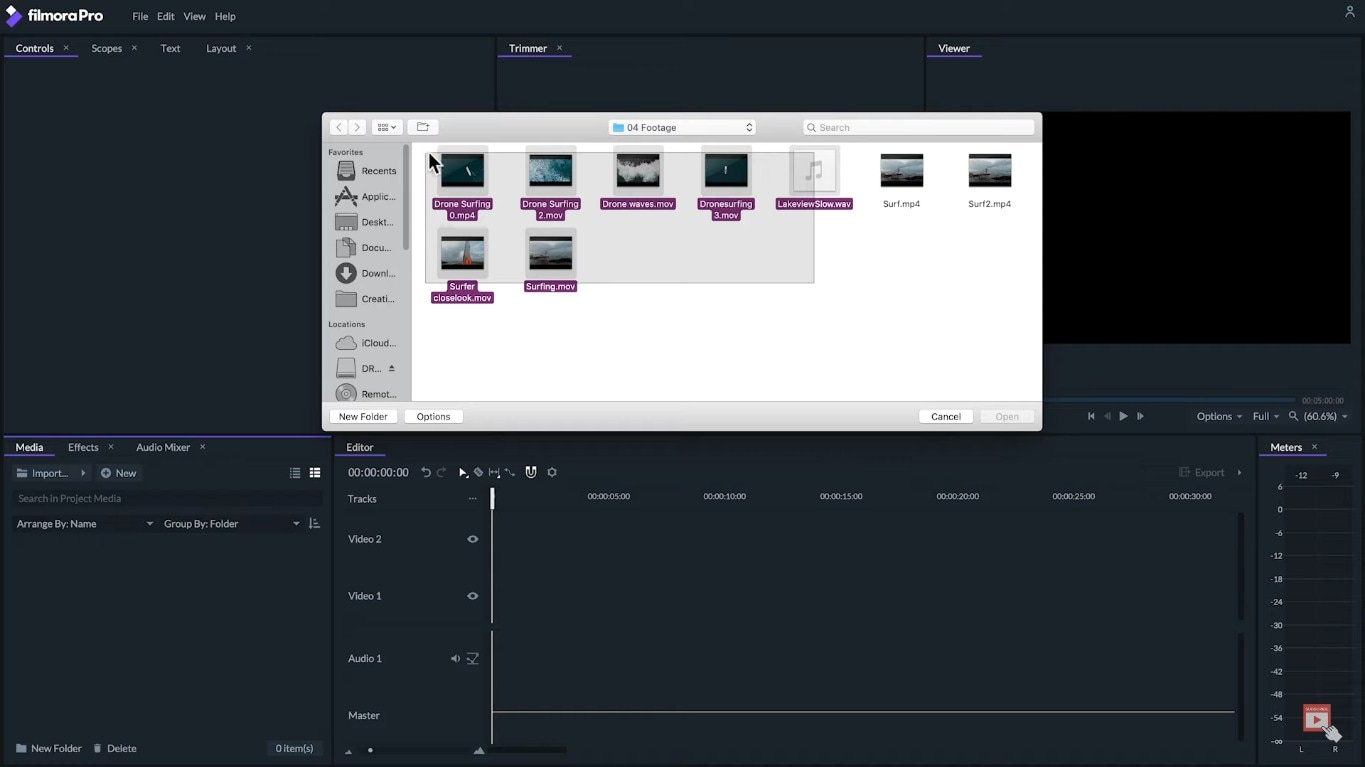
First, we’ll choose which files we are going to use for the edit. It can be audio files like voiceover, sound effect, and music; image files like photos and graphics, and of course video files. FilmoraPro supports various media formats. Then we’ll link these files to our edit by importing them into the project.
Click on the import button on the media panel and select all the files you want to use. All the files that are imported will be visible in the Media panel. By default, you can find it in the lower-left corner of the screen. We can click on any of the files to see a preview of it inside the Trimmer Panel right in the middle of the screen.
By clicking on the Play button, we can play/preview the media file. And you’ll have small playhead for the trimmer at the bottom of the panel. We can click and drag clips from the media panel and drop them in the Editor Panel.
Start Editing
The first time we do this; a window will pop up and suggest that we automatically match the sequence to the project settings. In this case, let’s click on Yes. On the Editor Panel, we will see our video is represented by the blue rectangle.
If it has audio on it, we will also see a green rectangle on the lower side of the video. The white line on the Editor is the project’s playhead and we will see a preview of this timeline in the viewer panel. It shows the project at the frame location of the playhead.
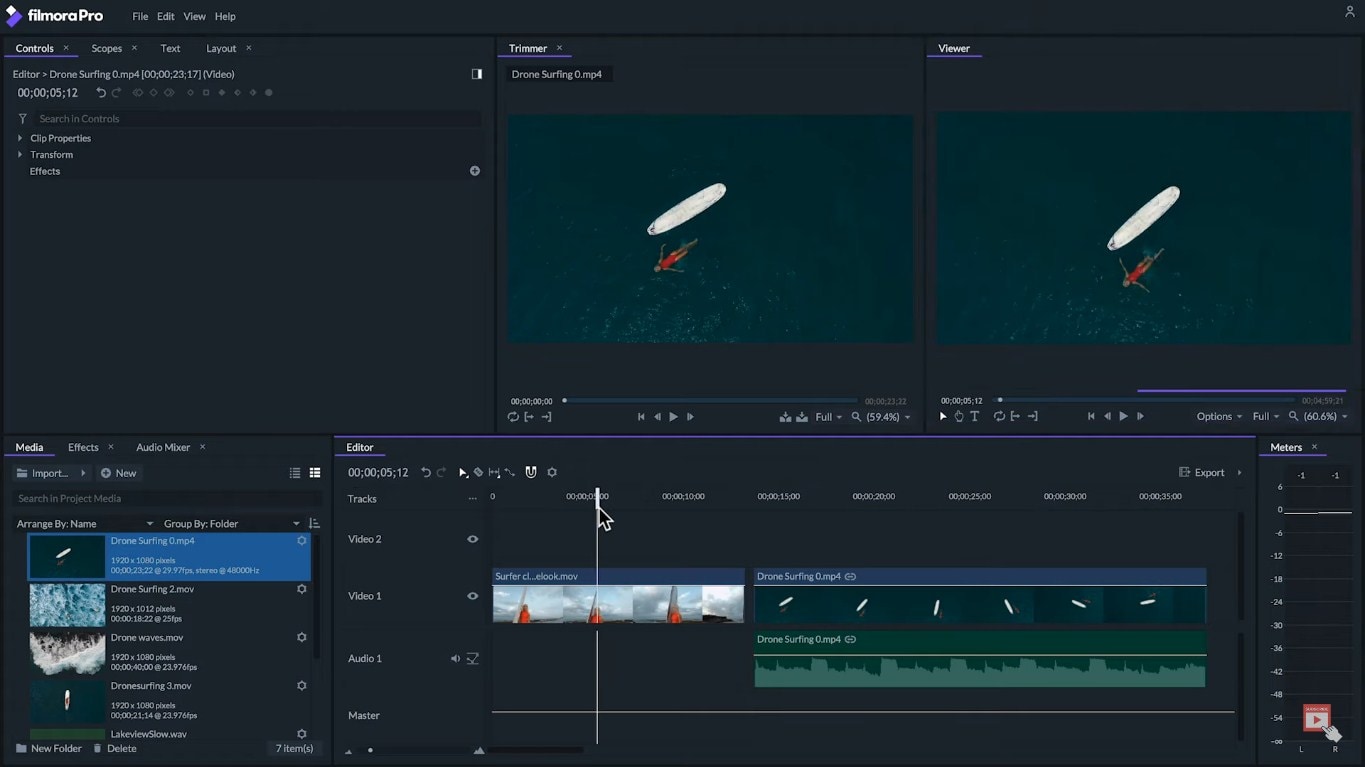
We can trim the clip by clicking and dragging from its sides to choose where we want it to start and where to finish. Once we’ve done this with the first clip, we can add other clips, background music, sound effects, and arrange and trim the clip the way we want.
Save the FilmoraPro Project
Once, we are happy with our edit, we can export our project to turn it into a video file to be easily played or uploaded. To do this, we will click the Export icon in the Editor panel and then we click on Contents. This will take us to the Export screen.
On the queue, we will see our project name. In the preset column, we’ll choose the preset that suits our needs best. In our case, we are going to upload it to Vimeo, so, we’ll choose the Vimeo preset.
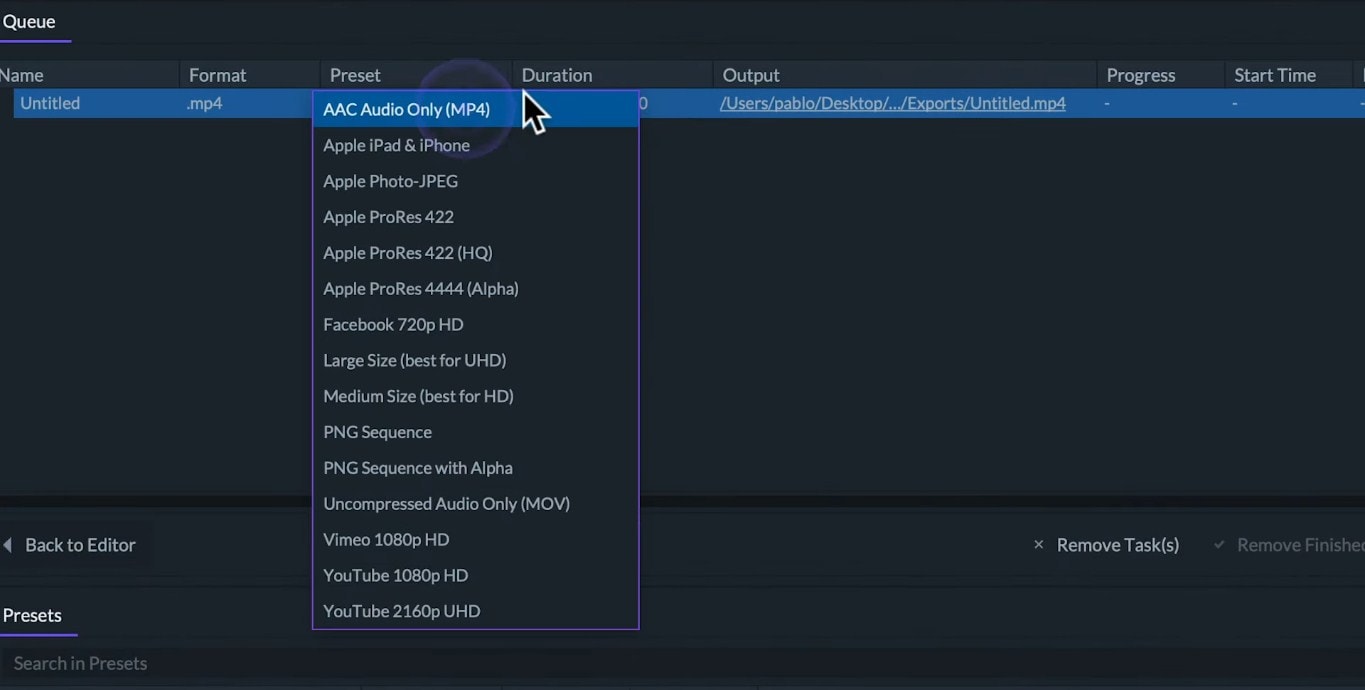
On the output column, we’ll click to choose the name of our video and where to save it. To finish, click on the Start Exporting button. Once it is done exporting, we will have a final video ready to use.
This was a quick look at the process of using FilmoraPro. To get a more in-depth look at every step we took here, make sure to check out our next article in the series.