-
-
-
-
- Still have questions? Submit a ticket to our support team. Contact Us Or Call Us
-
-
-


The fastest way to save a project is to use the Ctrl+S keyboard shortcut, but you can also save by going to the File menu and choosing Save or Save As. When saving a new project for the first time you'll be asked to name your project and choose where on your hard drive it will be saved.
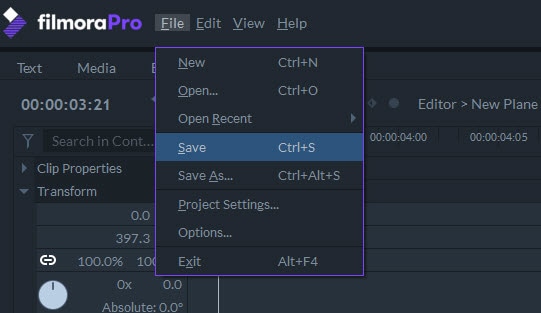
Choosing Save As lets you choose a new name or destination for your saved project. If this isn't your first time saving the project, this will create a second project file.
Filmora's Pro video editor also auto-saves your project at predefined intervals to ensure that you can recover your work if for some reason the program shuts down before you have a chance to save your project.
More information about adjusting the auto-save settings is available on the Setting Up FilmoraPro page.
The media assets you're using in a project are not saved in the project file. In order for FilmoraPro to access them the next time you work on your project you must make sure that they are still saved in the same location and that the file names have not changed. If you're opening your project on a different computer then you started it on then you will need to transfer your media assets to the second computer as well.
You can manage all tasks related to exporting a video in the Export screen.
To export your video, or a portion of your video, click 'Export' above the timeline and choose either In-Out Area or Contents.
Contents: exports all of the media on your timeline as a video.
In-Out Area: exports only the portion of your project that is between In and Out points which you have set.
Either option will open a dialogue window asking if you would like to Go to Export or Continue Working.

If you choose 'Continue Working' your export will not start, but it will be added to the Queue in the Export screen for you to review later. Choosing 'Go to Export' will take you to the Export screen.
From the Export screen, click Start Exporting underneath the Queue to export your video. If you want to keep working on your project (i.e. if you are only exporting a portion and are not finished the final video) then you can click Back to Editor from the Export screen after starting your export and Filmora's Pro video editor will continue your export as a background task while you continue editing.
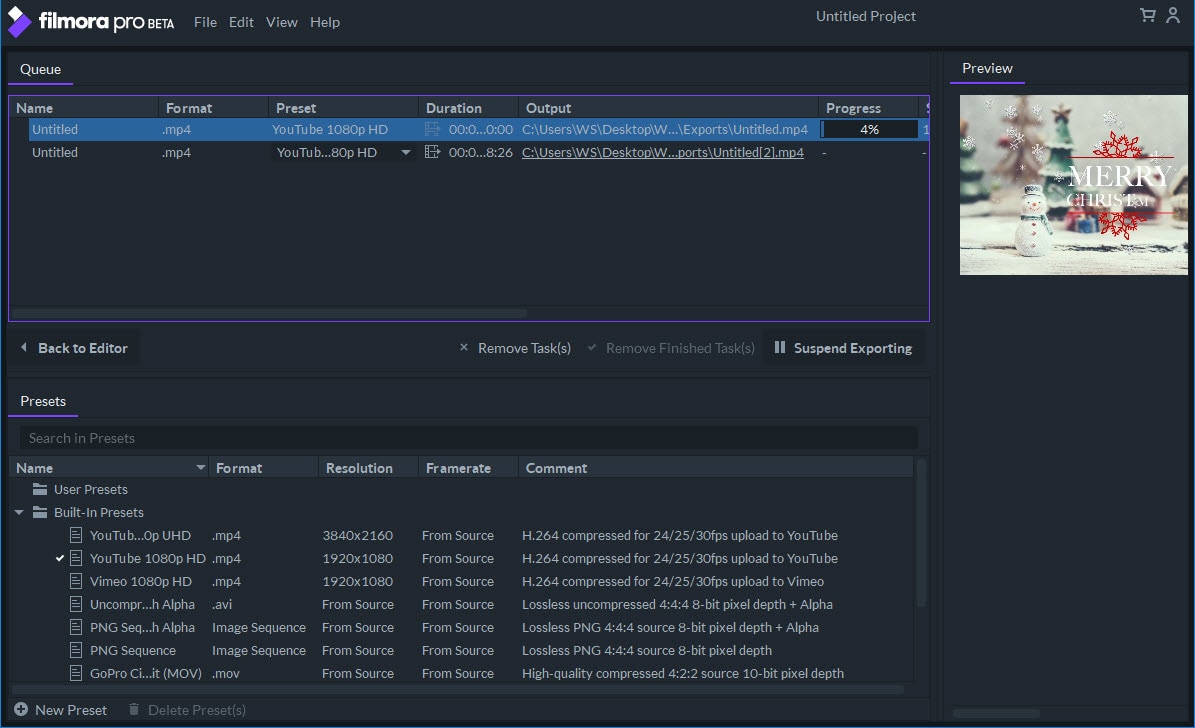
FilmoraPro's Export Screen is divided into three main sections:

All available export presets can be found in the Presets panel of the Export Screen. Export Presets are divided into two categories:
Visit the Supported Formats page of this manual to learn more about the export format options.
Double-clicking on a preset will enable you to select it and change the preset that is applied to new export tasks by default.
To delete a User Preset, select the preset you want to delete and click on the Delete Preset icon located below the preset list. You cannot delete Built-in Presets.
Projects and sections of projects that are waiting to be exported will be displayed in this panel.

At the bottom of the Queue Panel you'll see the following options:
After you click the Start Exporting button, you can click the Back to Editor button to head back to the Edit screen and continue working on your project. The rendering process will go on in the background without disrupting your workflow.
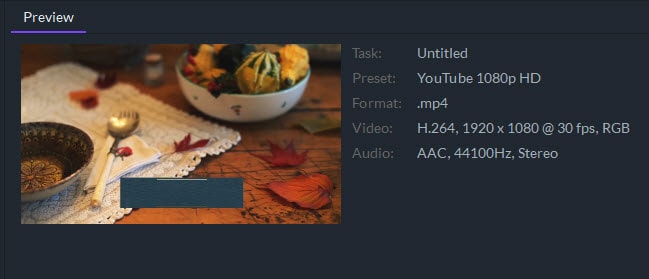
You can keep track of your export progresses in the Preview Panel. As the software advances through the task the frames that are currently being rendered will be displayed here. You can also see the details of the video that is being processed, including the task name, the preset, and the compression. The images displayed in the Preview Panel are taken from the buffer of the export. They do not slow down the export process because no additional rendering is required to display them.
To export an individual clip, right-click on it in the timeline and choose Add to Export Queue from the menu that appears.
You can repeat this process for multiple clips and they will all be added to the Export Queue as separate tasks.
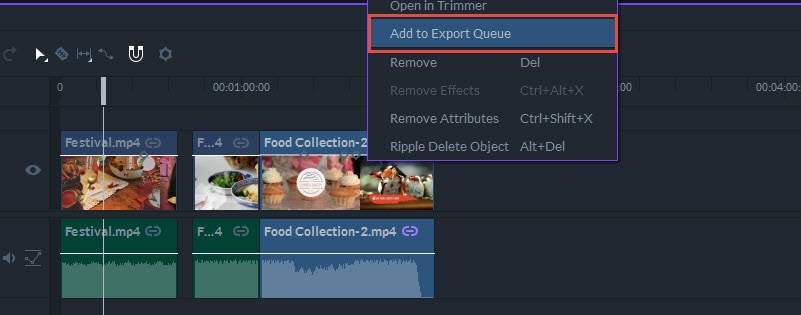
The Add to Export Queue feature is useful if you want to batch convert video files to a new format. If you add video clips to the Export Queue this way the names of tasks in the queue will indicate their source and their positions on the timeline.