-
-
-
-
- Still have questions? Submit a ticket to our support team. Contact Us Or Call Us
-
-
-


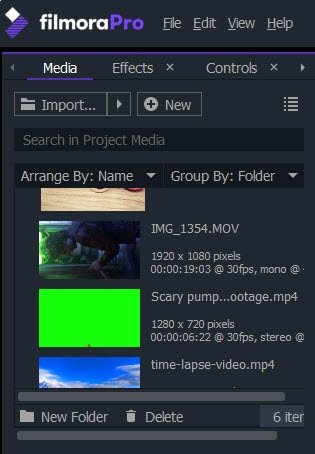
To place a video or audio file onto the timeline, you must first import it into Filmora Pro by adding it to the Media Panel. New media files can be added by clicking on the Import button in the Media Panel, or by dragging and dropping files directly from the folder to the Media Panel.
Please visit the Supported Formats page to see if the file you want to import is compatible with the software.
After a file is added to the Media Panel it becomes a media asset that can be manipulated with the video editing tools. A single file can be used multiple times in a project, and none of the changes you make affects the source file, because FilmoraPro only references the original files.
Copying or deleting a media asset in FilmoraPro will not copy or erase the file that is stored on the computer's hard drive. However, if you are working on the same project in FilmoraPro from multiple computers, FilmoraPro needs to have access to all media assets you intend to use off the computer's hard drive during the video editing process.
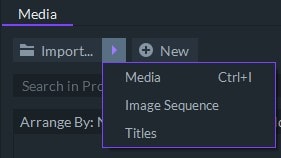
Click the arrow beside the Import button to display more import options.
All media assets can be customized by clicking on the gear icon that is located on the right end of each file in the Media Panel or by right-clicking on the file and selecting Properties.
If your audio and video files are recorded separately, you can sync your files quickly in the Media Panel.
Import the separate audio and video files into FilmoraPro and then click on a video file to select it. While the video file is selected, press the Ctrl (Windows) or Cmd (Mac OS) key and click on the audio file. Afterward, right-click on one of the files you selected and choose the Merge Audio/Video option.
FilmoraPro will then analyze both files and replace the existing audio track of the video file with the selected audio file. A new media asset that can be edited on the timeline will appear in the Media Panel after the synchronization process is complete.
Visit the Syncing Audio and Video Files page for more information.
Immediately after opening an existing project in FilmoraPro, you will be notified if any of the files in use are offline. You'll be able to see all offline files in the Media Panel, and FilmoraPro will save your progress when you relink the files by locating them in the computer's hard drive.
FilmoraPro references the original files and generates a media asset each time a file is added to the Media Panel. None of the adjustments you make to a media asset will have any impact on the source file, but deleting the original file from your computer, renaming it or changing its location on the hard drive will cause the media asset to go offline. This happens because the software searches for a particular file using an obsolete path. Media assets can also go offline if an external hard drive on which source files are stored is disconnected from the computer.
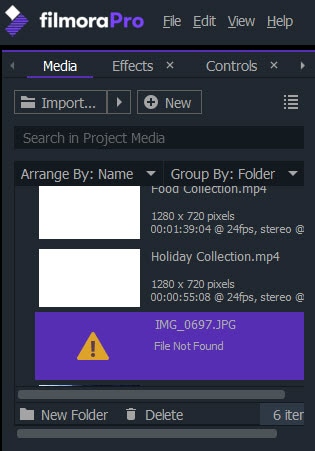
The example below shows how offline files are displayed in the Media Panel:
The following message will appear in the Viewer Panel if one of the assets you placed on the timeline is offline:
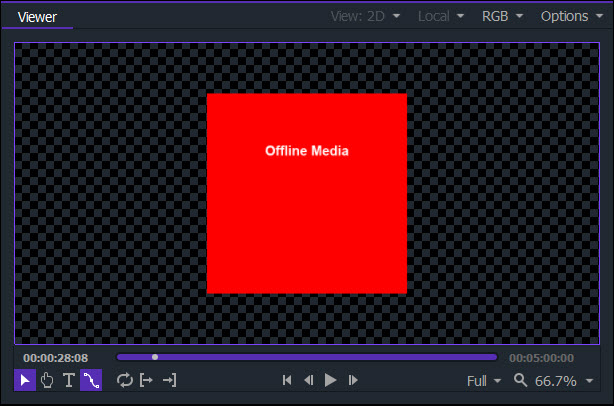
You will be able to edit your project even if your files are offline. However, you will not be able to preview or watch your video in FilmoraPro until you relink the media asset to the source file.
There are a few ways to relink offline files:
Restoring the Source File
The quickest way to get the file back online is to restore it to its original state.
FilmoraPro will automatically detect the source file and bring it back online after you restore it to its original state.
Relinking Individual Files
All offline files can be relinked directly from the Media Panel by clicking on the cog icon and then clicking on the Relink button. When a file browser appears on the screen, navigate to where your source file is located in your hard drive.
Batch Relinking
Every time a project is opened, FilmoraPro automatically searches for offline files. If multiple offline files are detected, you can double click on a media asset to relink it. A file browser will pop up for you to create a new path to the source file. FilmoraPro will then automatically search for the missing files and relink all files discovered in the new location. You can relink an entire folder of previously used audio and video files that went offline by relinking a single file from that folder.
All media assets in the Media Panel can be easily replaced.
Windows users can replace assets in the Media Panel by holding the Ctrl, Shift and the Alt key and dragging and dropping the new file on top of the old media asset.
Mac users can hold the Cmd+Alt keys to perform this action. If the asset you replaced was added to the timeline, this process will remove the old footage from the timeline and replace it with the new one. Only video, audio and image files can be replaced in this way.