- for Windows
- for Mac
Instant Cutter-filmora
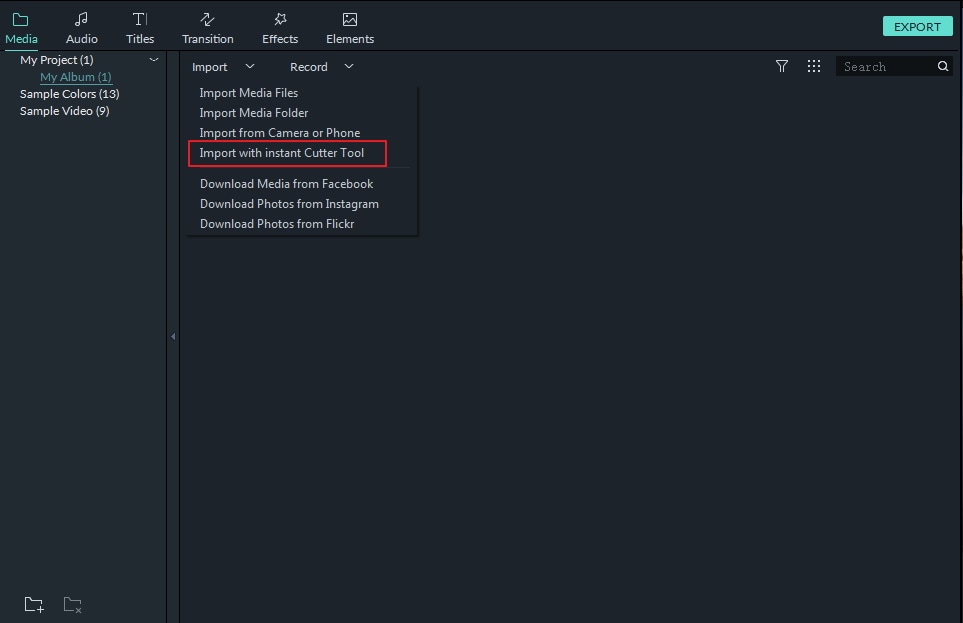
Filmora Instant Cutter Tool allows you to import large video files and action camera video footage in formats like MP4/MOV or MTS/M2TS and trim or merge them quickly without re-encoding. Just click the arrow next to Import and select Import with Instant Cutter Tool in Filmora.
With the Instant Cutter tool, you can:
Section 1: Trim Video Clips Using the Instant Cutter
To follow the steps below, first, open the Filmora Instant Cutter window by clicking Import > Import with Instant Cutter Tool in the Media Library.
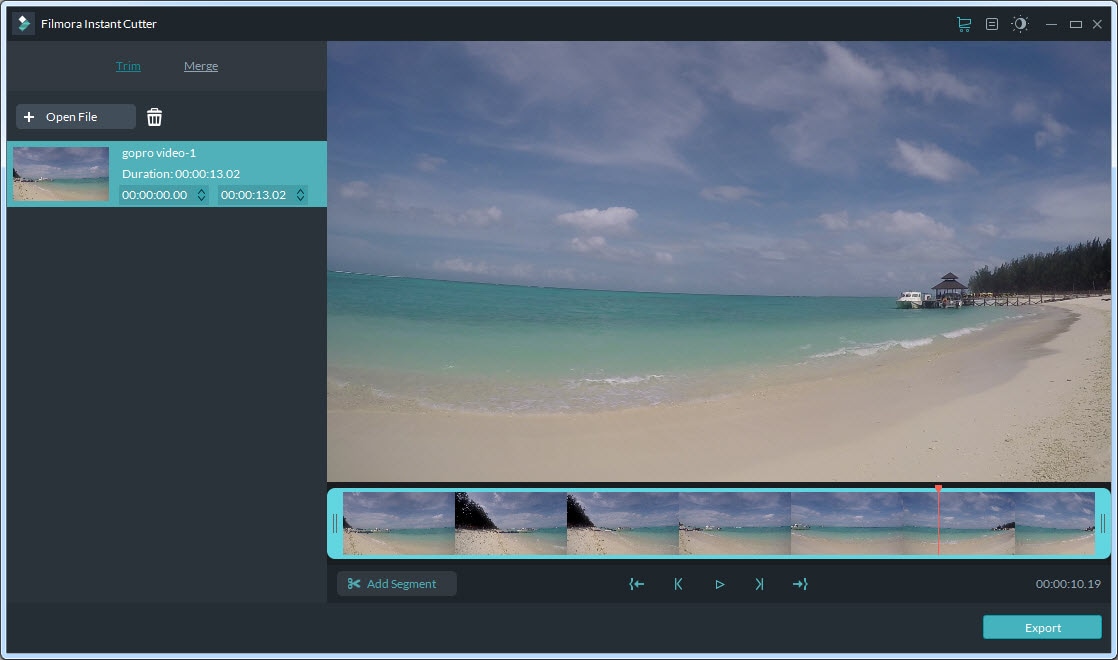
Step 1: Import video files
In the Trim tab, click the Open File button and choose the video file you want from your computer. You can only import one video clip at a time using this tool.
MP4/MOV and MTS/M2TS formats are supported.

Step 2: Trimming
There are three ways to trim your video:
Using trimming sliders
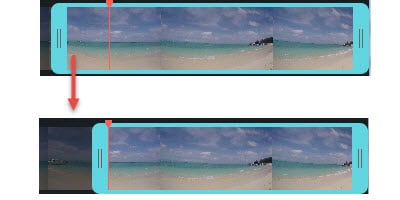
The teal in/out sliders in the Instant Cutter timeline allows you to trim your video clip quickly. Drag the In slider to set the beginning point of the video, and drag the Out slider to set the ending point of the video. The highlighted segment between these two points is what you want to keep.

Using Set in/out points
Move the Playhead to the position you want the video to begin, then click the Set In Point icon  in the Instant Cutter toolbar. The In slider will jump to the position of the Playhead. To set the endpoint, repeat this process and click the Set-Out point icon
  .
.
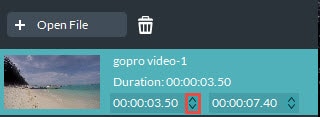
By Setting starting/ending time
On the left side of the Instant Cutter window (in the Trim tab), you will see video information such as video file names, thumbnails, and durations. Under the duration, you can adjust the start and end times of the video by clicking the  buttons or entering exact numbers.
Step 3: Add Segment
To create a new segment, put the playhead at the point where you want the segment to start, then click the Add Segment button. A new video clip that starts from the playhead and goes to the end of the video will be generated and added to the menu in the left of the window.

You can remove it simply by clicking the  icon.
icon.
Step 4: Preview
Press the Space key (or click the Play![]() button) to preview the video clip. You can set the preview starting point by moving the red.
button) to preview the video clip. You can set the preview starting point by moving the red.
You can click the![]() button to jump through the video frame by frame.
button to jump through the video frame by frame.
Step 5: Export
After finishing the trim, click the Export button to export your trimmed clip.

Save to: Your video will be saved under C:\Users\admin\Documents\Wondershare Filmora 9\User Media\LosslessPath\ by default, but you can choose a new location.
Open Output Folder: Choose Open Output Folder if you want the output folder to be opened automatically once the export has finished.
Send to Filmora: Choose Send to Filmora if you want to continue editing your video in Filmora and it will be imported into the Media Library.
Do Nothing: Choose Do Nothing to save your video clips without any further actions. You can continue your work in the Instant Cutter tool interface.
Click OK to execute the export process.
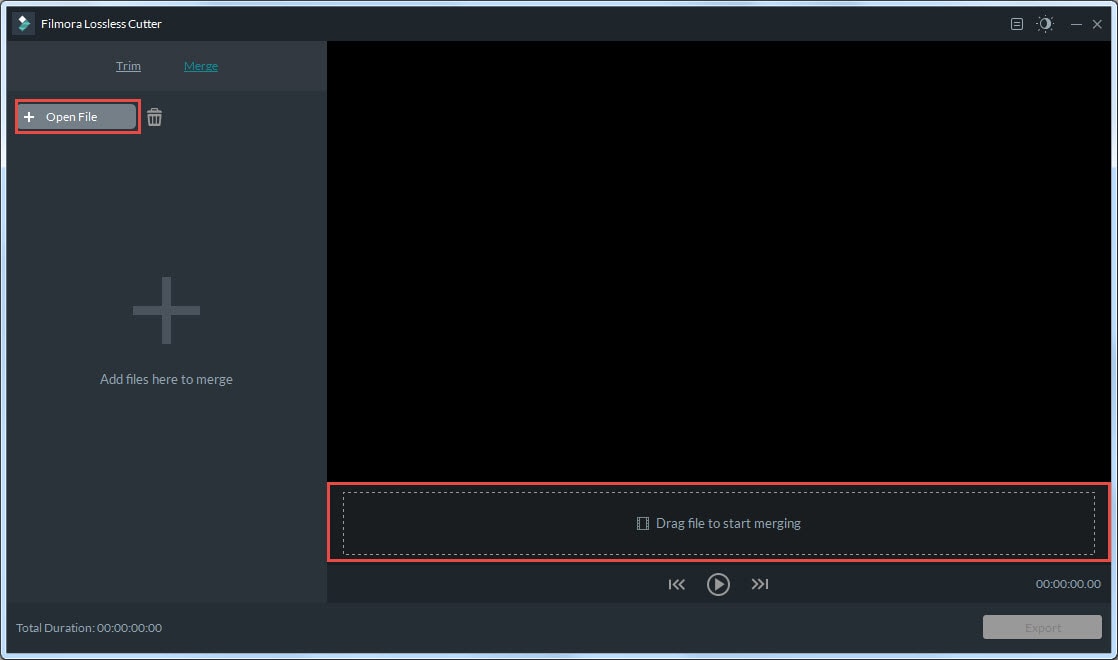
Section 2: Merge Video Clips
This feature allows you to combine two or more video clips together into one video clip. Open the Instant Cutter window by clicking Import > Import with Instant Cutter Tool in the Media Library, and then click into the Merge tab to access this tool.
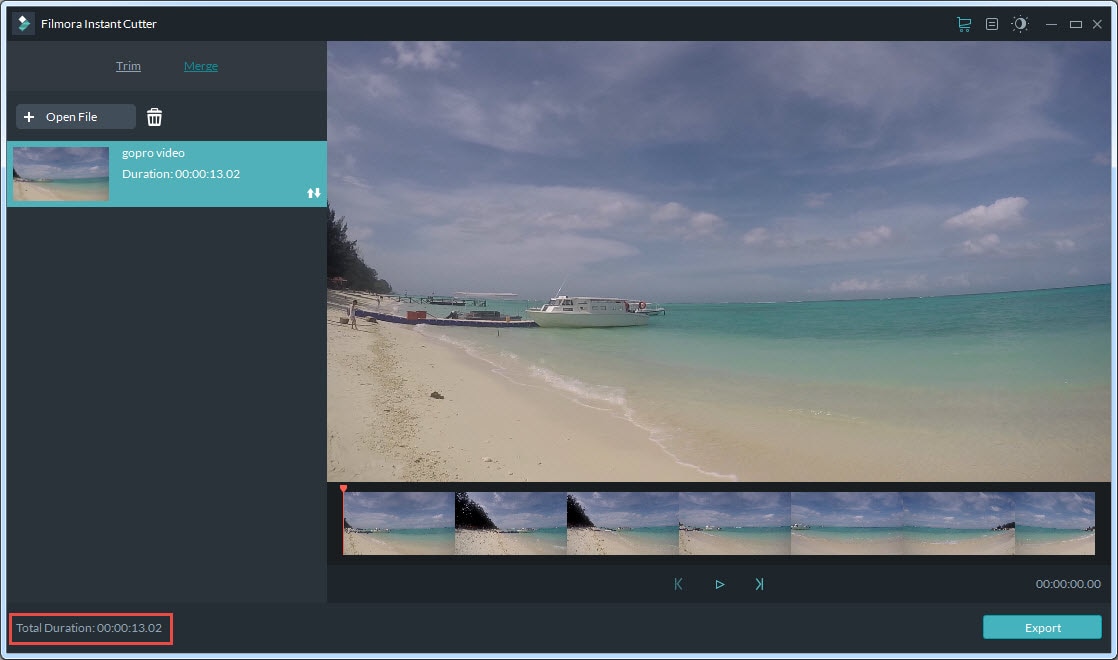
Step 1: Import video clips
Click the Open File button and choose two or more video files you want from your computer. Or, you can drag the video files you want directly into the Instant Cutter timeline.
Requirement:The video clips must have been shot by the same camera or device and have the same resolution and frame rate.
You can check the total duration of your combined video in the bottom left corner of Merge interface:
Step 2: Reorder the clips
If you want to change the order of the imported video clips, hover the cursor over the rearrangement icon![]() until it changes into a hand and then click and drag the clip to where in the order you want it.
until it changes into a hand and then click and drag the clip to where in the order you want it.
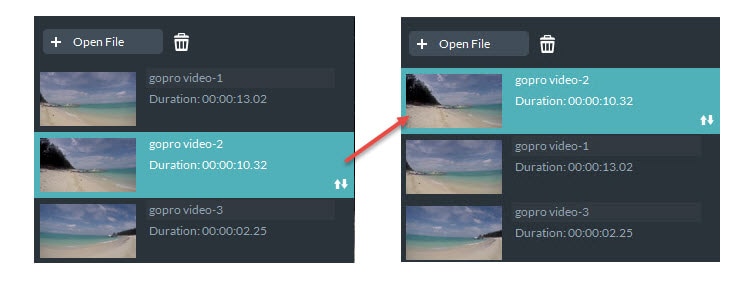
To remove a clip, select it and click the icon.
Step 3: Preview
Please follow the steps outlined earlier in this guide.
Step 4: Export
After finishing the merge, click the Export button to export your merged video.
Please follow the instructions in the earlier section of this guide to navigate the export window.