In the fourth video tutorial, we are going to learn some editing basics in Filmora9, such as how to add media to the timeline, arrange video and audio clips on the timeline, split and delete clips and change the duration of a clip.
Adding the media files to the timeline
If you’ve imported video, image and audio files in the Media Library already, just click on the green plus icon to add the clip to where your playhead in timeline. Alternatively, drag and drop files to any location on the timeline directly.
![]()
A prompt message is going to appear on the screen asking you if you want to match the project settings with the media. Click on the Don’t Change button, if you are adding a still image or a slow-motion video to the timeline because their settings may not be the same as those you’d like to use for the final cut of the video. It’s recommended to verify your project settings before start editing to avoid any issues.

Once you’ve added the video clip to the timeline, you should move the playhead to the exact spot where you want to make the new video clip to start. During editing, you may need to use the trimming, splitting, cutting, and deleting tools.
Split & cut
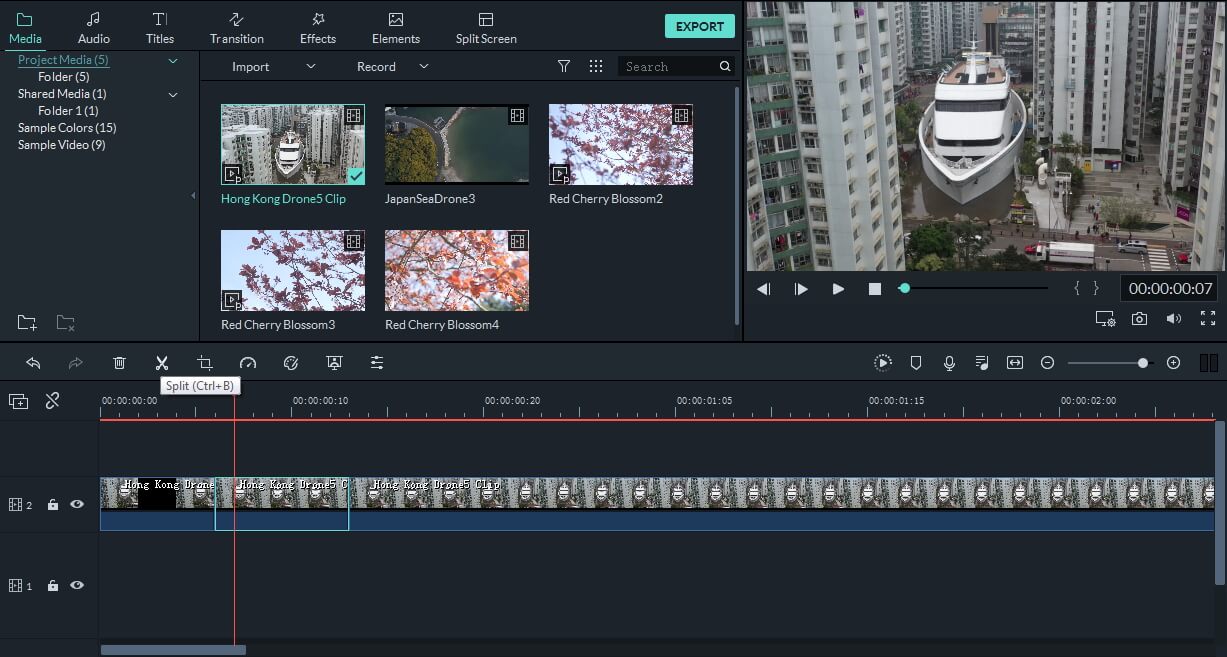
The Split icon that looks like scissors is located in the toolbar above the timeline. Click on it to make the first cut, reposition the playhead to the location where the new video should end and make the second cut.

To delete a clip from the timeline, you must first click on it to select it and then either press the Delete button on your keyboard or click on the Trashcan icon in the toolbar.
Deleting a clip will create a gap between the media files that remain on the timeline. Drag-click a clip and place it next to the preceding clip in order to eliminate the gap between them. Or, you can use the Ripple Edit or Auto Ripple feature to delete section without leaving a gap.
Trimming & Change Duration
Drag one of the clip’s edges to the left or to the right if you want to trim its duration. As soon as you start dragging, a box that informs you how much time you’ve taken of the video clip you’re trimming will appear next to the mouse pointer.

Filmora9 grants you complete control over video’s playback speed and duration. Right-click on a video clip, and select the Speed and Duration option from the menu. The Custom Speed window will pop up on the screen, and you can choose to play a clip in reverse, change its duration or the playback speed.
Trimming Before Adding Media to Timeline
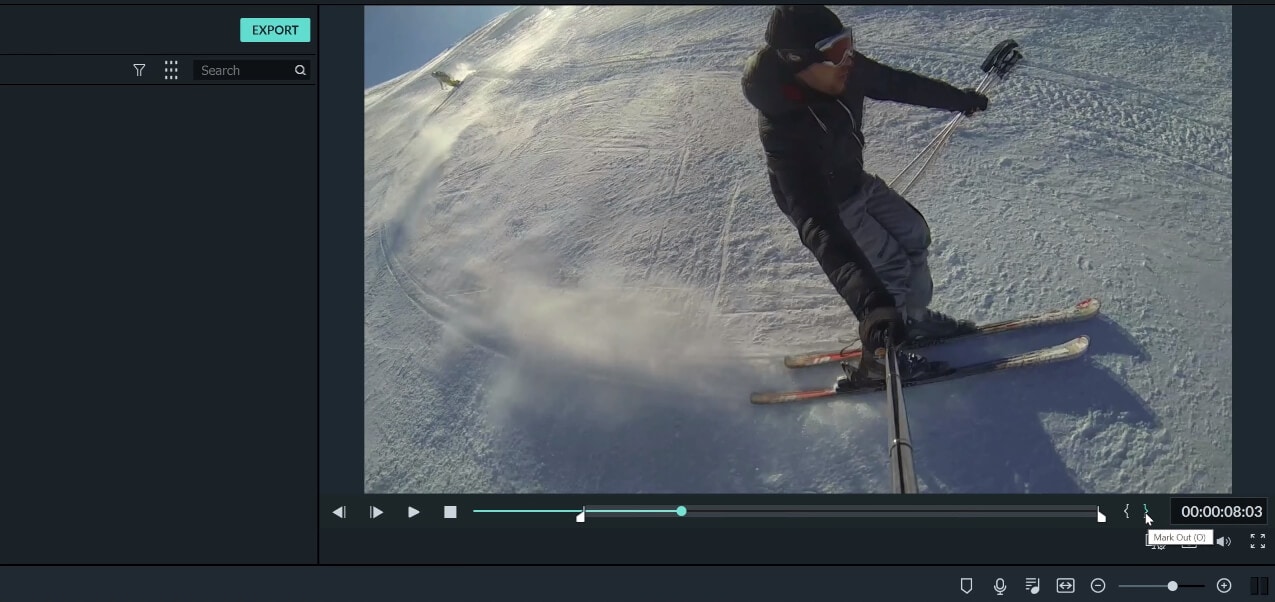
Filmora9 enables you to trim segments of video clips you don’t want to use before adding them to the timeline. Double-click on the video in Media Library to preview, and then use the Mark In and Mark Out features to start.

Preview and choose the position where you want a new video clip to start and press the I button on your keyboard to set the In-point. Jump to the frame at which you want the video to end and hit the O key to set the Out-point.
Or, you can also use the Mark In and Mark Out icons to set the In and Out points.
When done, return to the Media Tab and drag and drop the file for which you set the In and Out points to the timeline. The video will only contain the segment between the In and Out points you set. You can repeat this process for all video files you want to cut before adding them to the timeline and put them together to make a new video.

