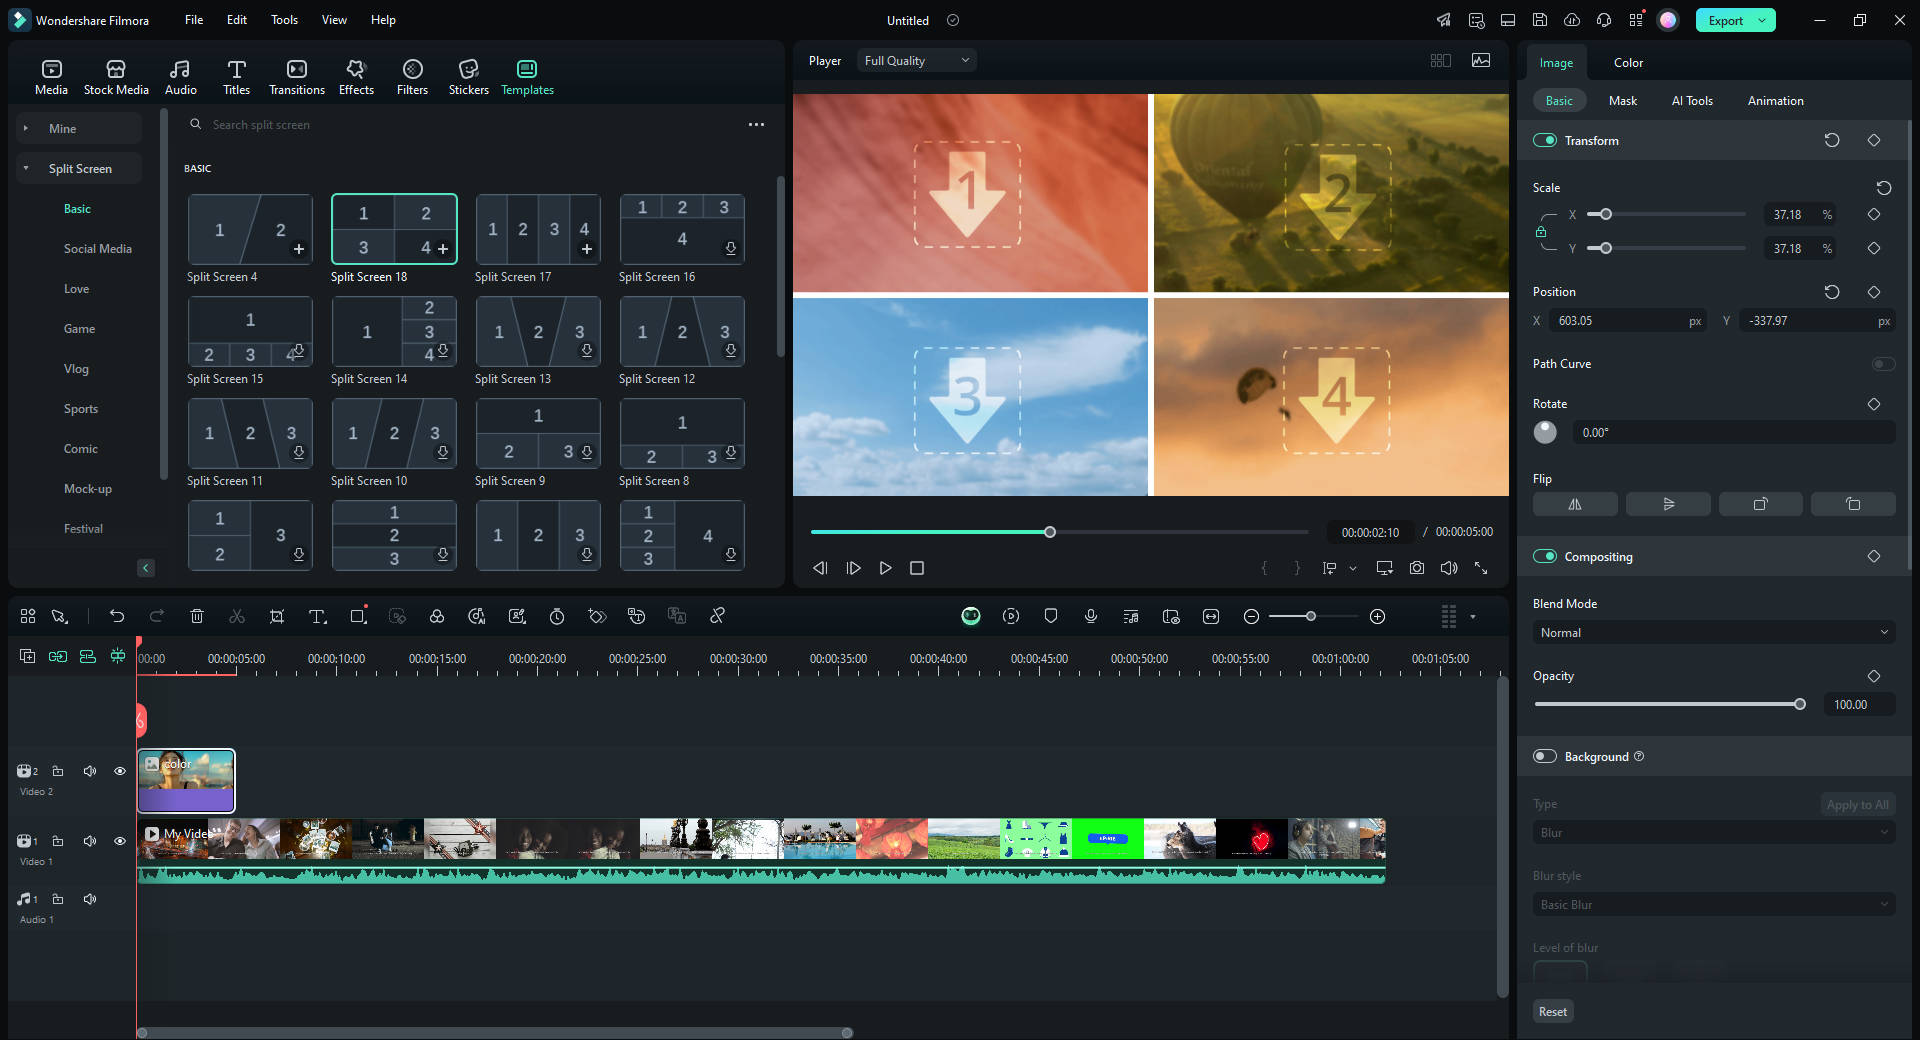
In this tutorial, we are going to show you how you can easily create split-screen effects with Filmora9, and edit the video clips you included in the effect.
Adding a split-screen presets to the timeline
Split-screen is an old video editing technique that enables you to play two or more video clips simultaneously. Filmora9’s Split Screen tab contains thirty different presets you can use to play up to six videos at the same time.

To add a split-screen preset to the timeline you just have to position the playhead at the location on the timeline where you want to place the preset. Afterward, you just have to click on the plus icon located beneath the split-screen preset you like, to add it to the timeline.

You can also check the Enable Split Screen animation checkbox if you want to use the preset’s default animation in your video. The video clips you would like to use in the split-screen effect are going to be located in the Media tab, and you just have to drag and drop them to the exact position in the preview window where you want them to be displayed in the final cut of your video.

If you would like to reposition a video clip, simply click on it in the preview window and drag it until it is perfectly positioned. After you click on a clip, you’ll use a slider that lets you change the size of a video. Replacing a video clip you already added to the split-screen preset requires you to just drag a new clip and drop it over the clip you would like to replace.
The Speakers icon enables you to mute a video you included in the split-screen effect while clicking on the icon next to it will grant you access to the Filmora9’s Advanced Split Screen editor window.
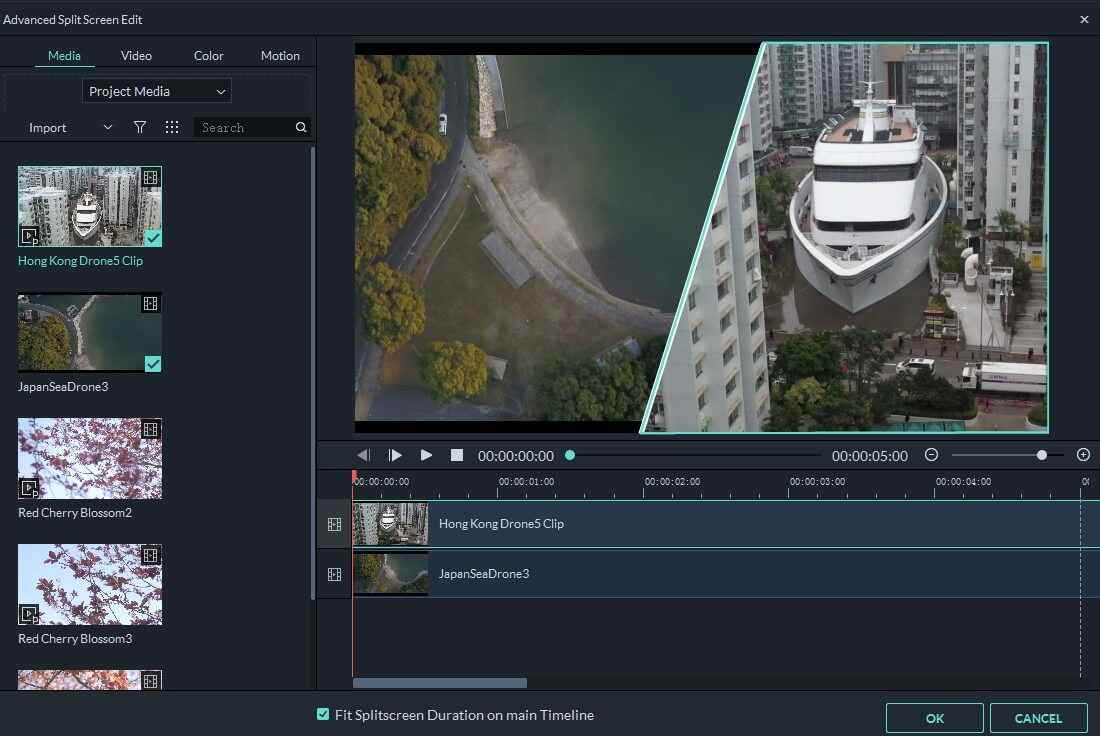
Editing videos from the Advanced Split Screen Editor
The Advanced Split Screen Editor contains Media, Video, Audio, Color and Motion tabs that enable you to add more footage to the split-screen preset, create the green screen effect or adjust a video clip’s volume.

Each of the videos you add to a split-screen preset is going to be displayed on the Advanced Split Screen Editor’s timeline. The maximum number of video clips you can add to a split-screen preset depends on the preset you selected.
Moreover, dragging a video clip on the Advanced Split Screen Editor’s timeline upwards or downwards will enable you to change their positions in the preview screen. In case one of the videos in the split-screen is longer than the other, you should enable the Fit Split Screen Duration on the main Timeline. This way, the shorter video ends with a freeze-frame, while the longer video continues playing.
A video will turn transparent after it ends, if you disable this option, so whether you are going to use it or not depends on your video editing style. Once you’re done editing the split-screen effect you should click on the OK button to confirm the changes.

