

In this tutorial, we’re going to learn some compositing basics. We’ll learn about - Blend Modes, Transform Tools, and Alignment Tools.
In FilmoraPro, there are two panels for different types of transformations - the Controls Panel and the Layout Panels. So, we’ll move both of them closer to the Viewer so you can look at them next to the final result.
Let’s begin with Controls Panel
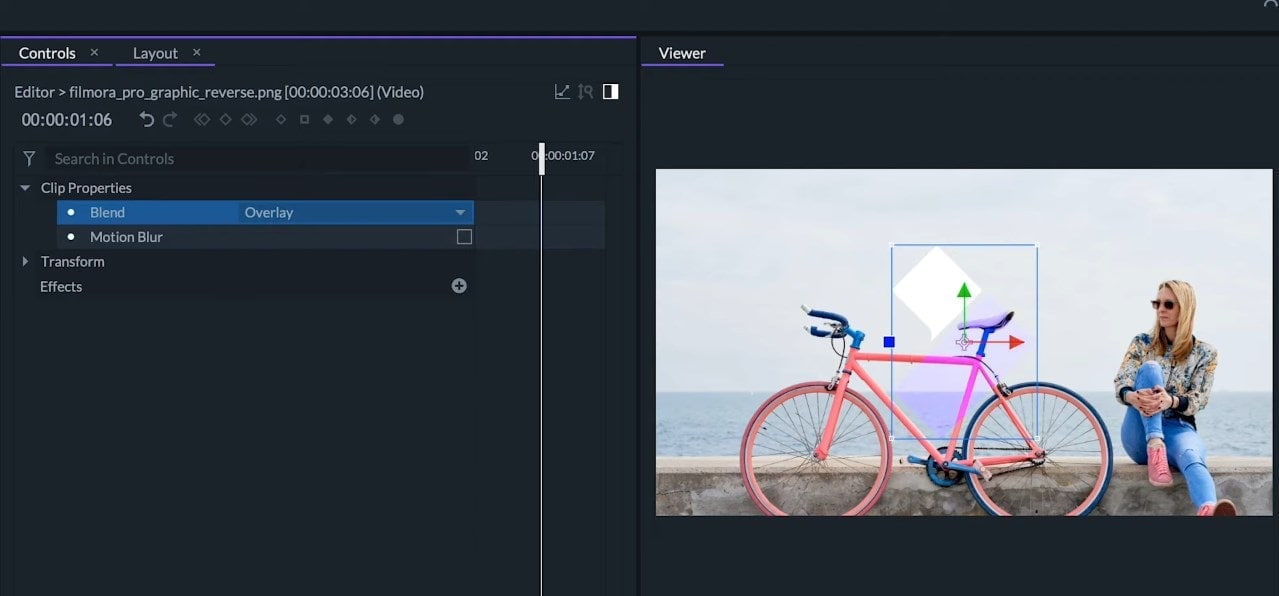
The Controls panel shows you all the properties related to a selected clip that we can change. In the Clip Properties, we have two options. The first option is Blend and here, we can choose different modes.
Blend Modes
A blending mode on a layer will affect how its pixels will blend with the pixels on the layer below to create completely different effects. These modes are used in most photo editing and graphics apps to apply different effects.
In the video, when an object is moving faster than the shutter speed of the camera, this can result in the blurry edges on the object like the dancer’s hand shown in the video tutorial. FilmoraPro can stimulate this effect on animated moving layers if activate the Motion Blur feature.
Transform Tools
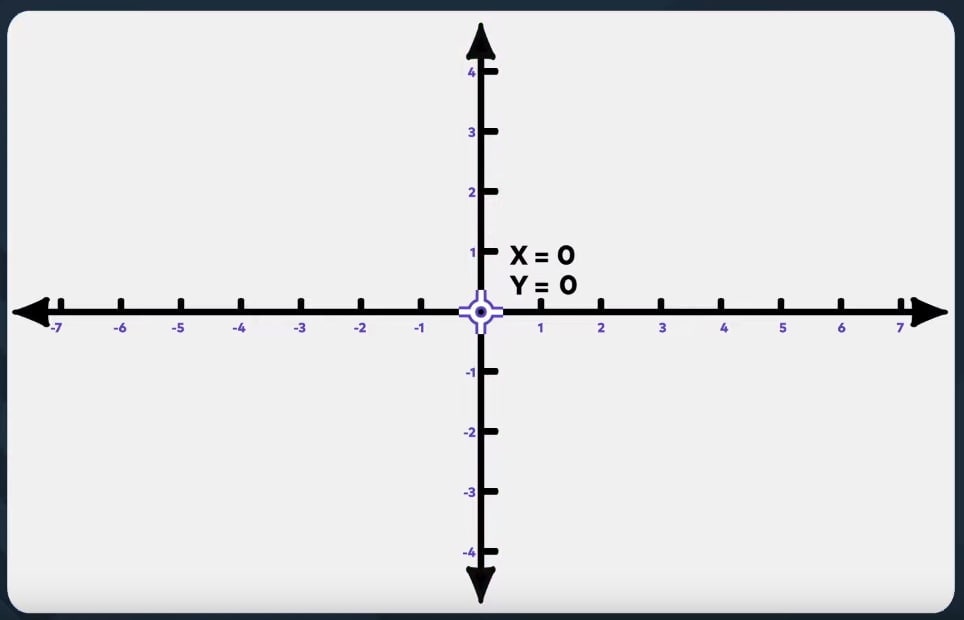
Next, we have Transforms options operating with numerical values. FilmoraPro like most editing software works on an axis based frame. The X-axis is the horizontal axis and Y-axis is the vertical one. The origin which is 0-X and 0-Y is in the middle of the frame. This means that we’ll have the positive X values on the right side and negative X values on the left. And positive Y values on the top part and negative Y values on the bottom.
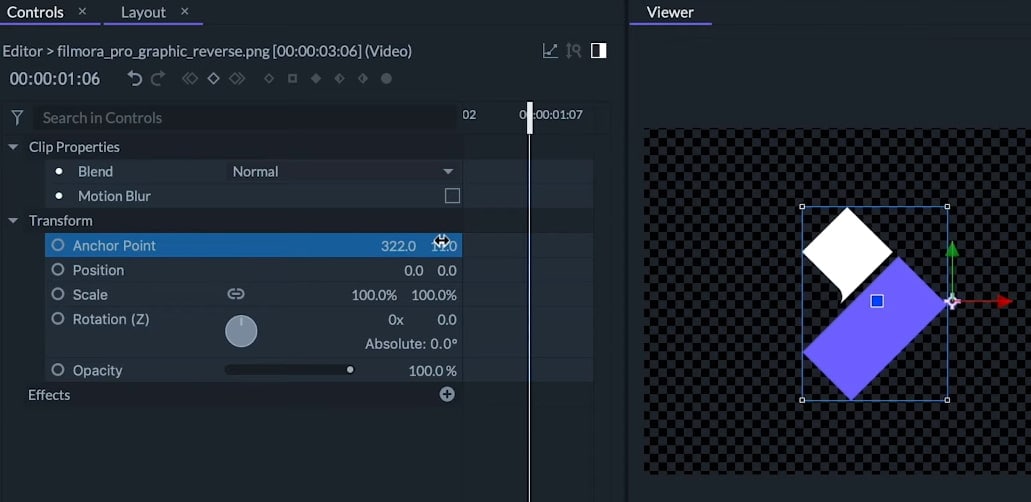
Anchor Point - it is the point in which the layer transforms around so all the transformations will depend on its positions. By default, this coincides with the center of the layer, but we can change its position by altering two values - the first one will be X value and the second one will be Y.
We will see that the anchor point will stay in place on the frame while the content on the layer is moving.
Position - This option will change the position of the layer and its value will depend on the anchor point position. As always the first value is X and the second value is Y. These are expressed in pixels. We can also change the position by dragging the object on the Viewer or dragging from the red arrow to move to its X-axis only. And same can be done with a green arrow on the Y-axis.
You’ll notice a circle on the left of the Position option. If we click on it, it will create a keyframe. This means that every attribute that has this circle can be animated.
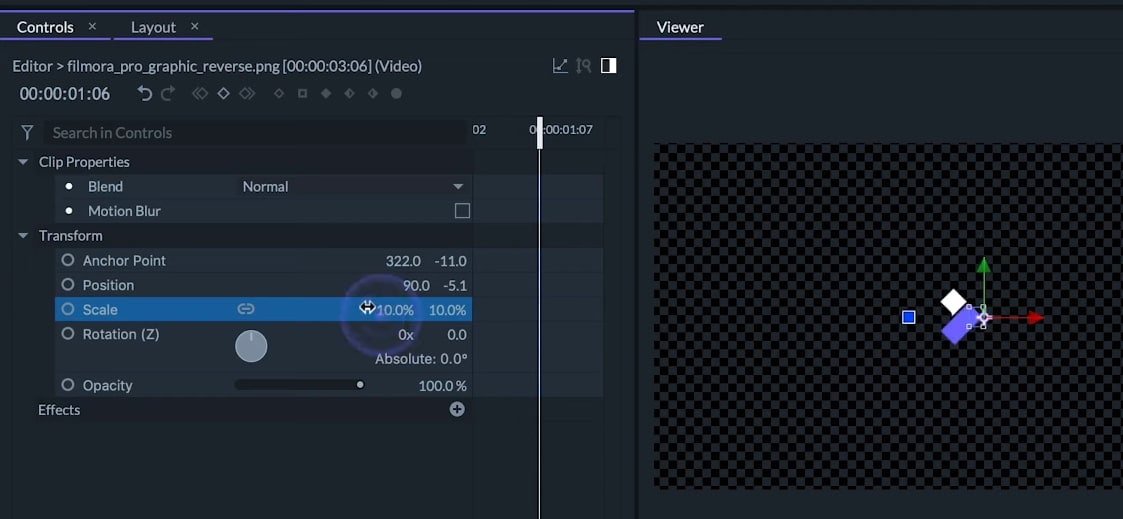
Scale - This option is used to change the size of the layers around the anchor point. It is expressed in the percentage of the original size. By default, the aspect ratio is locked. But, we can unlock it by clicking on the Chain icon located at the center of the Scale option. We can freely change the scale by grabbing on any of the white squares on the corners of the selection. And if we hold “Shift”, then the transformation will lock the aspect ratio.
Rotation - it is expressed in degrees and it will turn around the anchor point. The X value is the amount of the full turns. This is only useful if we animate the rotation. We have a dial (located at the center of the Rotation option) available to visually transform the rotation and we can also do this in the Viewer by clicking and dragging from the Blue Square.
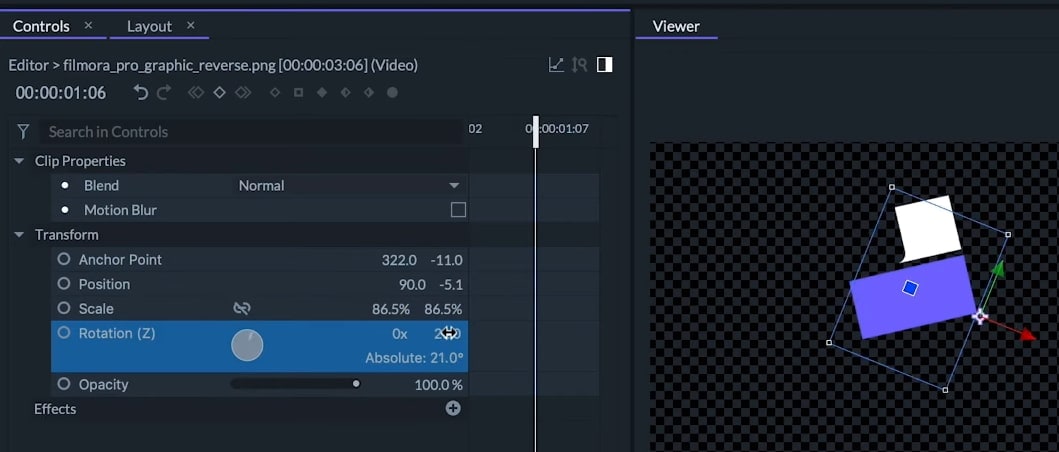
Opacity - it is the overall transparency of the object. A hundred percent will be fully opaque and zero percent will be completely transparent.
Below this list will appear any effect that we apply to layer. But, let’s now give a closure look at the Layout Panel.
Let’s Now Start with Layout Panel
All of the attributes present on this panel can be applied to more than one layer if selected. Firstly, here we’ll have four options -
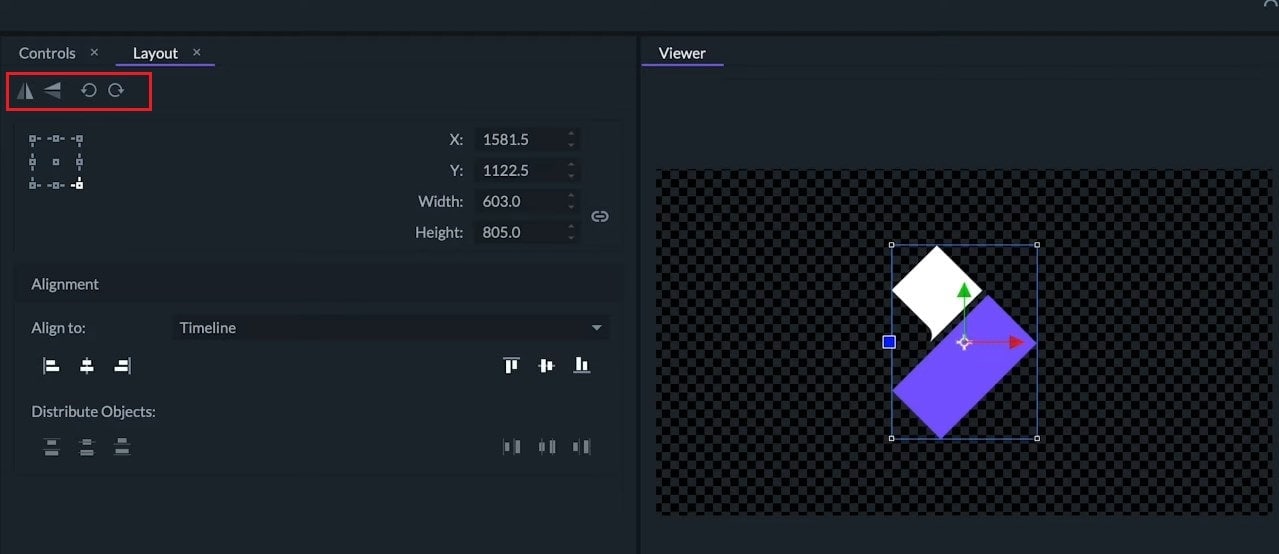
- Mirror vertical - This will flip the content of the layer vertically or horizontally.
- Mirror horizontal - This will flip the content of the layer horizontally.
- Circular clockwise arrow - it will rotate the layer 90 degrees clockwise.
- Circular counterclockwise arrow - it will rotate the layer 90 degrees counterclockwise.
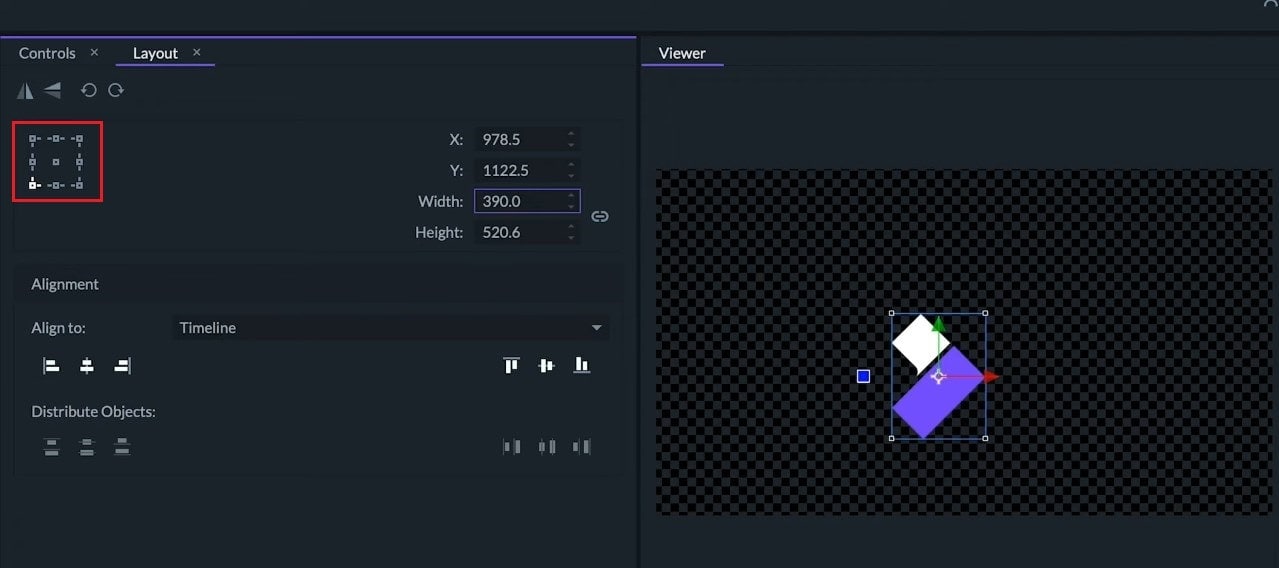
Next, we have Anchor Point Position Selector. It is by default on the center of the layer, but we can change it to the corners or to the sides. This anchor point will not affect the transformations on the Controls Panel, but the position and scale options on the right. This is especially useful to transform several layers at once.
Alignment Tools
Finally, we have an alignment. On the left, we have the horizontal alignment tools and on the right, we have the vertical ones.
- If we align horizontally to the center, then our layer will be centered on the origin of the X-axis. These transformations will depend on the layer content and not the anchor point.
- If we align to the sides, then our object will move as far as possible to one of the sides without falling off the frame.

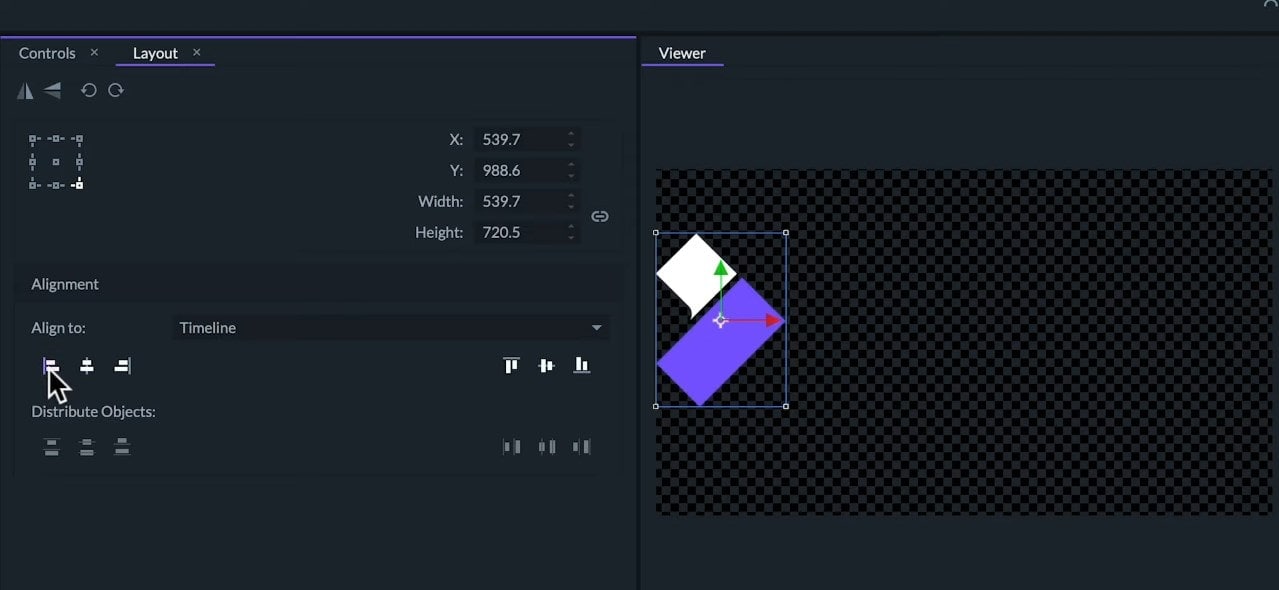
The vertical-align tool will do the same on the Y-axis - center aligns to top and align to bottom.
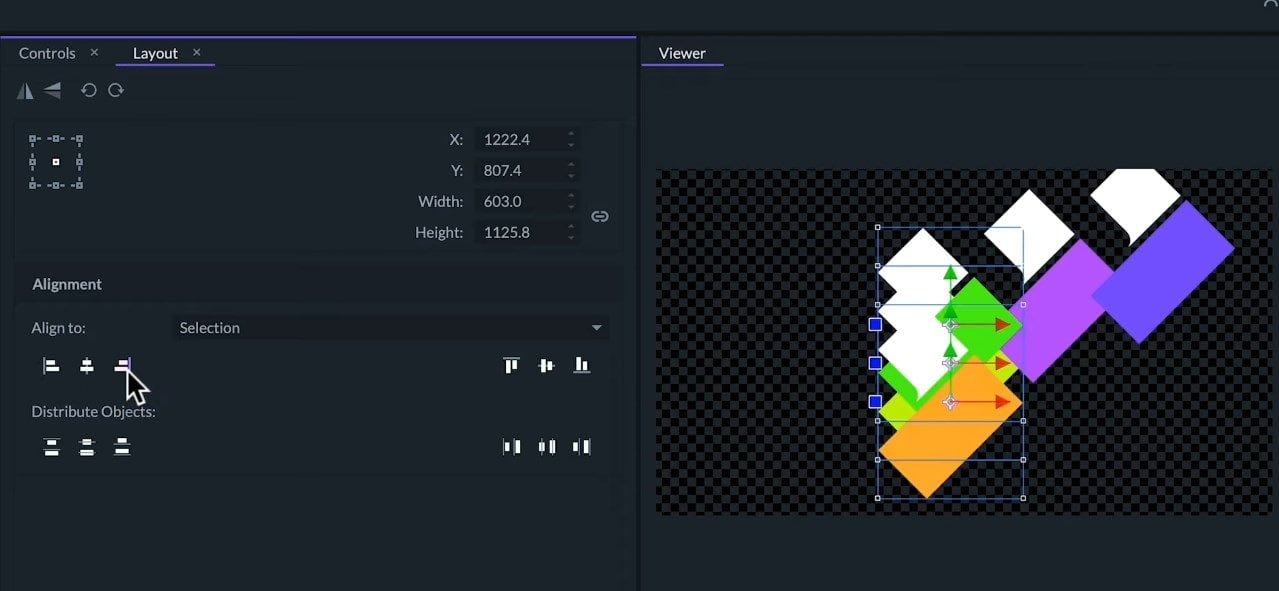
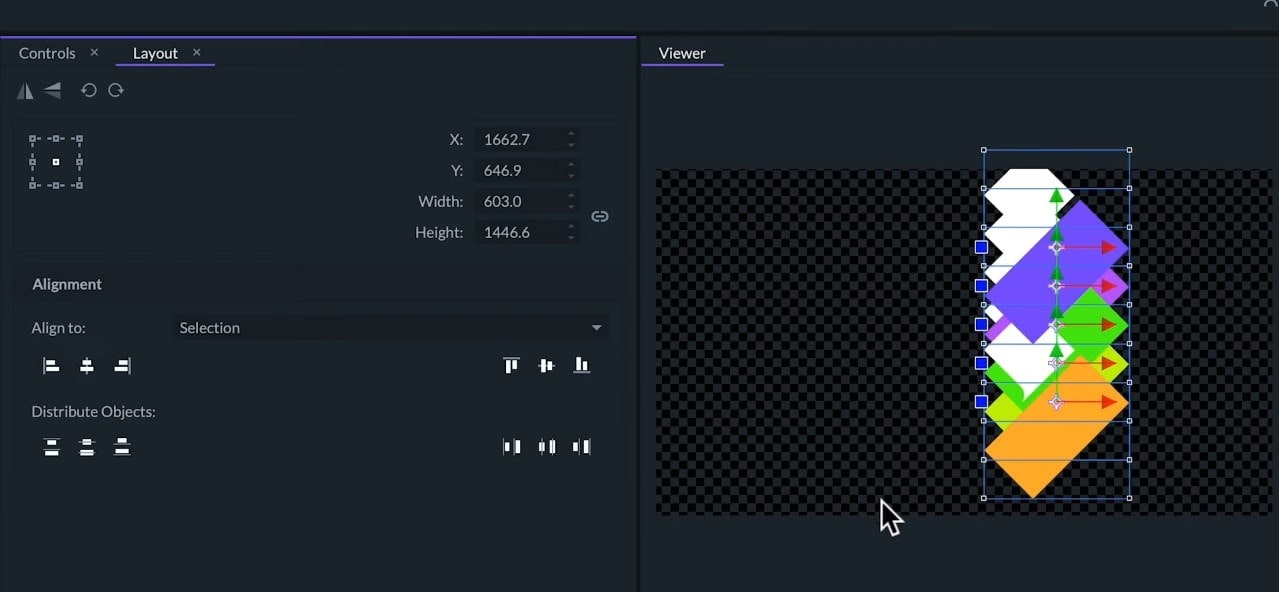
Multiple Layers Selection
If we select more than one layer, we can change the alignment from Timeline to Selection. This will align the objects according to other selected objects. For example -
- If we align to the right, the object that is further to that side will remain in its place and all the other objects will align to its edge.
- If we center to the selection, it will center all of the objects between the two farthest edges.
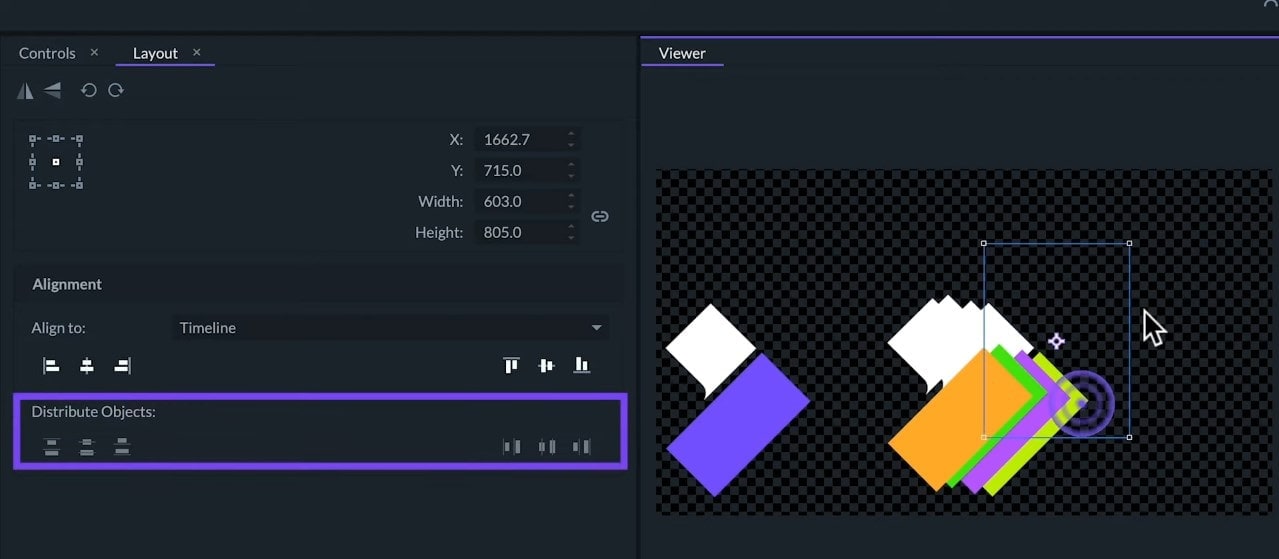
- If we select three or more layers, the Distribute Object options will be available. These options are useful if we want to evenly space multiple objects. We can distribute them vertically and horizontally.
So, these are tools to compose our layers. To learn more about FilmoraPro, make sure to check out our other tutorials.