

In this tutorial, we’re going to learn about some tips for efficient editing. We’ll learn how to organize our timelines, use shortcuts, and different ways to move playhead and zoom in the timelines.
When we’re editing a complex project, a good piece of advice is to stay organized, especially when you’re editing a project over several days or if you have many different scenes or layers. To have an organized timeline, it will help us save a lot of time during the edit.
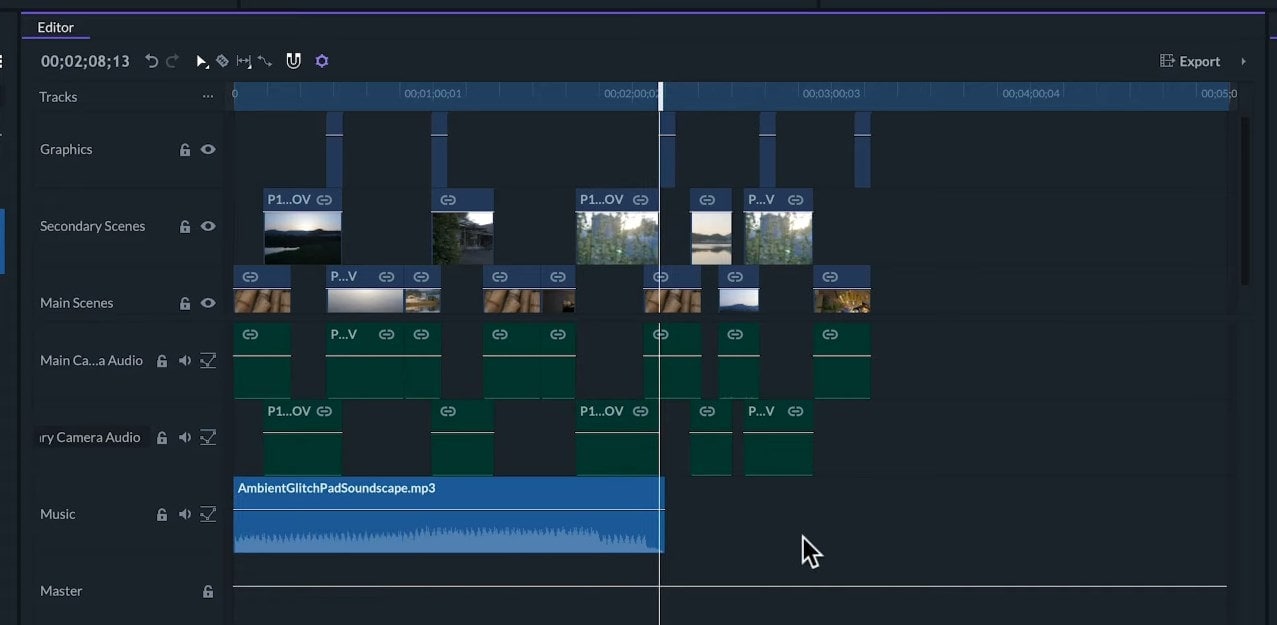
We can take advantage of the fact that we can add as many tracks as we want. Allowing us to divide the footage we have, for example, I can choose to put all the main scenes on the first track and the secondary scenes on the second track.
Renaming Tracks
But, if we’re using a lot of tracks, it can be hard to remember each one. So, to identify them we can rename each track by right-clicking on it and then, clicking on Rename track.
Now, I want to add graphics too. I‘ll add a new track by right-clicking on the other tracks and then on Insert track. I’ll rename the track and add the graphics there. We can do the same with the audio tracks. I’ll leave the first a second tracks for the camera audio and I’ll use the third track for background music.
Labels
Another we can organize our clips is with Labels. You can do this by right-clicking on your clip and going to Labels which will let us set the color or with the selected clips, we can hit a number from 1 to 9 to label the clips with a different color.
In this example, I’m giving a tomato color to the drone shots so I’ll select them and press 1. Another advantage of using labels is that we can easily select all of the clips with the same tag by right-clicking on one of those clips and then on Label>Select Matching Labels. Else, it can be done by selecting one of the clips and using the shortcut Alt + M.

Locking Track
If we want to avoid altering the clips on a track, we can lock the entire track by clicking on the Lock icon. It displays the clips in the track can’t be accidentally selected or adjusted.
![]()
Be aware though that if two clips are linked like this video and its audio below it and one of the tracks is locked, we can modify only the unlocked clip. And if we move it, our clips will no longer be in sync.
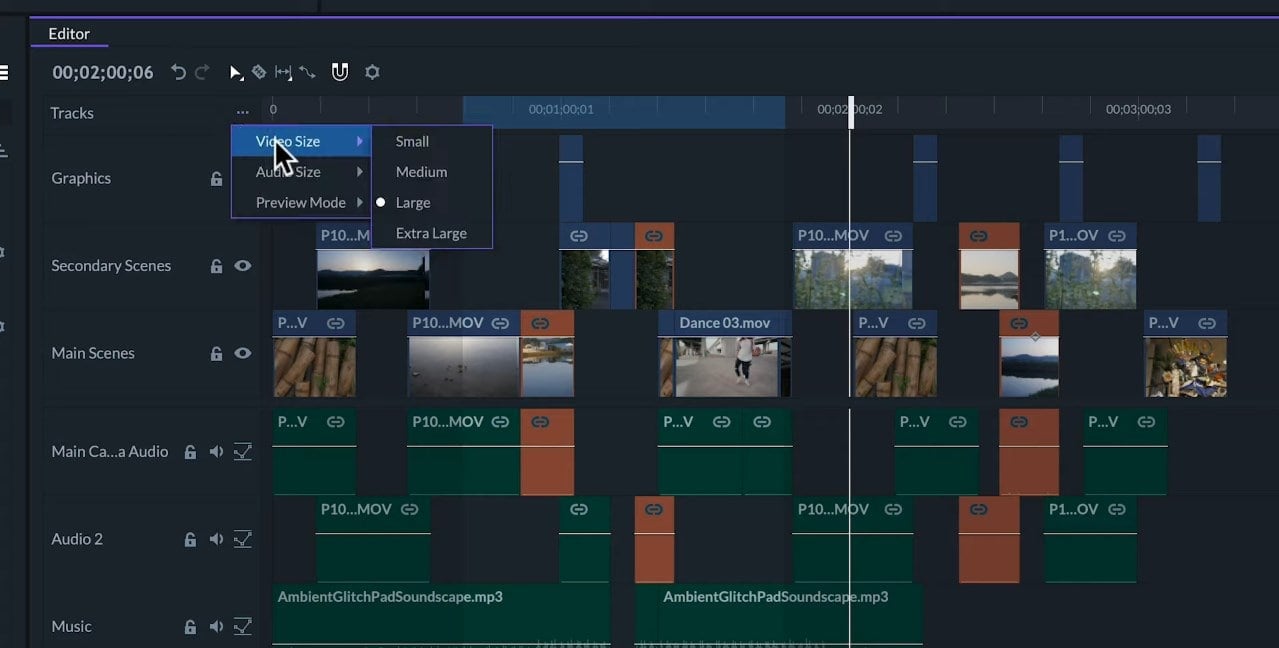
If we have too many tacks that we can’t see within the height of the timelines, we can decrease the size of the tracks by clicking on the three-dot icon next to Tracks. In this case, I’ll select the video size and change it to small. This way a lot more track can fit on a smaller timeline.
Moving the Playhead
On the timeline, we can precisely move the playhead frame-by-frame by using the left and right arrows or we can jump by 10 frames by holding the Shift key and using the same arrows. We can play and pause the video with Spacebar. You can play and pause the video with J, K and L keys, where L plays forward, K plays backward and K pauses the video.
When the video is playing, you can press L to fast-forwarding and pressing it repeatedly increases playback speed. Press J to decrease the speed. You can also play backward at faster speeds by repeatedly pressing J and press L will now decrease backward play speed.
We can also jump from the previous to the next cut by using the Up and Down arrow keys. Another jump we can do is to in and out points by using the Shift + I and Shift + O.
If we want the playhead to jump to a precise moment in the timeline, we can click on the timecode in the Editor or press CTRL or Command J and write the precise timecode where we want the playhead to go.
Copying and Moving Clips on the Timeline
We can quickly make a copy of a clip if we start moving it and then, we hold CTRL or Command and then, place the copy where we want. We can move a clip between other clips by holding the Shift key. This will automatically make a space for it.
Zooming the Timeline
To horizontally zoom in and out of the timelines, we can use the slider on the bottom left of the Editor panel or we can scroll the mouse when the cursor is hovering over the slider.
Another way is by holding the CRTL or Command Key and scroll the mouse when the cursor is hovering over the timeline. We n also click on the big and small mountain icons next to the slider or by holding Command on Mac or CTROL on Windows while pressing the + and -.
So, those are the more advanced tools for editing. To learn more about editing in FilmoraPro, make sure to check out our other tutorials.