

In this tutorial, we will go over the basics of Masking in FilmoraPro. We will learn how to create different shaped masks and how to edit them.
What Is a Mask
A mask on a layer is a shape that will isolate a section of a layer that will be visible from the other section which will not be visible. It can be used to create different effects, so let’s see how we can create them.
How To Use Masking
To apply a Mask, we will select the clip we want to apply it to. The masking tools are in the viewer panel next to the Selection tool. In FilmoraPro, whenever we see this small arrow in the corner of an icon, we can click and hold on it & more options will dropdown.
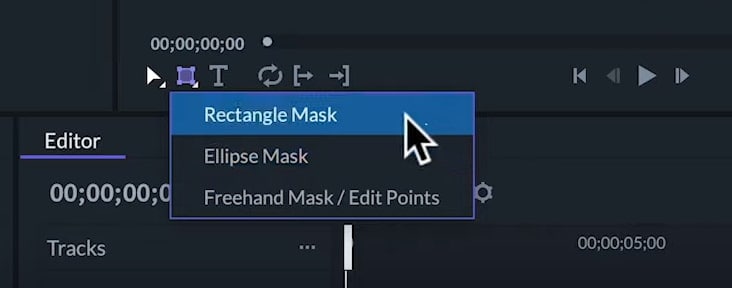
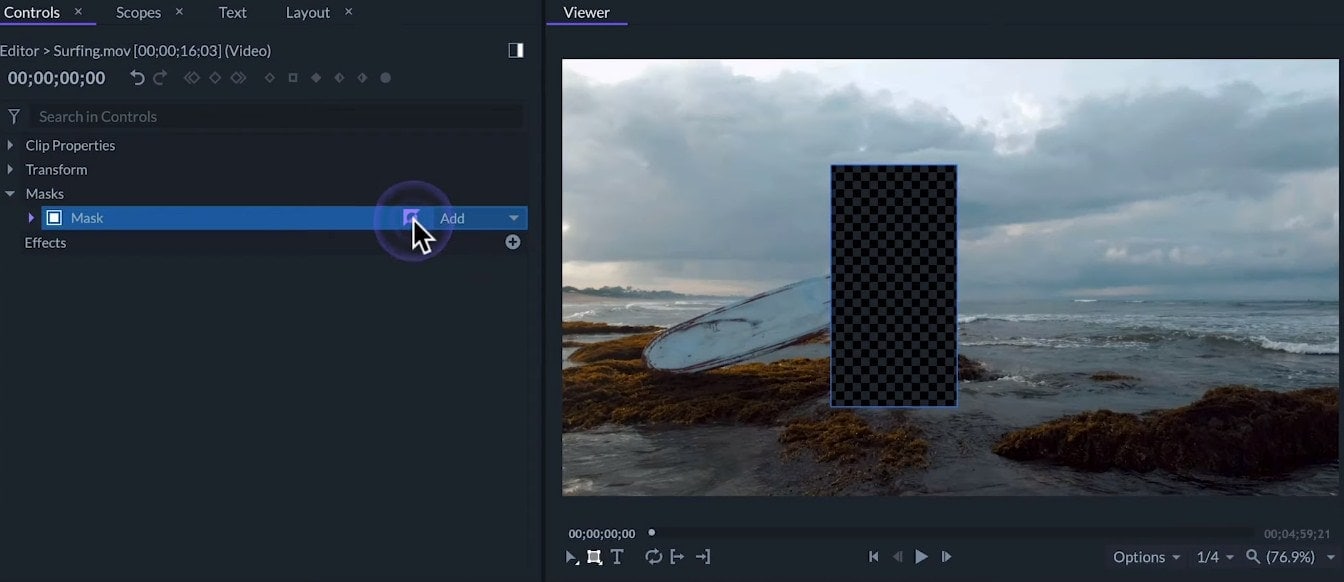
Here, we have different shapes for masking. Then we will select the Rectangle Mask tool on the Viewer panel. Now, we can draw a rectangle in the view.
If we hold the Shift key while drawing, the mask will be a perfect square. And if we hold the Alt key, instead of scaling from the corner, the shape will scale from the center.
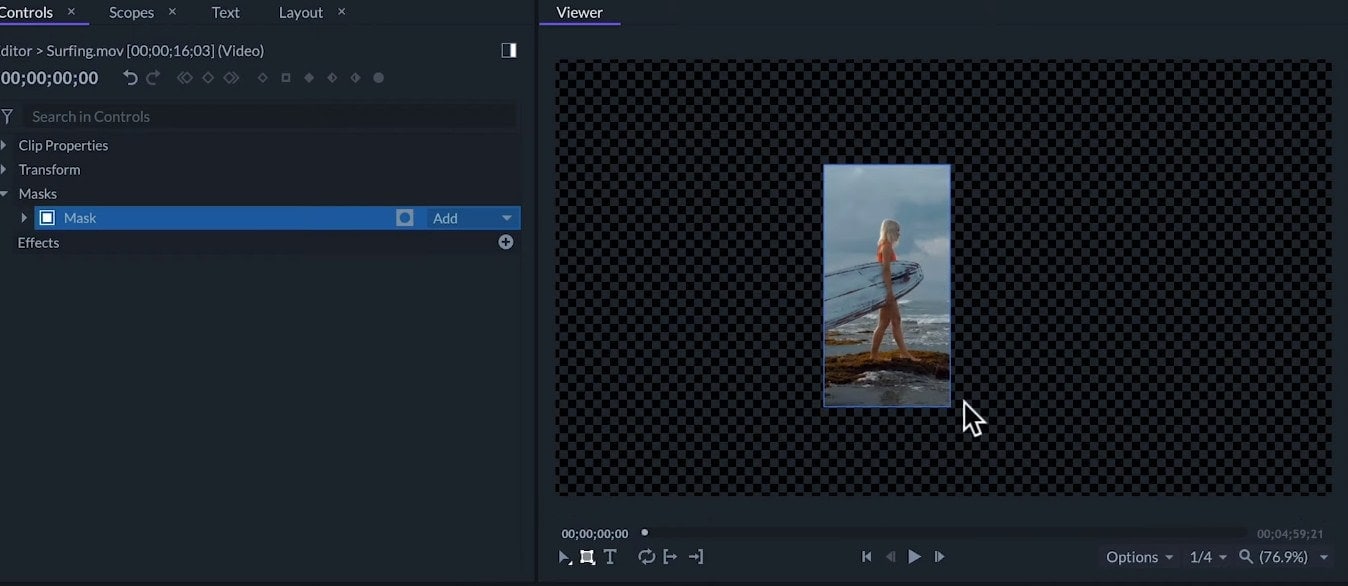
This is useful to start drawing the mask from the center of the subject. The part of a layer that is inside the rectangle will be visible while the rest of the clip will become transparent.
Activate/Deactivate Mask
The mask will appear in the Control Panel. If we deactivate it, the mask will stop affecting the clip. We can still edit the points on the shape of the mask while seeing the complete video. If you click on the dot-like icon, it will invert the affected section of the mask.
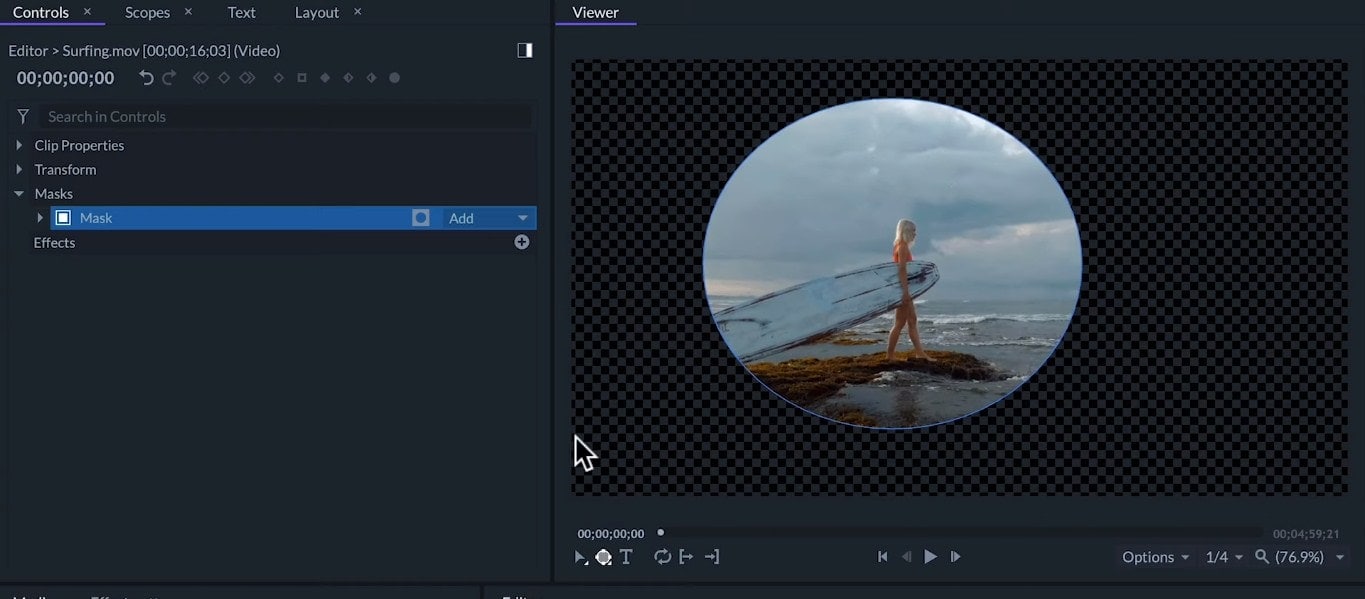
If we select the ellipse mask when we click and draw, we'll be drawing an elliptical mask. With this shape, we can also use Alt or Shift keys.
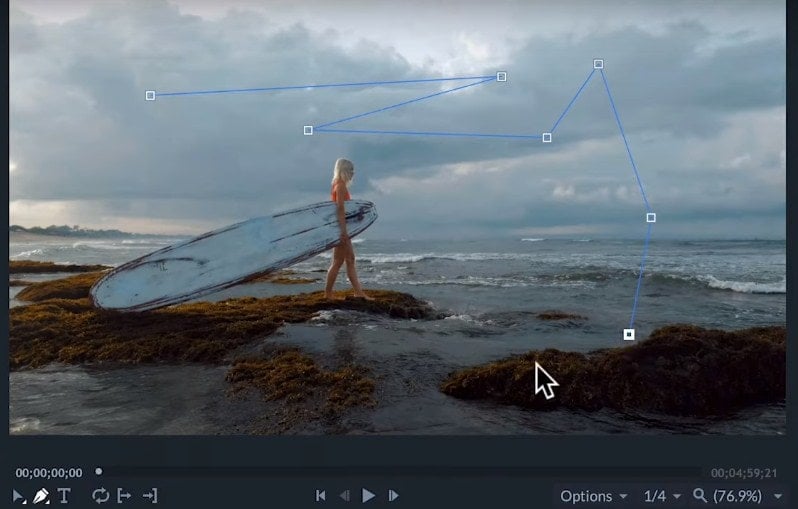
The freehand mask tool will let us draw a personalized shape mask or edit the shape of the masks that are already drawn on the clip.
To draw a new shape, we can click on the Viewer to create points. Each new point will be connected with the previous one with a straight line. If we click and drag, we'll be creating a Bezier which makes a curved line.
We can finish creating our mask by clicking on the first point that we made. This will make the mask active and it will start affecting the clip.
Edit the Mask
The Masking tool will be in Edit Mode whenever the mask is selected. To edit a mask with the same tool, we can click on any point to select it and then move it around.
If it's a Bezier point, we can click and drag from the circles to adjust the tangent of the curve.
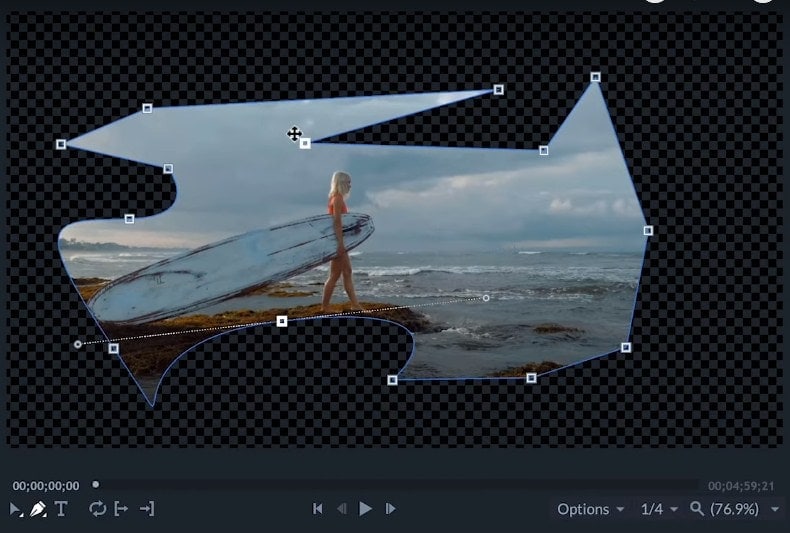
If we right-click on the point and select Unlock Curve, we'll have a different tangent for each side of the point. And if we change it to linear, the point will not have a curve.
To add new points, we can click on the line. We can draw a rectangle on the screen to select multiple points.
Or we can hold Shift to select the points we want to add to our selection. When more than one point is selected, the white rectangle will let us scale that selected section of the mask. You can also move them. Right-click and invert the selection or select all of the points to move them.
To delete a selected point, we can right-click it and click on Remove. But if we click on Reset, the point will move back to its original position.
If we go to the Control Panels, we can adjust more settings of the mask.
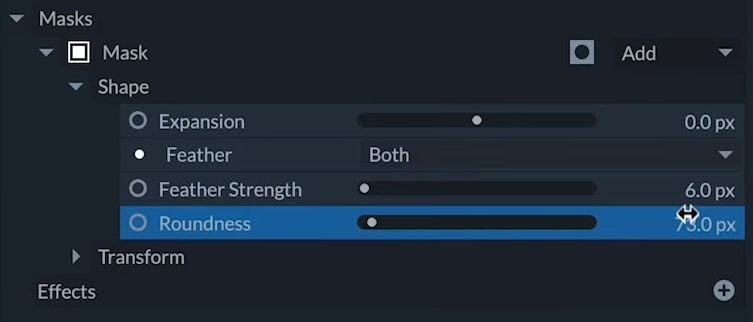
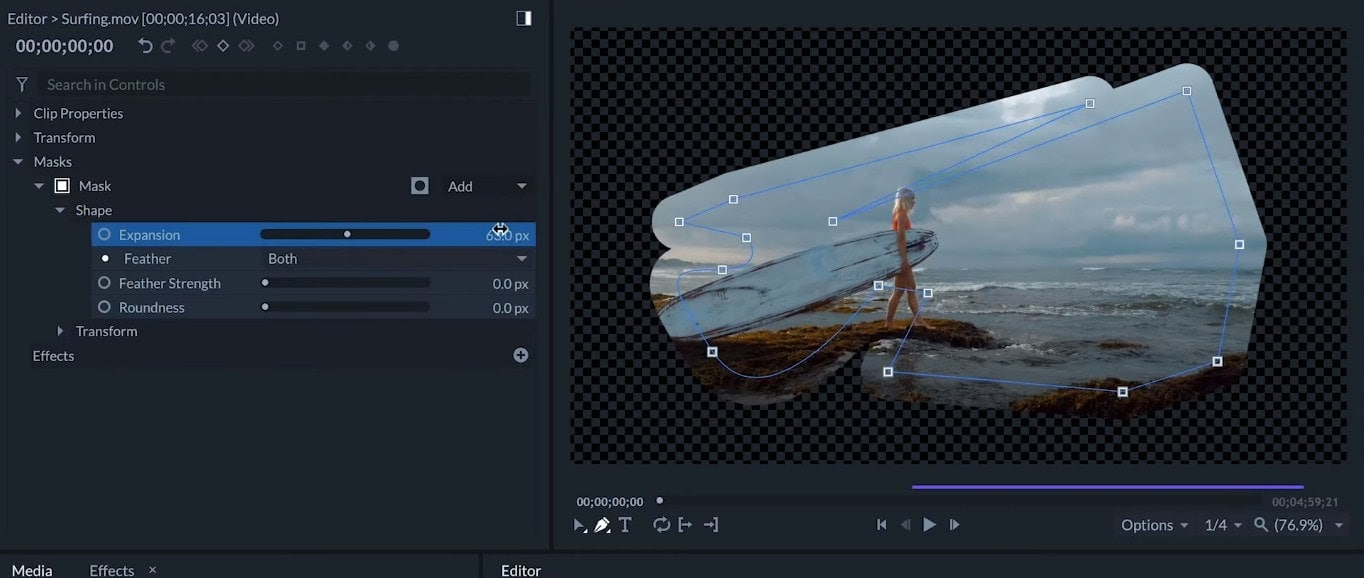
- For the Shape Settings, the Expansion will expand or contract the mask without changing the shape or position of the points.
- The Feather Strength will blur the edges of the mask. This feature helps us to blend the mask to the clip with the background. It can blur from inside the mask, the outside, or both.
- Roundness will turn a linear shape into a curved one without affecting the points.
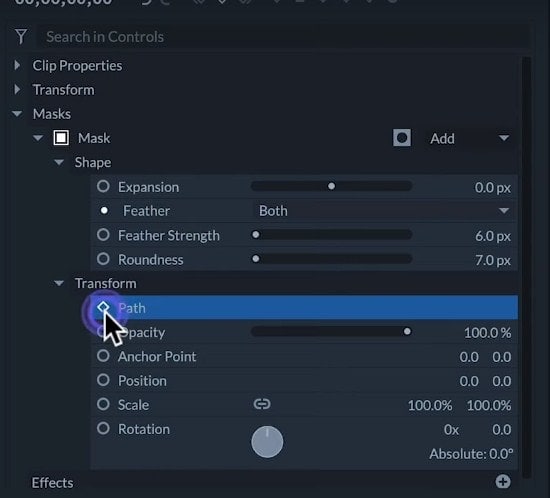
Do Some More Transformation
In the Transform menu, the path option will add keyframes to animate the shape of the mask over time. We can also adjust and animate all the regular transformations including Opacity, Anchor Point, Position, Scale, and Rotation.
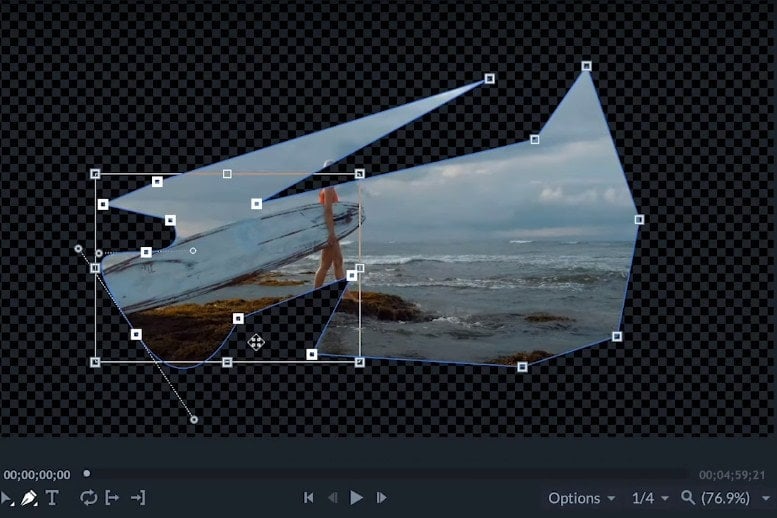
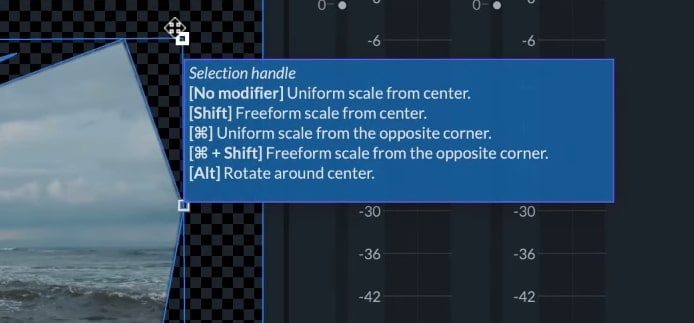
We can also transform these Settings in the Viewer with the selection tool.
If we select the Mask, we'll see a bounding box around the shape. We can drag it to change its position. From the white squares, we can also scale it. And if we hold Alt, we can rotate it.
Finally, we can change the position of the anchor point of the mask by holding Shift or right-click on it to center the Anchor Point.
An information box on how to edit will appear if we hover our mouse over the corners or the Anchor Point.
So, this is the basics of FilmoraPro Masking techniques. To learn more, don’t forget to check out our other tutorials in the series.