

Are you ready to learn how you can add effects and motion graphics in your videos? FilmoraPro video editor advance editing effects and motion graphics have made everything easier. In this tutorial, we will learn about FilmoraPro project settings including templates, timecode, resolution, frame rate, audio, etc. these are some technical settings that we need to be aware of when we work with media files.
In this guide, we will discuss what these settings are and how they affect your video projects.
Start Creating New Project
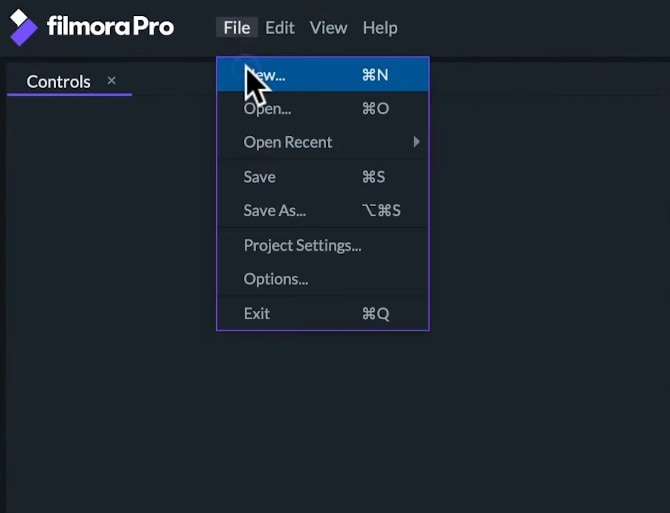
There are three ways to create a new project in FilmoraPro. We can click on the create new project option on the home screen. We can go to the toolbar and click on the File>New option. Or else, we can just press shortcut control of CTRL + N on Windows or CMD + N on Mac.
If we create a new project while already working on a project, we will be asked if we want to save the current project before FilmoraPro creates a new one.
When we create a new project, we will be directed to the Edit screen. One of the first things we should do is to go to our project settings by clicking on the toolbar: File > Project Settings. Here, we can choose the settings for our edit.
Depending on what kind of project you are working on, you might want to choose different settings for your edits. For example, a video meant for Instagram would likely have a different resolution setting than a video meant for 4K TV.
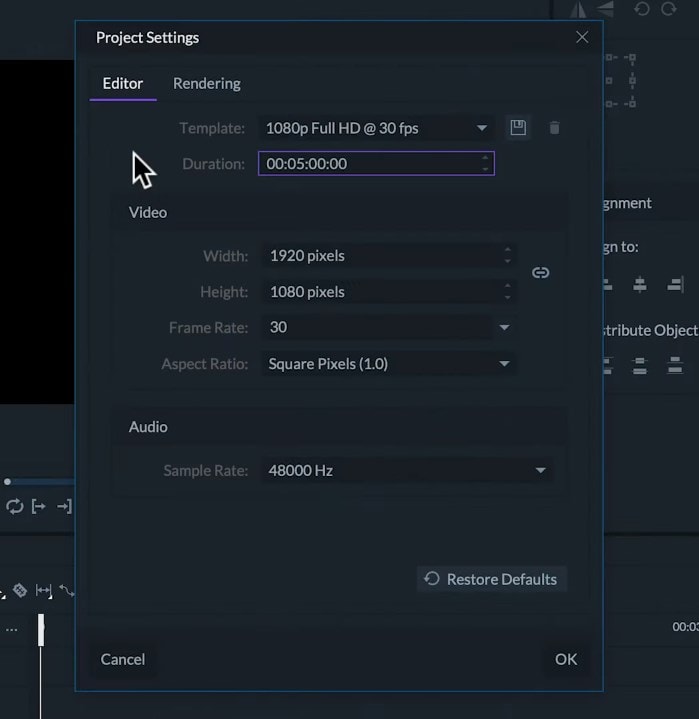
We have two tabs to choose from at the top of this window, i.e., editor and rendering. Let’s start with the first tab, Editor.
Project Settings – Editor
Here we can choose between the templates. These are premade combinations of the settings for different uses. In most cases, all you will need for a project is to choose from one of these presets. But today, we will go into all the settings - we can choose the duration of our project which is set to 5 minutes by default.
Timecode
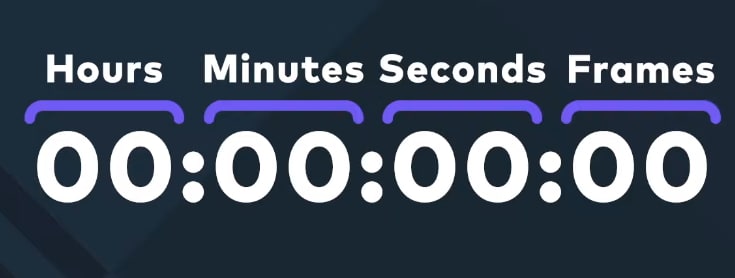
As you can see the timecode format for most video editing software is set in 4 groups of two-digit numbers each. From left to right, the first number is hours, then minutes, followed by seconds, and finally, last value on the right frames. So, as an example of we want to make a project zero hours, 15 minutes, and 30 seconds long. This is the timecode we want to use.
Resolution
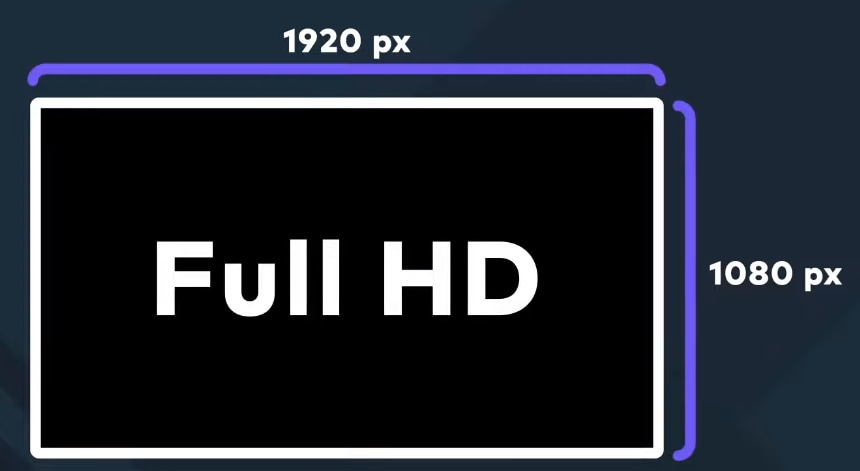
The resolution of our project is measured in how many pixels wide and how many pixels tall the video is. By default, FilmoraPro projects will start with the resolution of 1920 pixels wide by 1080 pixels high. Since this is the standard scale of full HD video, we can freely change the resolution by modifying the number on each box.
Width and Height Scale
If we want to change the width scale, the height scale will automatically change to preserve the aspect ratio. To freely modify the proportions of our video, we can turn off the preserve aspect ratio by clicking on the chain icon located in the middle of the Width and Height field.
Now, we are free to choose whichever resolution we want. We can create a vertical video from a smartphone or square video for Instagram.
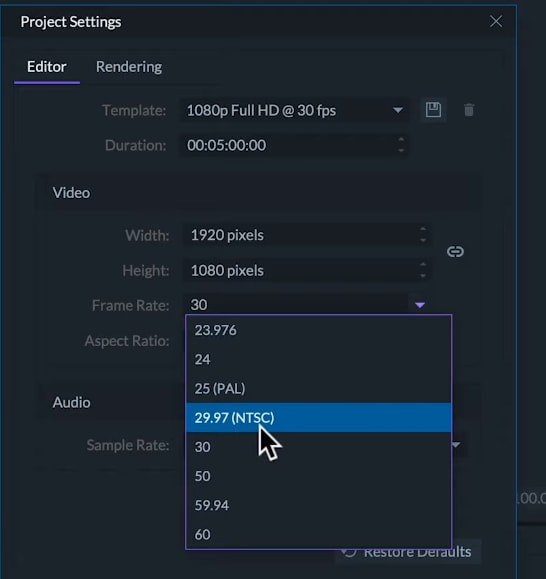
Frame Rate
When watching the above video, we are not looking at moving objects rather than the sequence of images or frames being shown in sequence at a certain rate which our brains then interpret into a motion.
The frame rate is the number of frames a video will show within a second. Many digital video cameras shoot at 23.976 and 29.97 frames per second. These are the standards in countries that use the NTSC system.
The 25 and 50 frames/second are used by the cameras in countries that use the PAL system. Most movies work in 24 frames/sec.
Some TV shows and home cameras work in 30 frames per second which reflects a realistic motion similar to what we are used to seeing in real life.
Anything higher than 30 frames per second is mainly used to create slow motion. Though some people primarily gamers tend to work with higher frame rates like 60 frames per second.
If you are making videos to post on social media like YouTube, most frame rates should work fine. But it is ideal to match the settings of whatever footage your camera took. By default, FilmoraPro will ask you if you want to match the settings of your footage when you drag the first clip into the editor from the media panel.
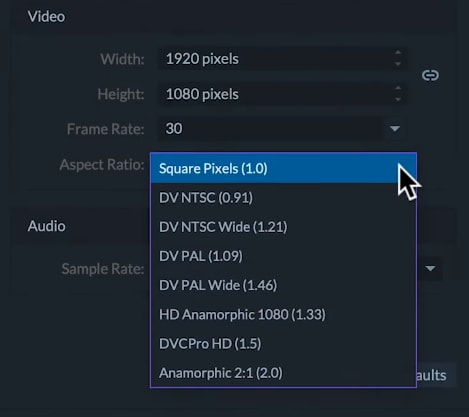
Aspect Ratio
We can also change the pixel aspect ratio. But in most cases, we will just want to use the default square pixels option.
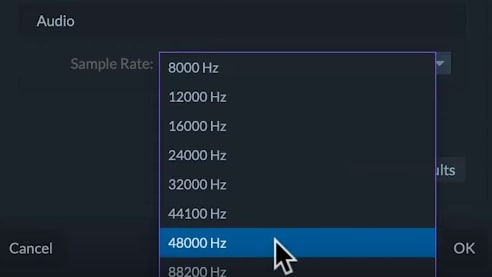
Sample Rate
It is the number of samples of the audio carried per second measured in Hertz. The higher the sample rate, the better the audio quality. The standard rate of audio is 48,000 Hz which is commonly used for videos. But if you are set on changing it, you can change it here.
If we have a specific arrangement of settings that are not already available in the templates, then we can create and save our template.
For example, let’s say we want to make several vertical Full HD videos at 24 frames per second for social media. To create this template, we will deactivate the preserve aspect ratio option by clicking the chain icon.
Here change the resolution to 1080 pixels wide, 1920 pixels high and change the frame rate to 24 frames per second. Click on the Save Setting as a Template option and write the name of your new template. In this example, we will choose the vertical Full HD format and hit the Enter key.
Now, every time we want to use this format, we can choose it from our templates.

It’s Time to Render
The rendering tab will let us change some advanced settings for color and anti-aliasing, but we will get deeper into this in future tutorials. After choosing our settings, we can hit the Ok button. And we are ready to go.

So, that’s a look at starting your project in FilmoraPro. To learn more about editing in FilmoraPro, make sure to check out our other tutorials in this series.