

In this series of tutorials, we are going to show you the basics of editing in FilmoraPro from start to finish. In this tutorial, we are going to explore how we can reuse the effects.
We will learn how to apply effects on multiple layers, how to copy effects, copy attributes, and how to create user presets. Let's begin.
Know-How to Copy-Paste The Effect
To apply an effect, we must drag the effect from the panel onto the timeline and drop it on the clip we want to apply it to. We can apply the same effect to multiple clips at the same time by selecting all those clips and dragging the effect to one of them.
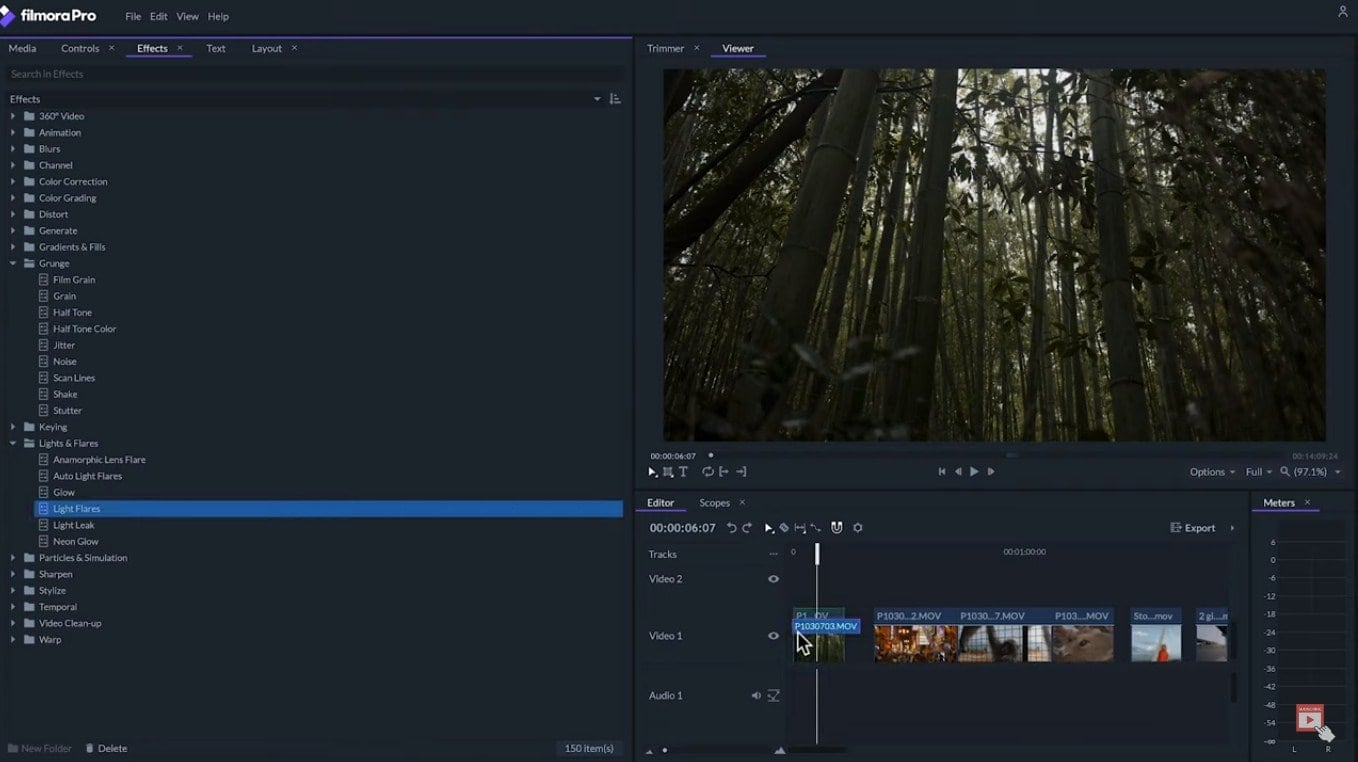
Then we can adjust the effect in the control panel. Although this will affect only one clip at a time, still we can copy and paste the effect from one clip to another by selecting the effects.
First right click and click on the Copy, and then right-click on the other clip on the timeline and click on Paste here. Another way to apply the same effect to multiple clips is by copying the clip that has the effect, right-click and copy. You can also use the shortcut- Ctrl + Command C. Then right click on the other clip and click on Paste attributes.
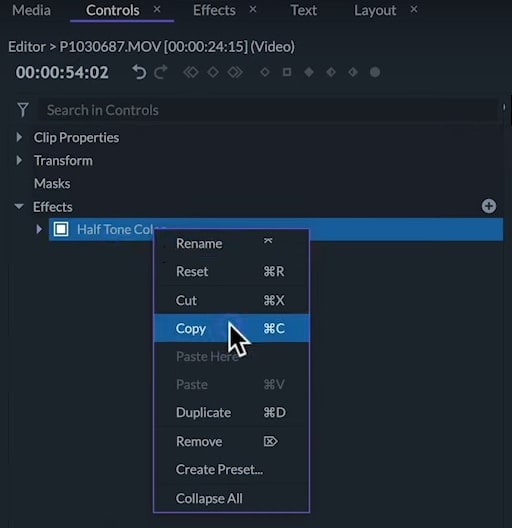
For Windows OS, you can use the Ctrl + Shift + V keys, and on Mac, you can use Command + Shift + V keys.
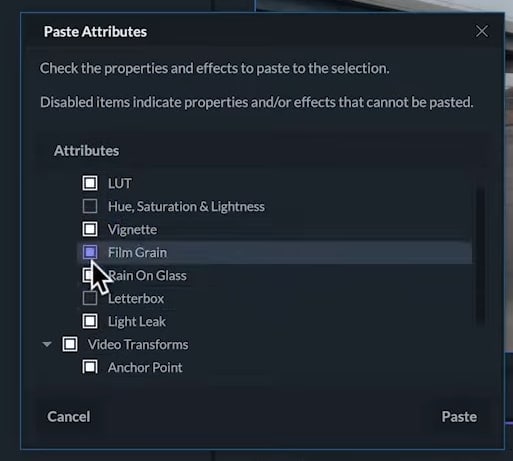
A window will pop up. Here we can select from all the effects that have been applied to the first clip which ones we want to paste. And if we've transformed some attributes on the clips, these will also be available here.
After making the selection, just click on Paste. If we find a combination of effects that we like and we'll be using several times, we can save them as Presets.
Create New Presets & Import/Export Them To Share With Other Users
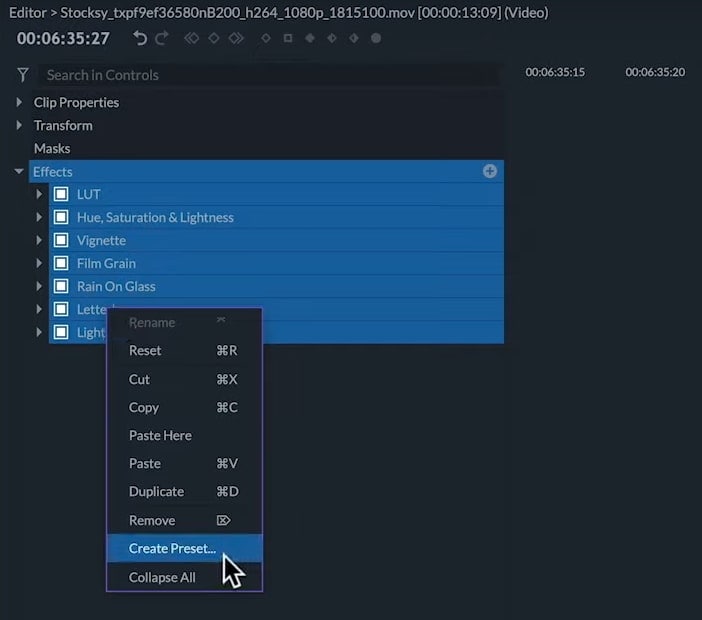
To do this, let's select the effects that we want to have applied to our clip. Right-click on them and click on Create Preset.
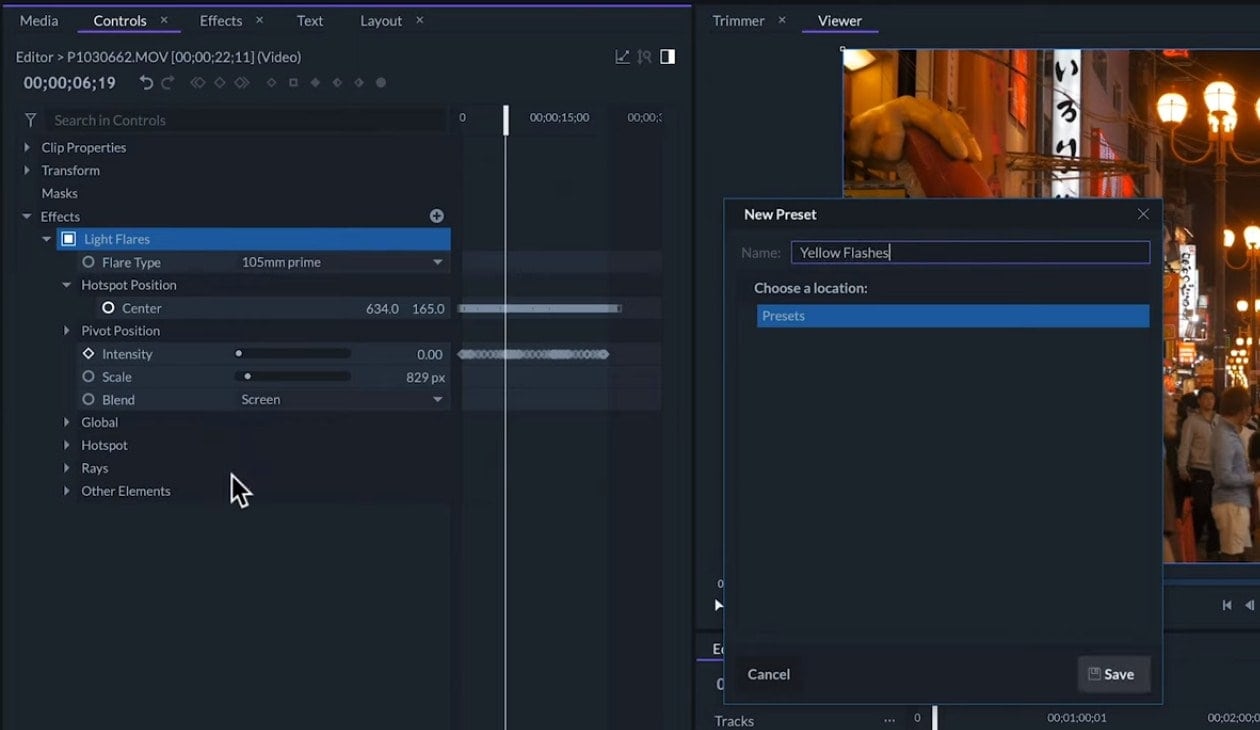
We will write the names of the new Presets and click on Save. From now on, it will be available in the Presets folder located in the Effects panel. We can also create Presets from a single effect with the precise adjustment we need & even animate adjustments.
For example, we've animated the position and intensity of this light flare effects. And we gave a yellow color to it. You right-click on the effect, then on Create Preset and we'll name this one, Yellow Flashes.
Now, that the Preset is available in the Preset panel, we can apply it to other clips on the same project as well as clips in other projects. We can even share our presets.
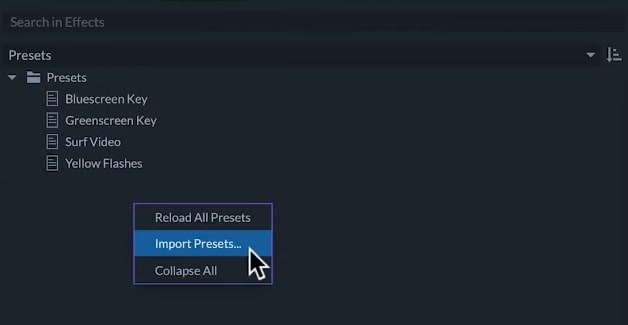
If we right-click on the Presets, and then on Export Presets, we will be creating a new file with the format .wfppr which can be sent to other FilmoraPro users to use on their own projects.
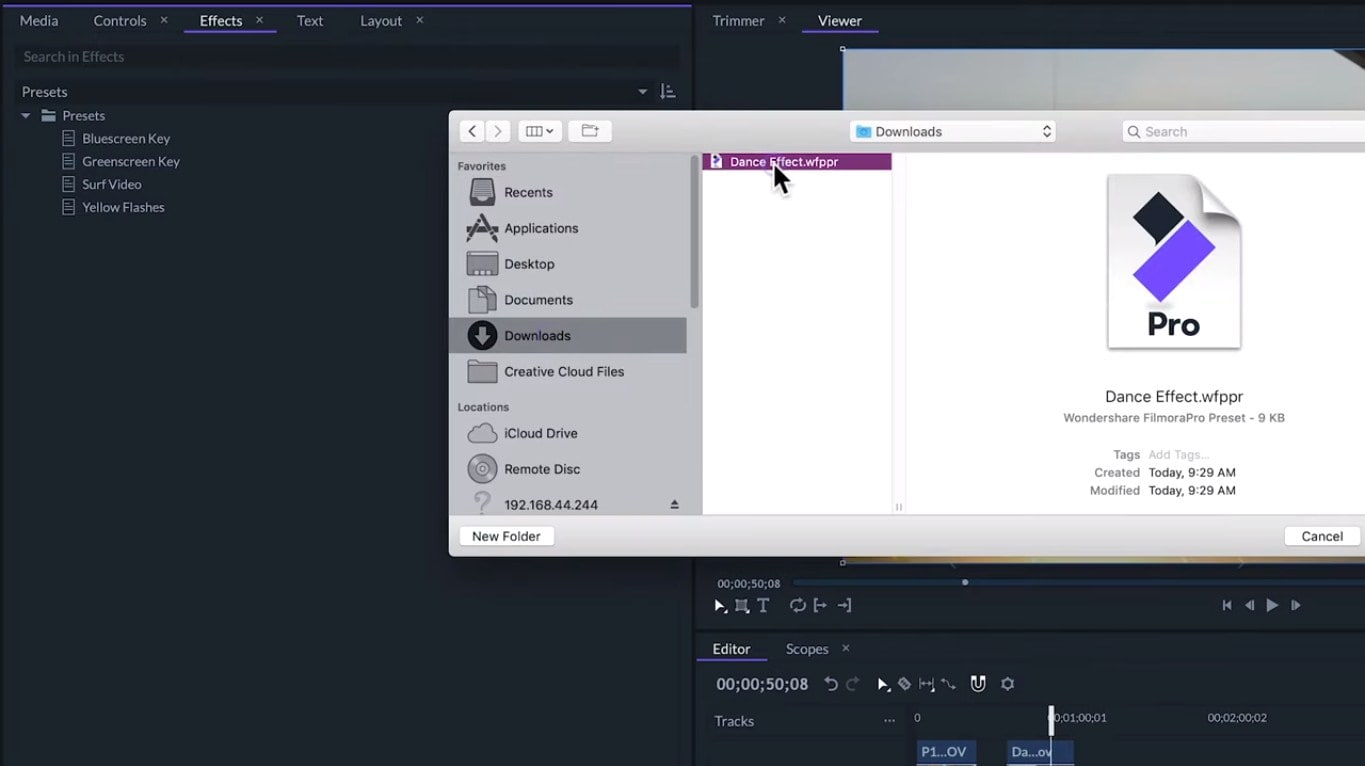
If we get a new preset, we can add it by right-clicking and then clicking on the Import Presets & select the file.
So, that’s an overview of reusing the effects in FilmoraPro. To learn more about editing, make sure that you check out the other tutorials in the series. After all, there is no limit on what you can make.