

In this tutorial, we’re going to learn the basics of color correction. We’ll learn how to apple Effects, Auto Options, Basic Tools and LUTs.
In Professional video editing, there are two main processes related to color - Color Correction and Color Grading. Color Correction is done first to balance the image to look as close as possible to how the human eye sees things. Color Grading is a more artistic process to change the aesthetic or mood of the video.
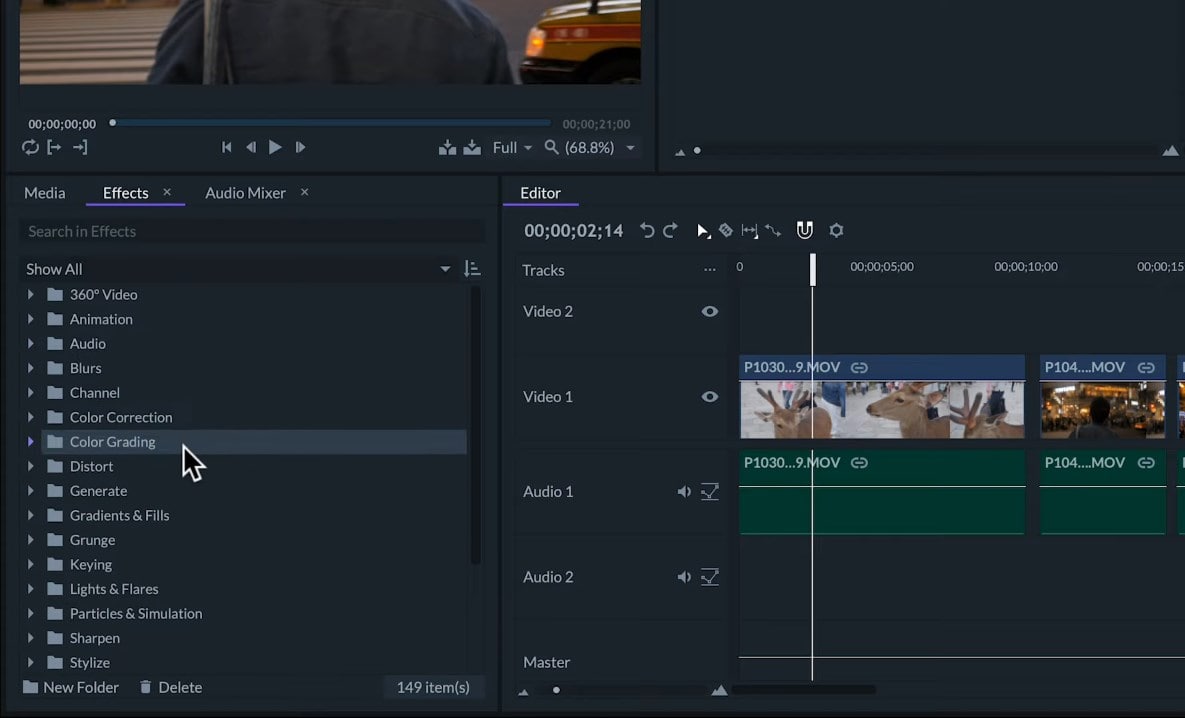
On the Edit Screen, we have the effects panel. This is a library of effects that we can apply to our Clips. They’re classified into the folders for each type of effect. As you can see that there is a folder for color correction and another one for color grading effects.
Let’s Learn How to Apply Effects
To apply an effect, we can drag and drop it over the clip on the timeline that we want to apply it to. We can apply effects to multiple clips by selecting those clips and dragging effects to one of the selected clips. Once an effect is applied to a clip, it can be adjusted or modified in the Controls Panel. This will affect only one clip at a time.
There are three automatic effects for Color Correction - Auto Color, Auto Contrast, and Auto Levels. These effects will automatically how much to adjust the clip. So, as soon as, we apply any of them, the clip will immediately look better. Although we can still adjust three settings -
- Threshold - below which colors in a video will not be affected by this effect.
- Blend with Original sets how much the color will affect the clip. By default, automatic effects will calculate how much to adjust every frame clip.
- If we activate the Select Frame Box, we can choose one frame of the clip to calculate the adjustment for the rest of the clip.

To deactivate the effects, we can click on the box next to the Effect name. If we want to eliminate the effects from the clip, we can simply select the effects name and hit Delete.
When we apply some manual color correction effects to our clip, we don’t see any difference until we adjust them in Controls Panel. Let’s see some of the most basic color correction effects
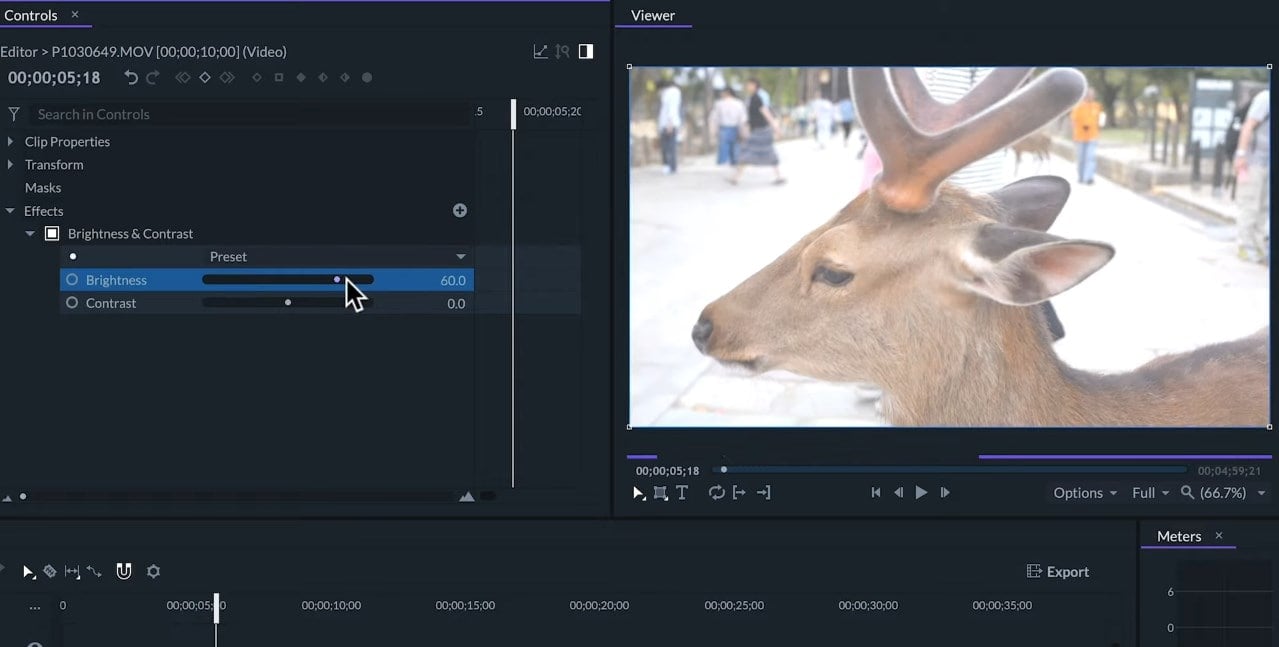
Brightness and Contrast
Once we apply this effect, we’ll see it in the controls panel. If we click on the small arrow left to the Brightness and Contrast, it will open its options. Here, we’ll have two sliders that we can move to the left or the right to select how much to effect the clip. If we move the Brightness slider to the right, the image will look brighter and if we move to the left, it will look darker.
On the right of the slider, we have a numeric value of the slider. We can also drag from this number or click and write the precise value we may want to apply.
Contrast is the amount of difference between light and dark tones. If we decrease the contrast of the image, it will look flat or dull. While increasing the contrast will make the image look punchy. We can also select the Preset on the upper box. This would be a combination of these two values for a faster setup.
Let’s try another effect.
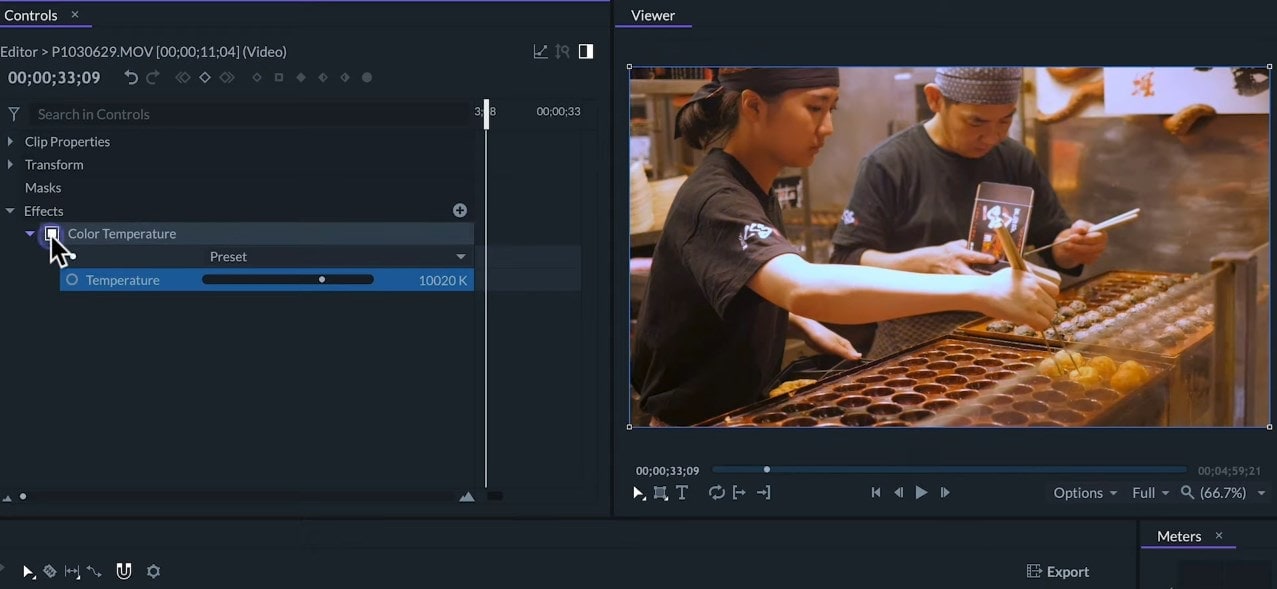
Color Temperature
Color temperature is the characteristic of visible light that on our clip will originally depend on the lighting of the actual scene and the settings on the camera. With this effect, we can tweak it a little bit and correct it. A lower value will make our clip tend towards orange which will produce a warmer feeling of the image. Conversely, a higher value will give us a bluer tone and a colder feeling.
Like most effects, if we tweak too much, then they might end up destroying the quality of the image. So, it’s always good to do this in moderation.
As an example- this image is too warm. So, I’ll use this effect (Temperature) to neutralize the colors. Turning the effect on and off by clicking on the box next to the Color Temperature effect so we can check the difference from before to after.
Let’s try an effect on color grading-
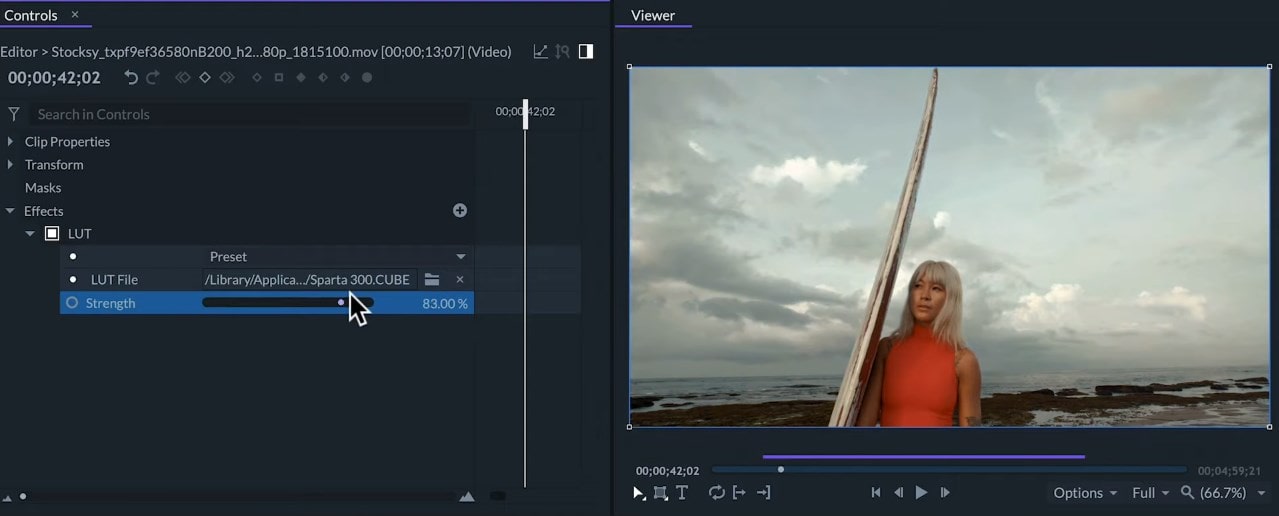
LUT Effect
A LUT is a combination of effects to give a specific look to the image. FilmoraPro offers some great LUTs that are based on the look of movies and series. Applying these LUTs will instantly give a strong mood to our clip. We can lower the strength with the Strengths Slider.
We can even download more LUTs from the internet to apply them to our projects. There are many sites that offer paid and free LUTs in different formats. FilmoraPro works with .Cube format. So, we’ll try one of the packages that are available for free on this site (shown in the below figure).
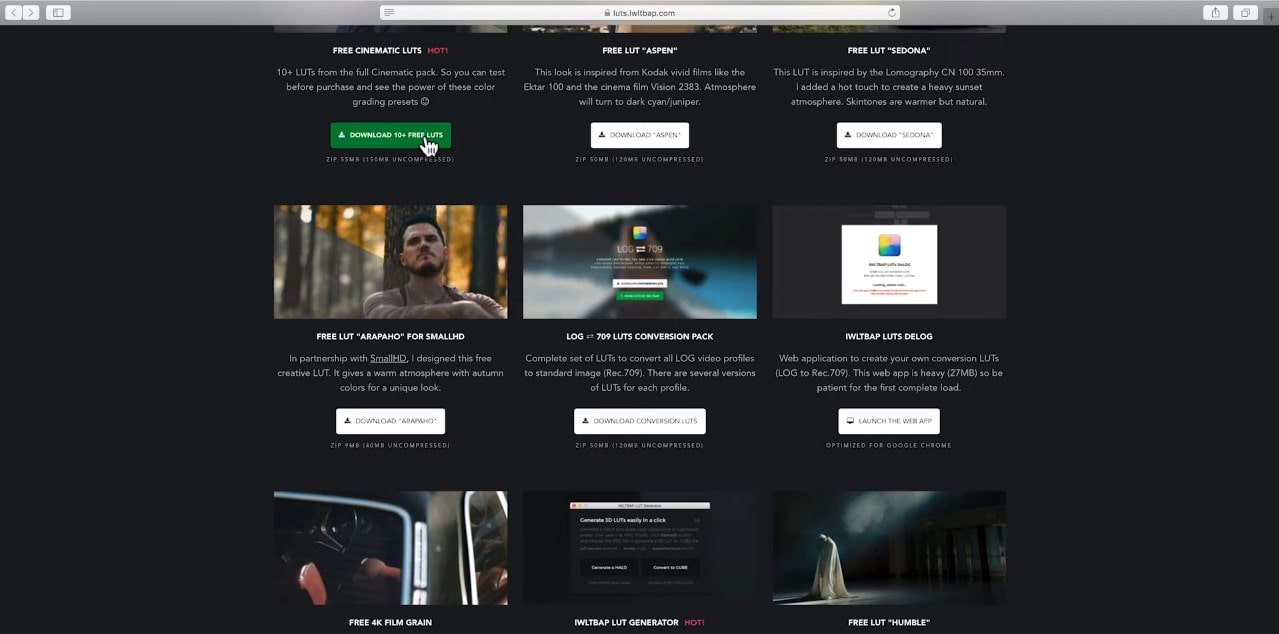
If you want to try it out for yourself, then you can visit Iwltbap and download and apply LUTs you like.
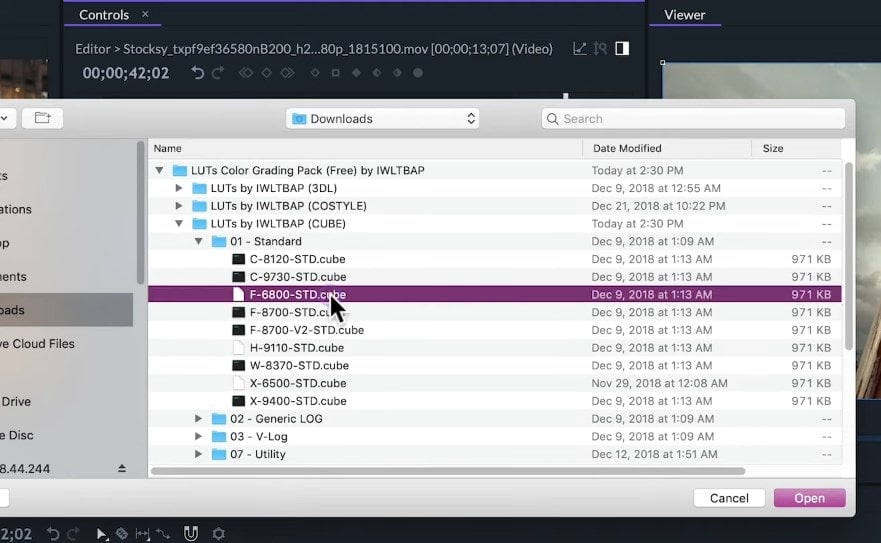
Once we’ve downloaded the file, we can look at the LUT the effect in the Controls panel and click on the Folder icon to locate the file. In this case, this will be the cube format folder. As soon as we open it, it will be applied to the clip.
So, that’s an overlook at some color correction tools. To learn more about editing in FilmoraPro, make sure to check out our other tutorials.