

In this tutorial, we’ll learn some basic audio editing - how to insert tracks, edit the levels, work with keyframes and use the audio mixer panel.
When editing audio, we can use a similar tool as editing video. In this case, we have a video on the timeline with its original audio on the first track.
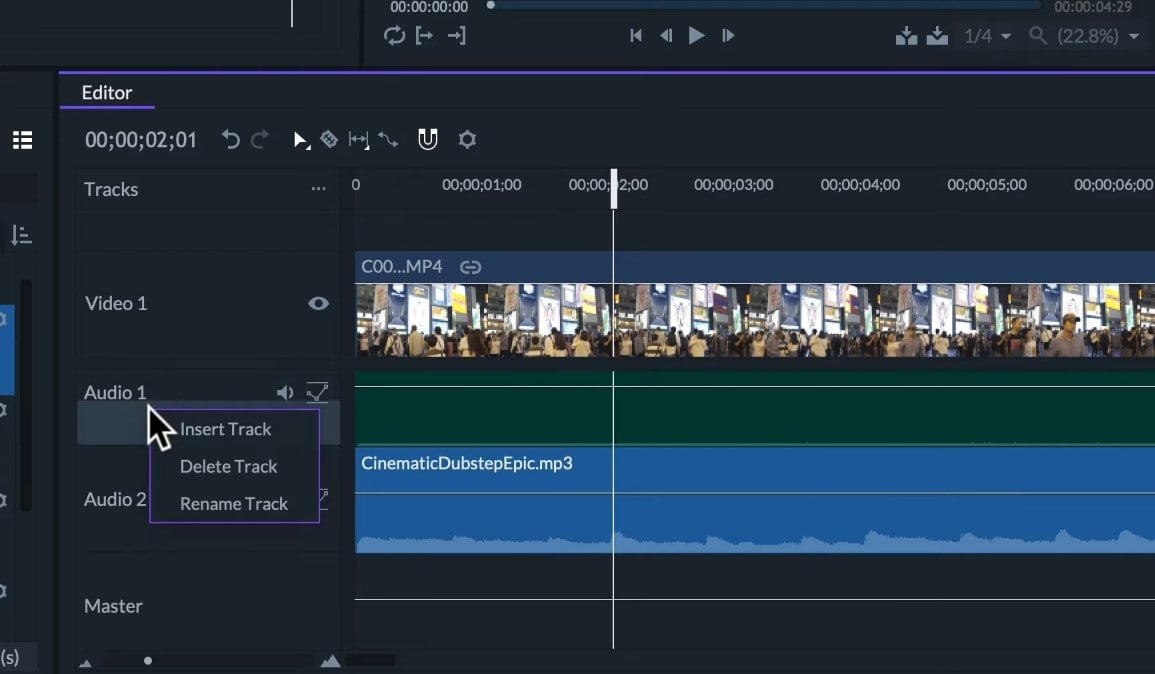
We’ll be using a second track for background music. We can see the third audio track is called the Master track because it represents the level of the entire mix after all tracks are combined. So, we can’t put audio clips in here, but we can add a new audio track by right-clicking on the name of any audio track and then click on the Insert Track to create a new track below.
We’ll use this next audio track to put in some sound effects.
Renaming Tracks
To keep things organized, we’ll name the audio tracks. To do this, right-click on the audio track name and click on Rename Track.
Meters Panel
On the Meters Panel, we have a monitor for the overall audio levels. It will show the loudness of the sound played at that moment measured in decibels (dB). The meters value goes from 6 to negative infinity decibels which will be complete silence.
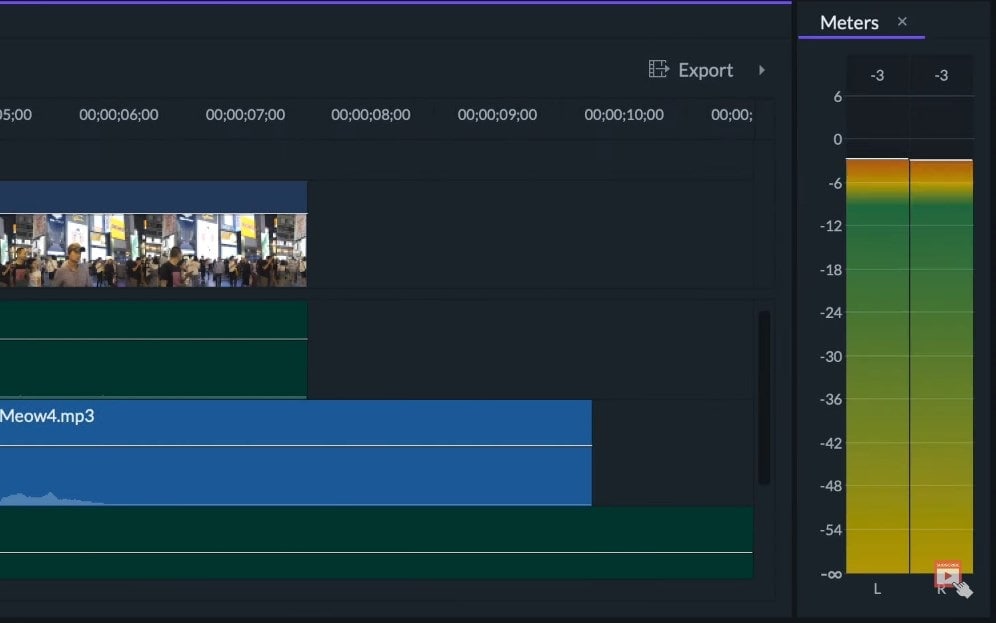
The louder the sound is the higher it will peak on our meter. If the audio levels go above zero, we’ll have an audio distortion that will make out audio lose quality and saturate. So, we’ll always want out audio Peaks to stay below zero.
Audio Workspace to Edit the Levels
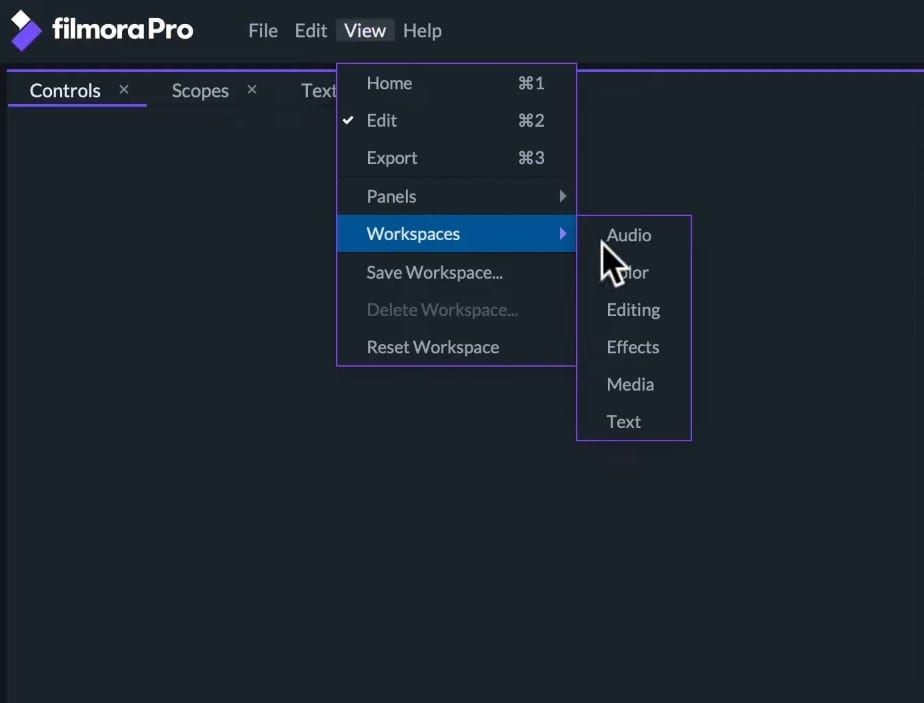
To start editing the audio, we suggest using the audio workspace. For this, we’ll go to the Toolbar and click on View > Workspace > Audio.
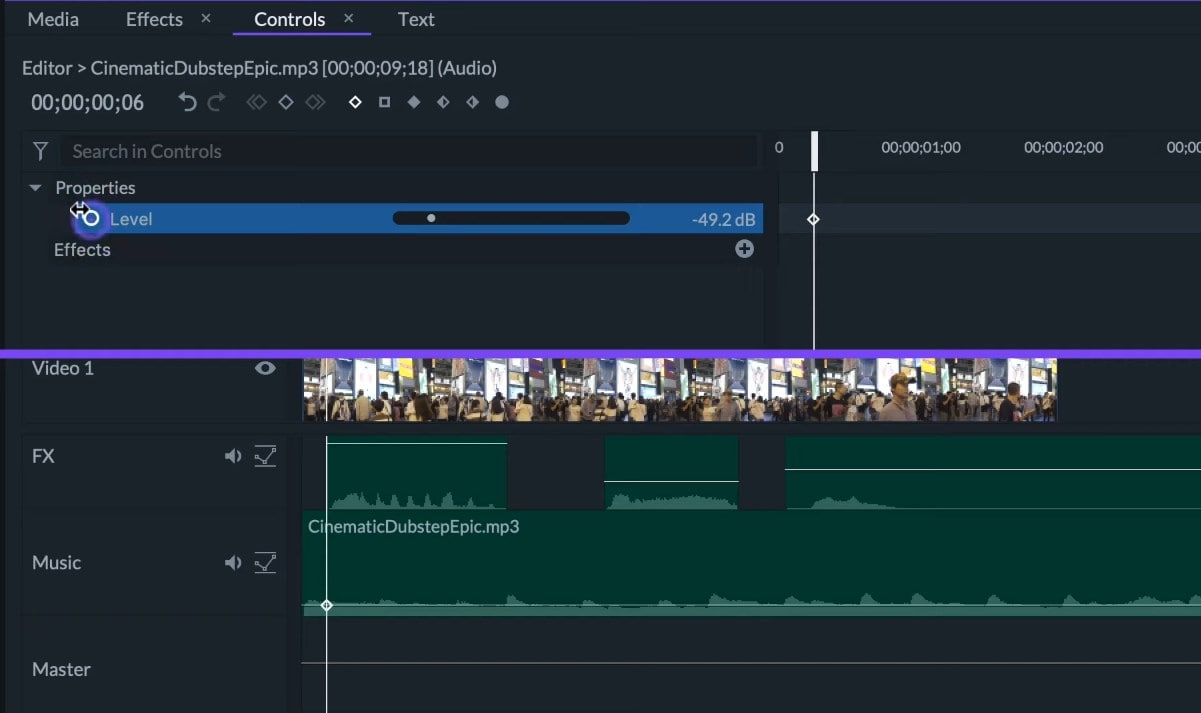
For this workspace, we’ll have the controls panel on the top left of the screen. Here, we can choose the audio levels of individual clips by selecting them and going to Properties level. When we move the slider bar, we’ll be adjusting the volume of the clip. A horizontal line on the clip will move up and down -showing the level. We can also adjust the levels by moving the line directly as shown in the below figure.
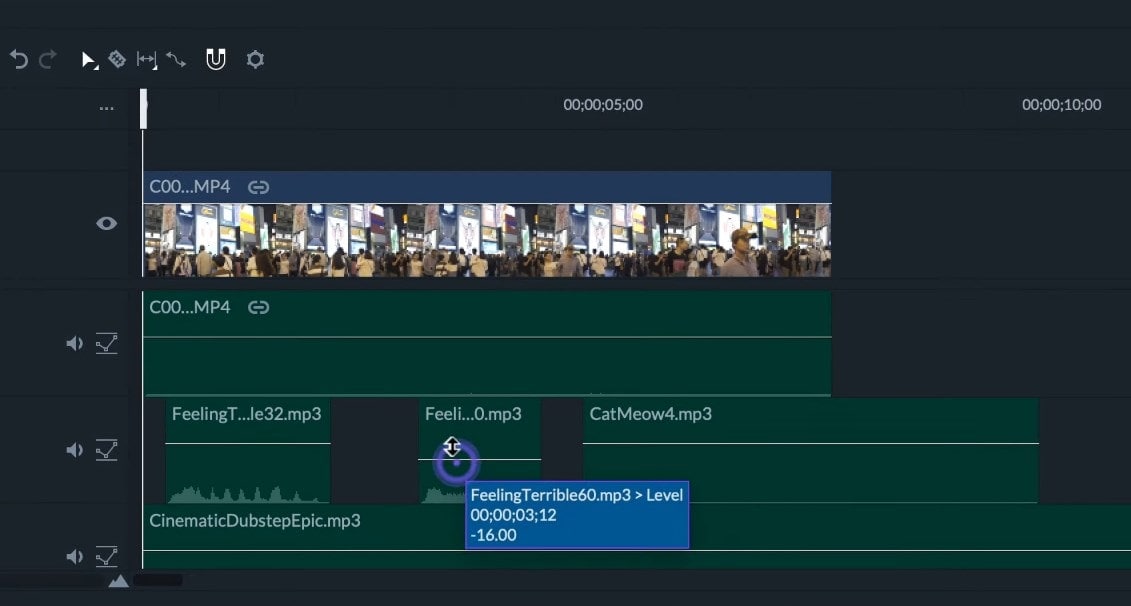
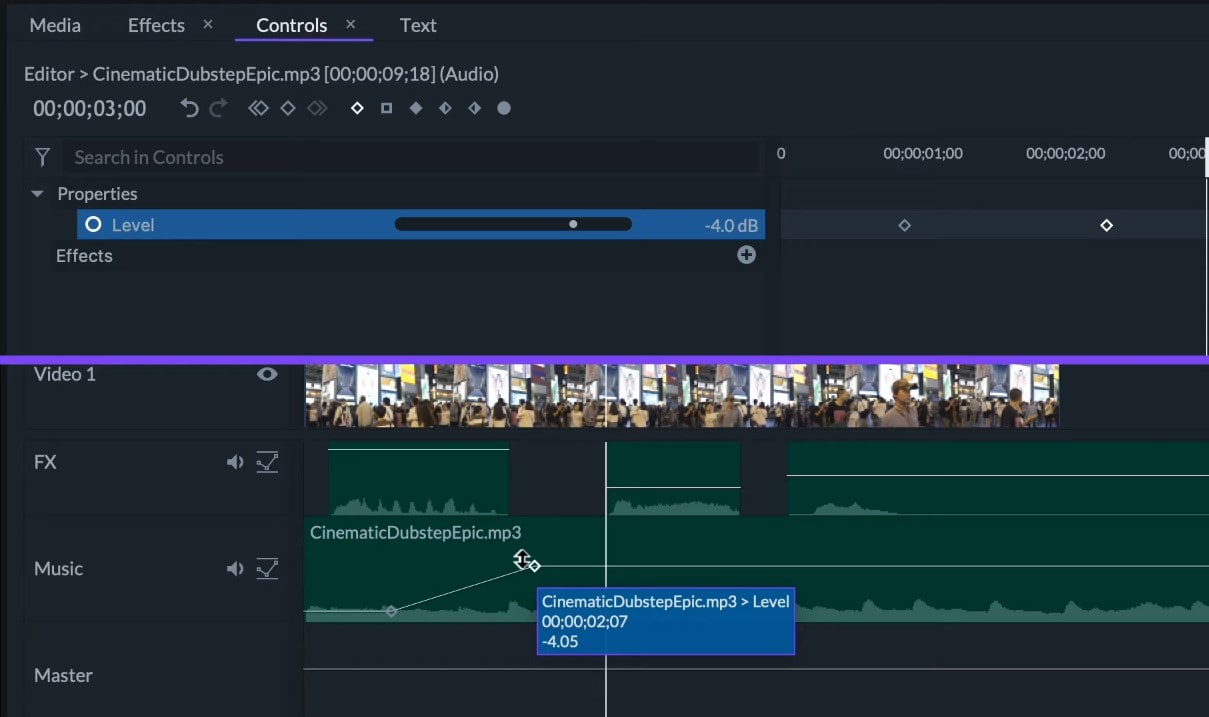
Here, we’ll put a different value for each clip. We can make the audio levels change for a long time. For this, we will use a keyframe.
Keyframes
A keyframe is a location on the timeline which marks the beginning or end of the transition. We can set a value on a certain time on the timeline. In this example, a low audio level and then, create a keyframe and then, we’ll set a different value at a different time on the timeline. And another keyframe will be created and FilmoraPro will interpolate the value between these two keyframes along the timeline.
In our case, we’ll do the same with our music audio clip. We will set a lower value and move the playhead until the place where we want to start increasing. Next, click the circle (shown in the figure) to create a keyframe and move the playhead where we want it to stop increasing and then, we’ll set a new value. We can hear how audio levels increase.
On the small timeline on the right of the controls panels, we’ll see the position to the two keyframes. We can even move the keyframes along the timeline.
On the clip on the editor panel, we’ll see a graphic of the interpolation. Here, we can also move the keyframe to change their position on a timeline and value. We can even create a new keyframe by holding the CTRL or Command and clicking on the White line.
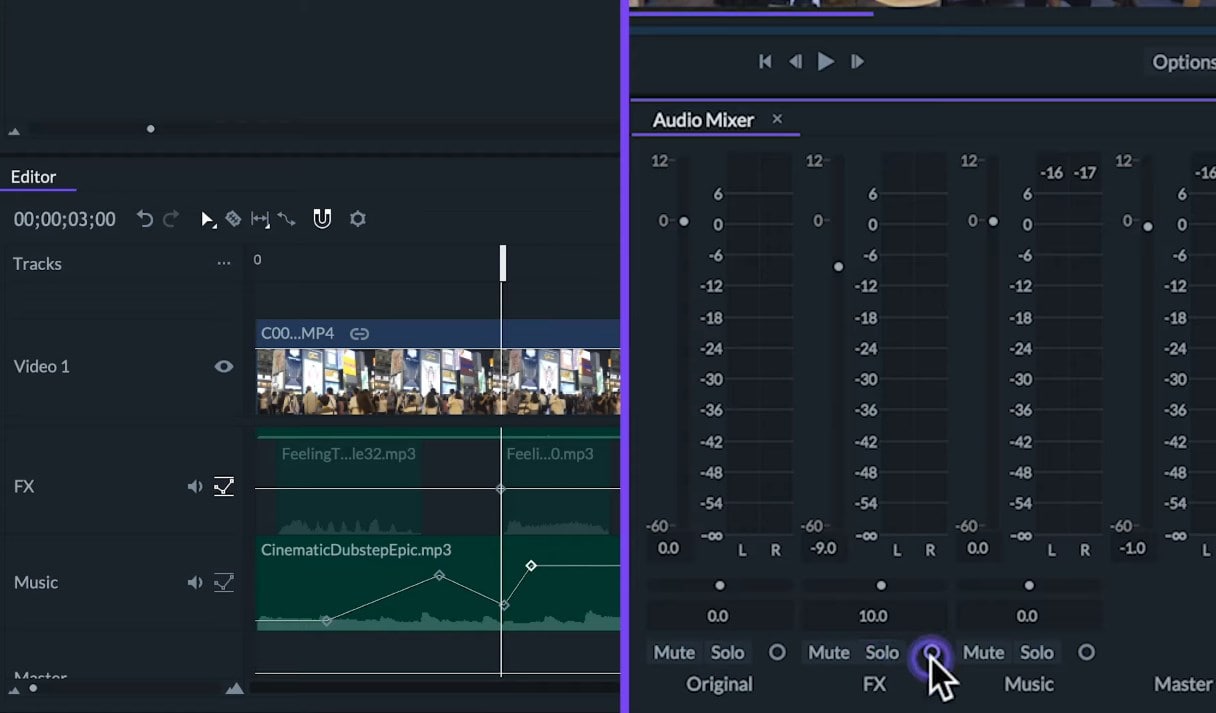
Audio Mixer Panel
Then, we have the Audio Mixer Panel which is on the lower half of the screen to the right. It will show an audio monitor for every audio track and one for master audio track. We can see that every monitor is named as we have named each track. On the left of every monitor, we’ll have a slider bar to adjust the game levels of the complete audio track. This will affect every clip that is on this track. If we modify the levels of the master audio track, this will affect the entire project.
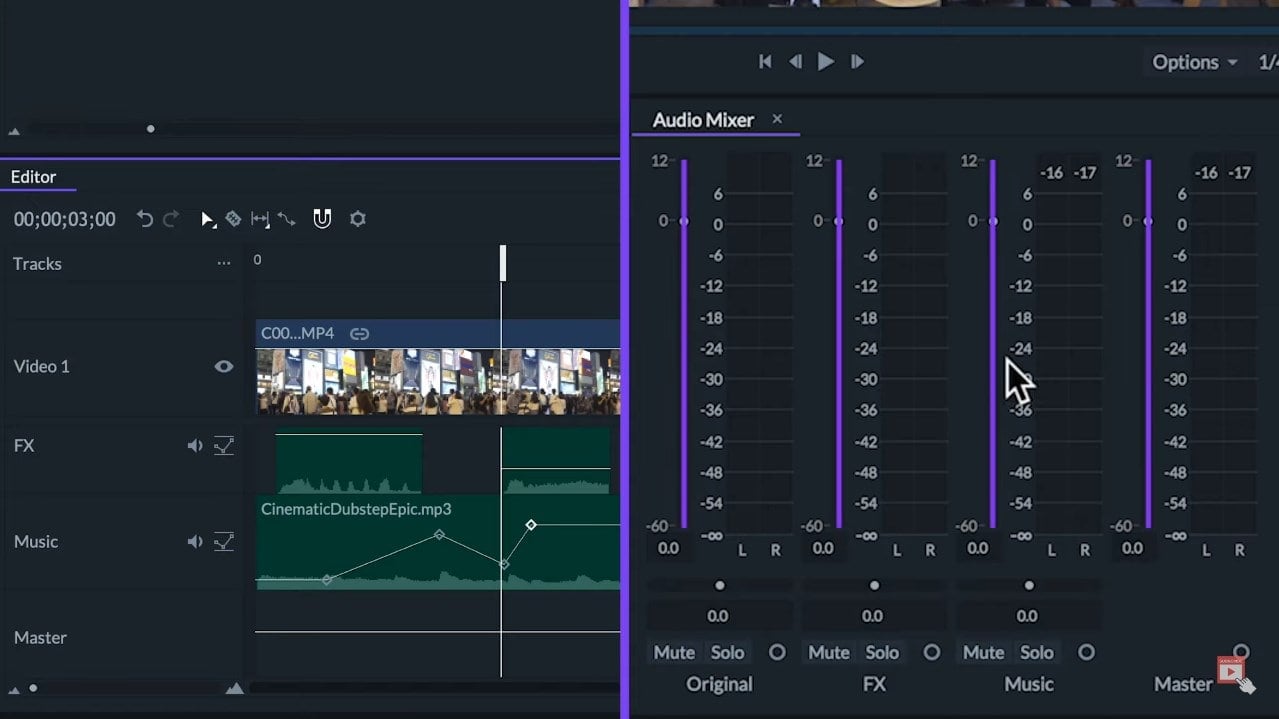
If we activate this icon (shown in the below figure) on the track, then we’ll see a white line for the complete track levels, instead of seeing the individual clips game levels.
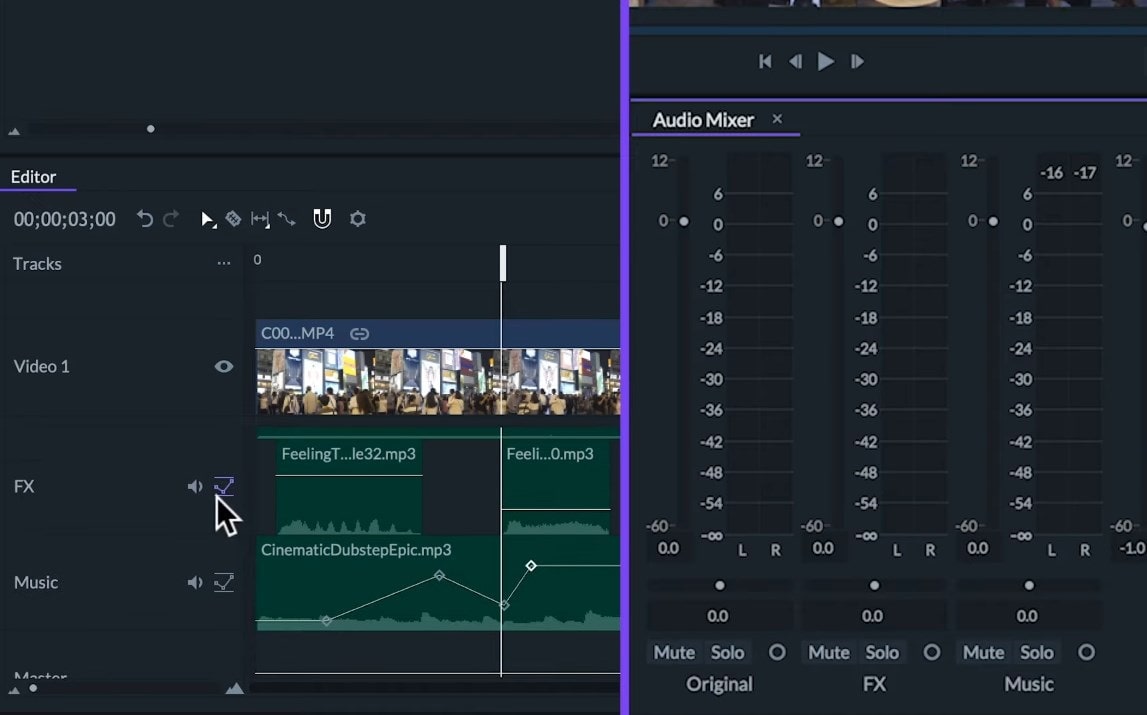
On the Audio Mixer, we can also balance the audio to the left or the right channel.
Mute a complete audio track or activate the Solo option to adjust it without getting distracted by the sound of the other tracks. We can also click this circle (show in the below figure) to insert a keyframe for the audio levels of the complete track. If we insert a new track, there will be a new audio monitor for this track.
So, that’s an overlook at audio editing. To learn more about editing in FilmoraPro, make sure to check out our other tutorials.