

In this tutorial, we will learn how to import media into our project. We will also learn how to use the media panel, the trimmer panel, and the viewer monitor.
So, let’s import our media.
Importing files means choosing the files we want to use in our edit and bringing them into the project. We can import video files, audio files, and static images.
Media Panel
Let’s take a closer look at the media panel. There are a few ways we can import our media. We can simply drag our media from elsewhere on your PC to the media panel or we can also double-click on the space on the media panel, click the import button or press the CTRL/CMD + I on your keyboard to bring up the file browser. Here, we can choose which media would like to import.
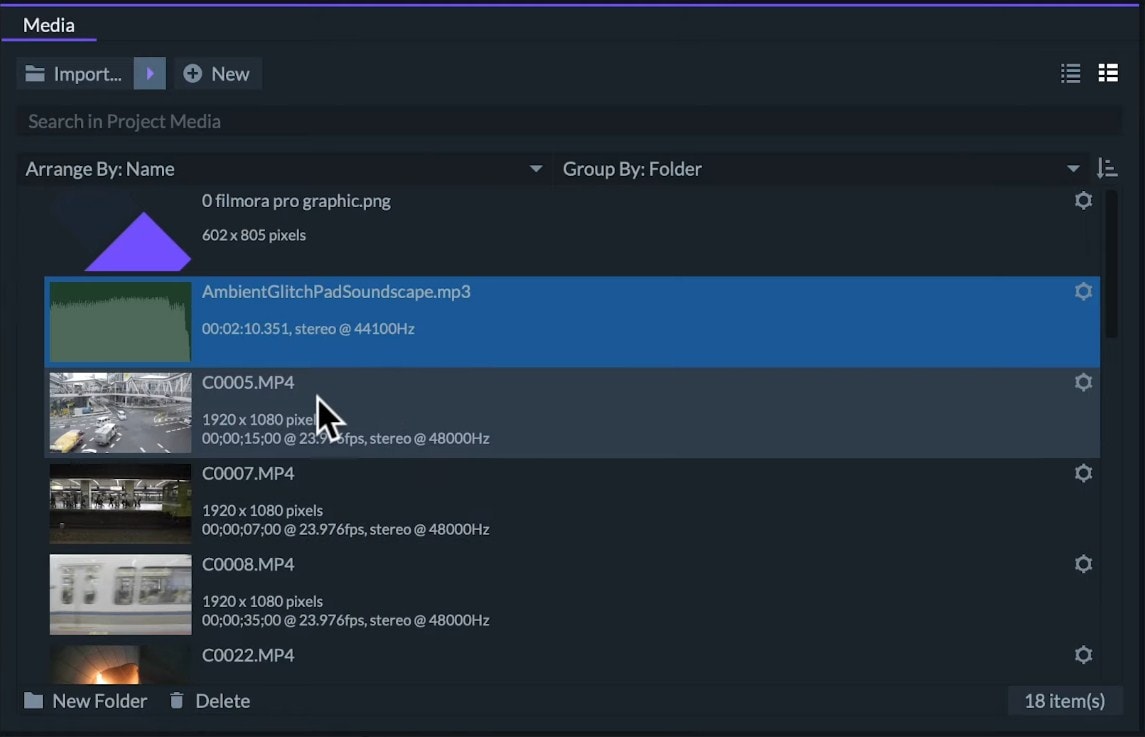
In the media panel, we see a list of imported footage with their thumbnail previews on the left. It makes easier to identify the files. Over on the right, we have the name of the file and its settings.
Import Files in List Mode
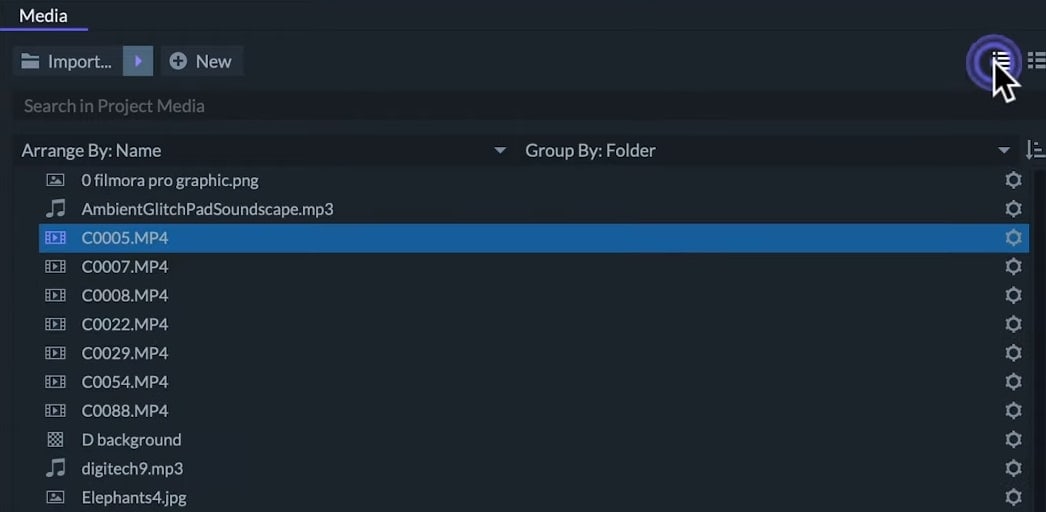
We can also view our media in list mode. This will show only the name of the file and icon to identify the type of file. This way we will be able to see more files without the need to scroll down.
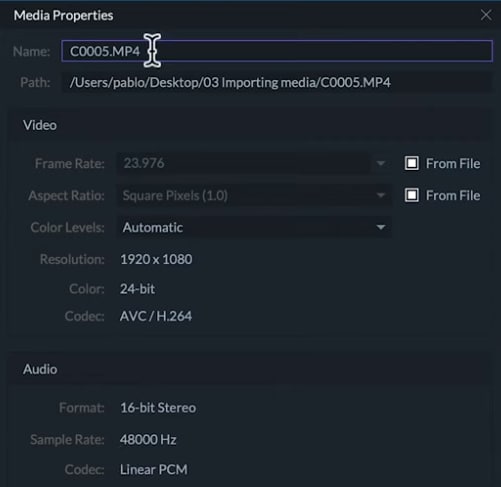
If we click on the gear button on the right side of the file name, then we can open the media properties window. This will let us check and modify some settings for the files.
To rename the file, we can use the media properties window or we can select the file, hit Enter and write the new name. Naming files correctly is crucial to avoid losing time when you edit, especially when you are working with lots of files.
Note: That being said, changing file names in FilmoraPro will not change their names on your computer.
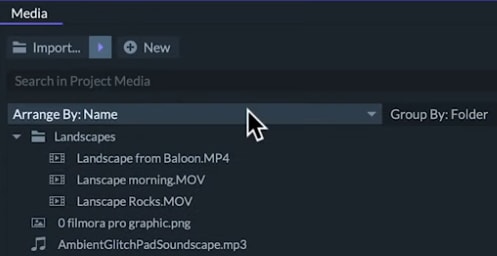
To keep files even more organized, we can create folders by clicking on the new folder icon, writing down the name, and pressing the Enter key.
Now, we can click and drag files into that folder. We can choose to arrange our media alphabetically or by type of files in descending/ascending order.
You can choose to group files by folders you created or you can group them by media which will automatically separate the files in audio, video and images, planes, and titles. If we can’t find a file we have imported, then we can search for its name in the search field.
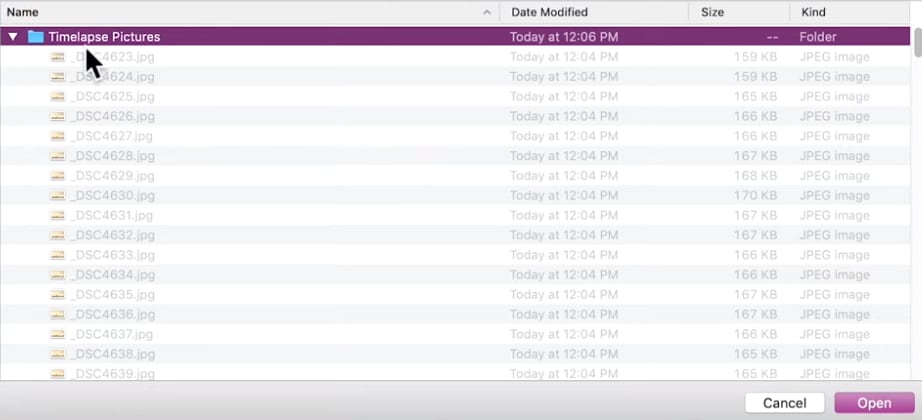
Import Sequences of the Images
We can import sequences of the images so that they play as if they were the frame of videos. For this, we need all of the image files to be inside a folder and named an order with numbers on the end. We will click on the arrow next to the import icon and then on the image sequence. Then, we will select the folder with images. In this case, I select these pictures for a time-lapse and FilmoraPro will import it as a video clip.
Trimmer Panel
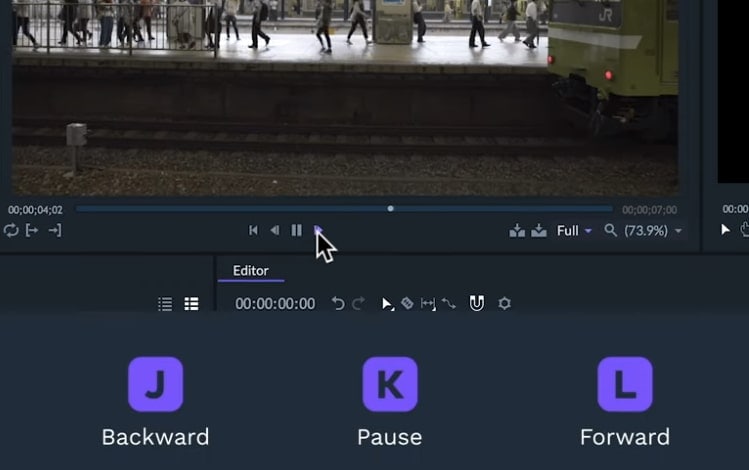
If we click on a piece of media, then it will open the trimmer panel. Here, we can preview our media by clicking on the play icon or hitting the spacebar. We can click on the previous and next frame icon to move frame by frame. Or you can use left and right arrow key which comes in handy while doing precise cuts. We can also press L key to play forward and hit it again to play faster. The K key will pause the video and the J key will play it backward.
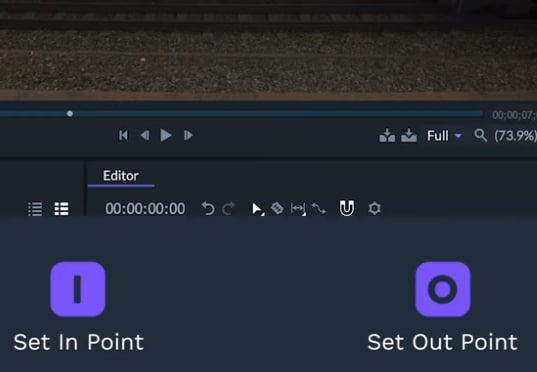
The next thing we can do is to select the part of the media we want to use by setting in and out points. To do this, we are going to find the exact time we want this clip to start. Then, we will click set in point or hit I key on the keyboard.
Next, we will find where we want this clip to end and we will click the set-out point or hit the O key. When we do this, we will see a blue section in a small timeline on the trimmer window. It represents the media we have selected. We can loop our playback by clicking on the loop icon or pressing the CTRL/CMD + L key.
When we do this, the trimmer will playback the selected parts of the media as a loop on the bottom right we can select how zoomed in or out we want our trimmer. We can select a certain percentage or scaled to fit the size of the panel.
We can also change it by scrolling while our cursor is hovering over the monitor. This will not affect the scale of our natural clip, but will only change the way we see it in this panel.
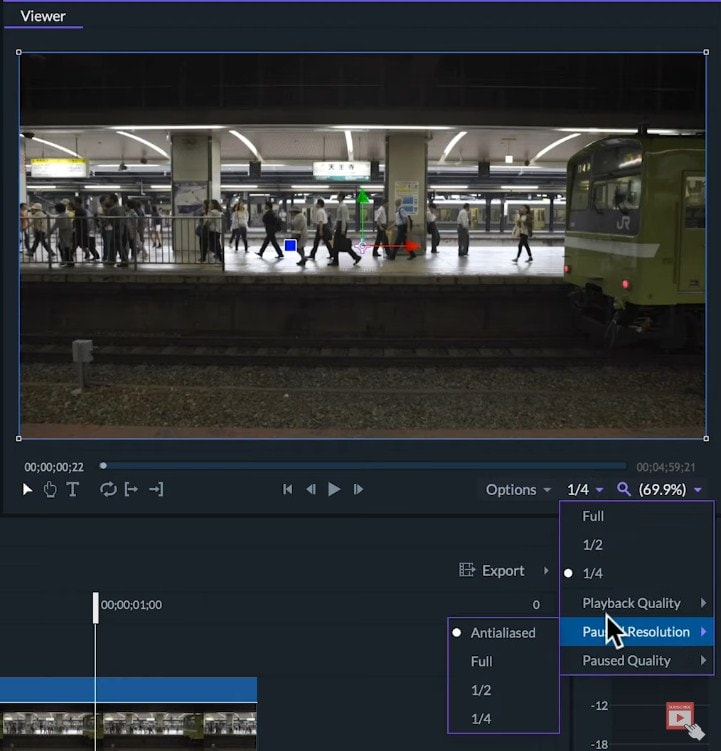
Change Playback Quality
Further down in this drop-down menu, we have the playback resolution where we can choose the quality of the preview of the trimmer. The higher quality will give us a better preview. But, a lower quality may be more responsive to some computers.
So, if you run into lag, then it is a good idea to lower your preview quality. This won’t affect your end product of course. We can click and drag our footage straight from the trimmer to the editor panel to bring our clip into the timeline.
If the project settings are different from the videos, a window will pop up and ask us if we want to automatically change our project settings to fit the media.
Viewer Panel
Once we have some clips in our timeline, we can see them in the viewer panel. This panel monitors like the trimmer, but it will show us the entire edit instead of only one file. We can play, move frame by frame, select in and outs points of our edit. It is more important when we are ready to export and also, change the zoom in playback resolution just like in the trimmer panel.
So, that’s how to import media in FilmoraPro. To learn more about editing in FilmoraPro, check out our other articles.