

In this tutorial, we’re going to learn some different ways to transform and place the elements in the frame. We’ll learn some Shortcuts, and Transform in the Viewer. In the Layout Panel, we’ll learn about Alignment and Distribution.
So, let’s start with Shortcuts
When we’re positioning an object in the frame, we can precisely move it pixel by pixel by holding the Alt Key + Arrow keys.
Or we can move it by 10 pixels by holding the Alt + Shift keys + Arrow keys.
![]()
We can quickly place the selected layer in the center of the frame by pressing Shift + 3. If we press Shift + 2, the image will be centered in our frame. The rotation will be set to 0 and it will be scaled to fit the height of the frame keeping the aspect ratio.
Pressing Shift + 1 will scale the object to fit the width of the project. And if we press Shift + key which is the one to the left of the 1 key, the object will be stretched to fill the size of the project ignoring its original aspect ratio.
Transforming Multiple Objects
Now, let’s learn the difference between transforming multiple objects on the viewer, the layout and the control panels. Sometimes, we want to adjust more than one layer at the same time.
But, if we adjust the values in the Controls Panel, we can only affect a single layer. We can adjust multiple layers by using the Layout panel in the viewer.
When we have several layers selected, we can scale them from the viewer. Each layer will be scaled from its own anchor point.
If we change the scale from the Layout panel, FilmoraPro will create an invisible selection frame around all the selected layers and scale all the objects from the center of this frame.
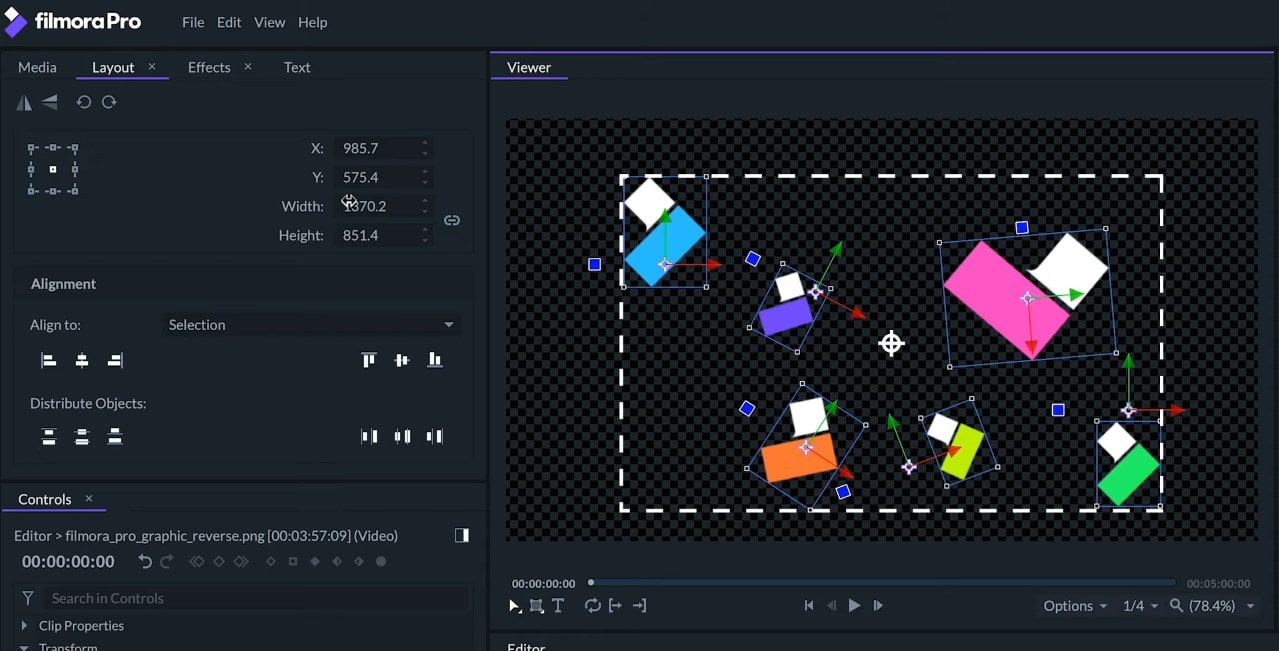
We can change the anchor point of the frame with the Anchor Point Selector. For example, if I select the upper left corner, the scale will happen around the upper left of the frame.
If we transform the position from the Layout panel, it will move all the layers along the X and Y values of the project. In the Viewer, we can transform all the layers along with the X and Y values of one of the layers by using the arrows or just move all the layers by clicking and dragging from one of them.
If we rotate the selection from the Layout panel, it will rotate 90 degrees from the center of the selection frame independently of the anchor point position that we have selected on that panel. But, if we rotate them from the Viewer, each layer will rotate from its own anchor point.
The Mirror features will also transform the layer from the center of the frame.
Alignment
When the alignment is set to the timeline, it will align the selected layers along with the size of the project.
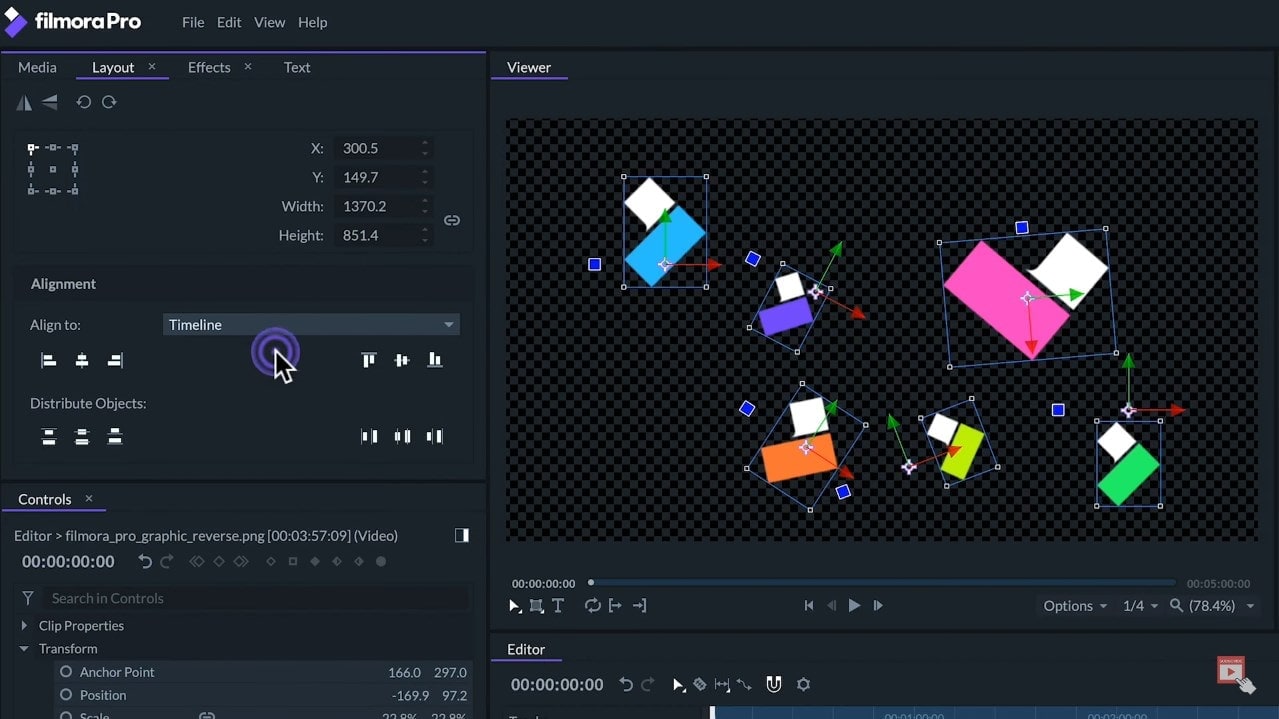
So, for example, if we set align vertical top, it will align the upper pixels of each layer to the top edge of the viewer. If we click on align the vertical bottom, it will align the lower pixels of each frame to the bottom edge of the project.
The same thing happens on the sides - align horizontal left and align horizontal right. When we click on the align horizontal center, it will horizontally align the center pixel of each layer with the horizontal center of the project independently of its anchor point.
If instead we click on align vertical middle, it will align the same pixel to the vertical center of the frame. If we change the alignment to the selection, the FilmoraPro will create again this invisible selection frame and will align all the layers corresponding to this frame instead of the size of the project.
So, this way will have ultimately align horizontal left, align horizontal right, align vertical top, and align vertical bottom, align vertical middle, and align horizontal center.
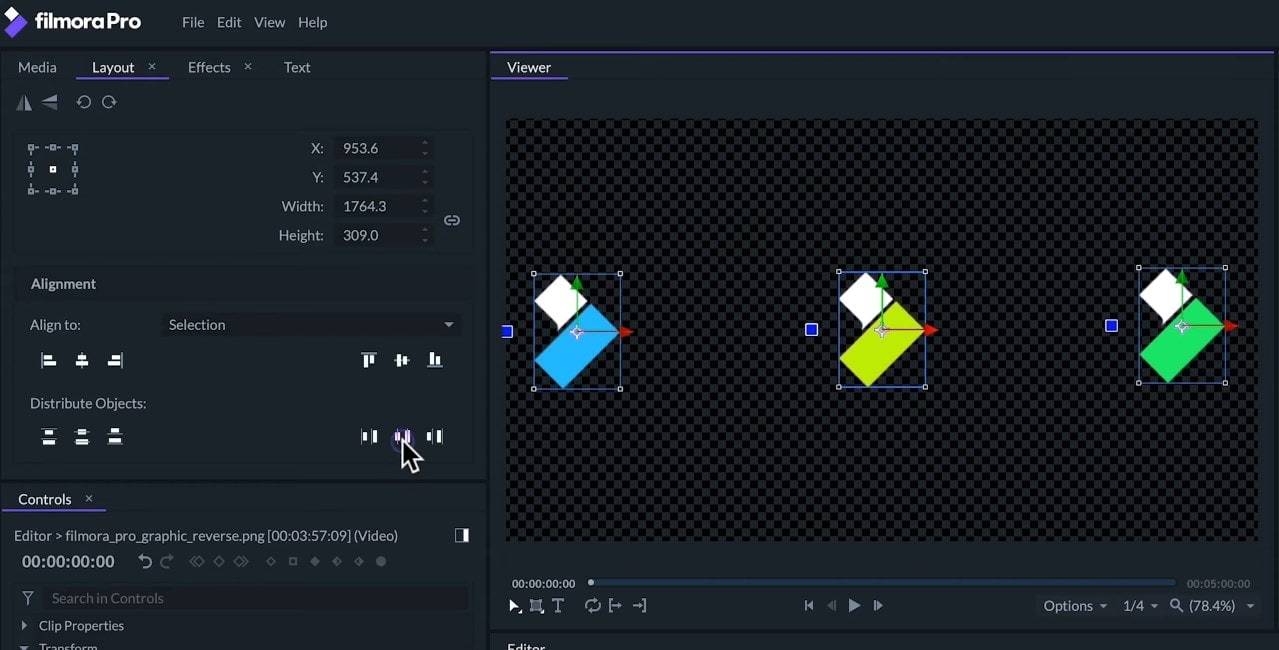
Distribute Objects
The Distribute Objects feature will always work within a selection frame. So, it’s always necessary to select at least three layers to use this feature. It will evenly distribute the layers.
So, if we click on distribute left, it will horizontally distribute the objects according to their pixel farthest to the left so that all these pixels have the same distance on the horizontal axis. The two objects furthest on the sides will still remain in their places.
A distribute right will calculate the distribution of the pixel that is the furthest to the right. If we click on distribute horizontally, it will do the same but calculating from the center pixel of each layer. It can do the same thing for distribute vertically, distribute top, and distribute bottom.
Just as a practice example, if I wanted all these layers to the same height direction and horizontally distributed, I could select all the layers and hit Shift to scale to fit height.
Reduce the scale on the layout panel and then, move to first layers - one on the left and other on the right and then finally select all the clips and click on the distribute horizontally and align vertically to the middle.
So, that’s all on some more on transforming and placing objects. Don’t forget to check out our other tutorials to learn more about editing in FilmoraPro.