

In this tutorial, we are going deeper into Color Correction. Today, we will be looking at the Scopes, Levels, and HSL effects.
Color is a process that should be worked on after your edit is done. Otherwise, you might be wasting time correcting clips that might not even end up in the final export. Another note, color correction always comes before color grading. Color Correction is a complex process, so, if you don’t know how they affect your videos, it is recommended that you go through the previous tutorial on Scopes in this series.
Color Correction is necessary to:
- Match the clips together especially if there is a different lighting setup or the clips were recorded with different cameras.
- Fix some mistakes in the camera when recording, and to.
- Adjust log picture profiles that leave the video with low contrast and saturation.
A log profile is able to capture more detail in the highlights & shadows, but it always needs to be corrected in post. So, we'll use color correction for these three purposes.
Let's Begin the Editing
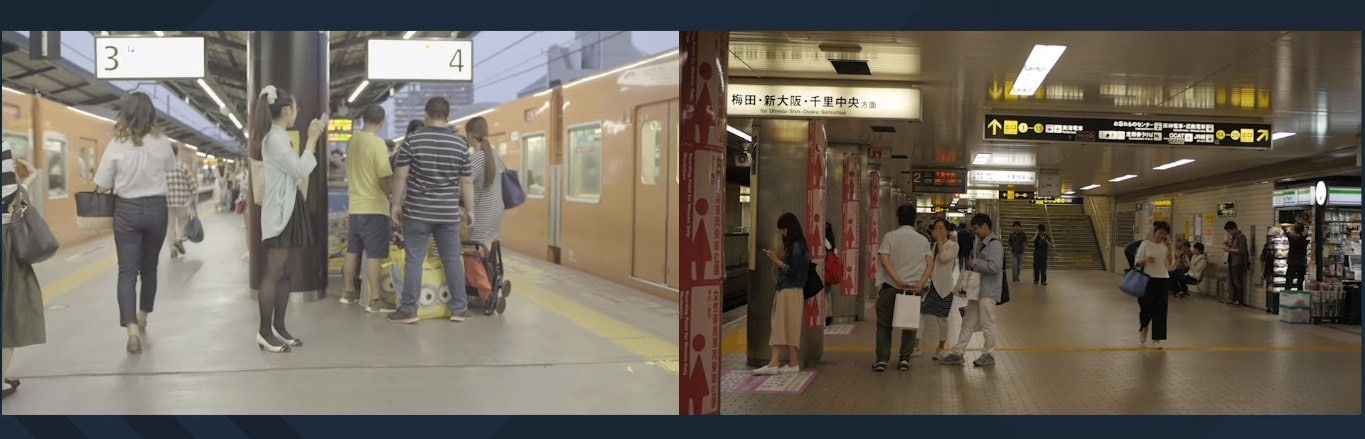
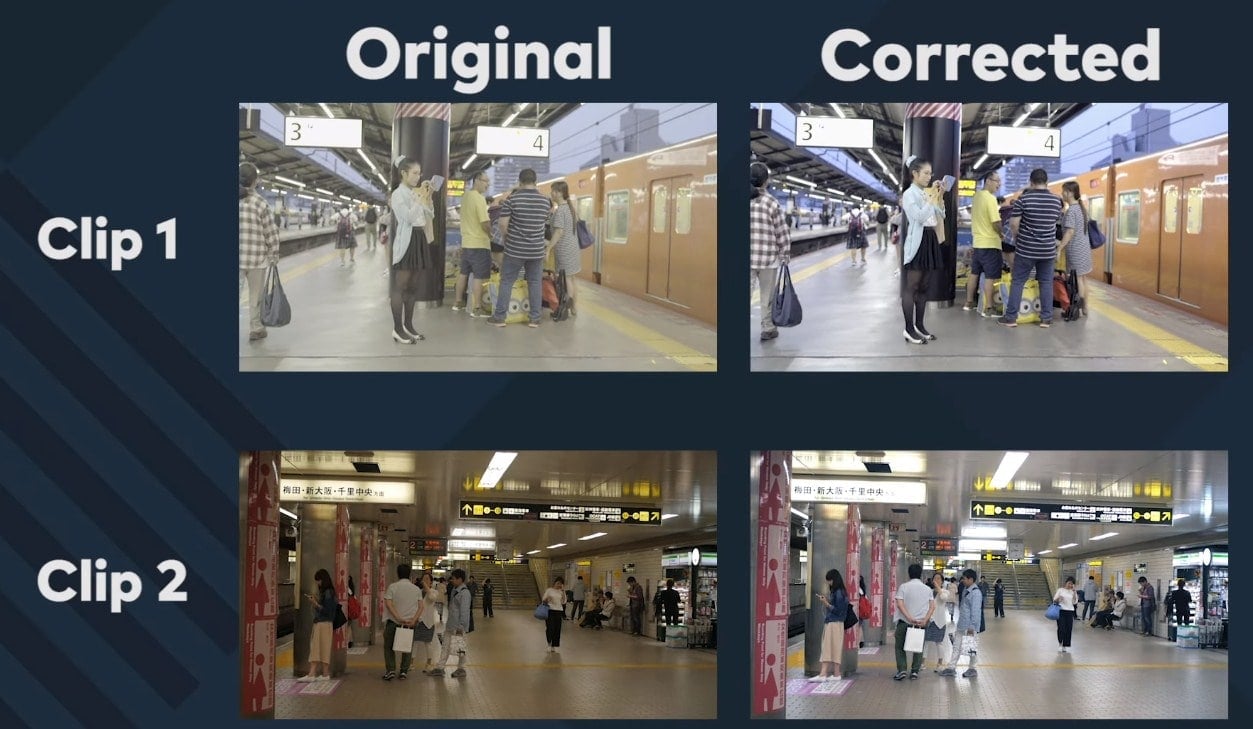
Here, we have two clips that we want to edit together on the same project. But they were recorded in different places. The first one has a flat log profile ad the second one has a wrong color balance & low exposure. And of course, they don’t match together. So, there will be a lack of continuity if we just leave them as they are. So, we divide color correcting in two parts.
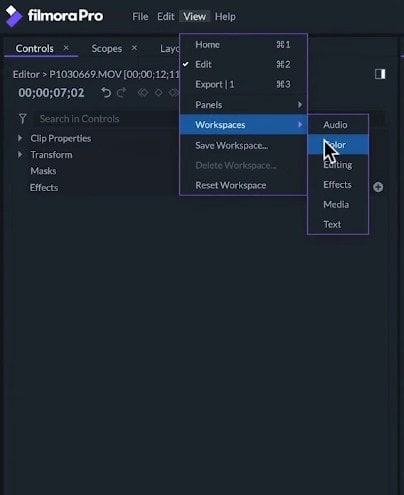
First, we'll look at exposure and contrast. And then, later on, we'll look at the color. So, when performing color correcting and grading, we suggest that you use the Color workspace. But you can also adapt your own custom workspace as we did in the video.
Working with Luminance
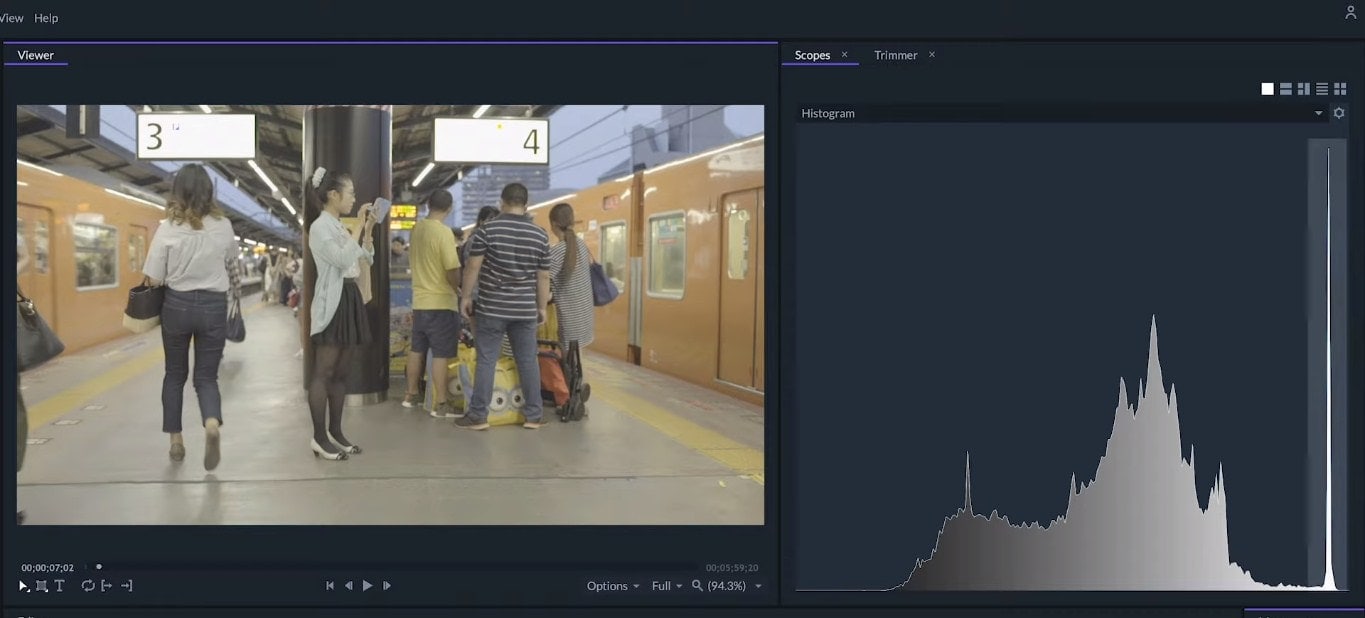
For color correction, we'll use Scopes which will show information about brightness and the color of an image. The histogram displays the amount of pixels corresponding to every luminance value. The brightness levels are displayed on the horizontal axis from black to white. The vertical axis will show the number of pixels on every brightness value.
So, in the first clip, we'll see that it has a lot of pixels that are on the same value that is close to the maximum white value. This corresponds to the two white sides in our image and to the small lights and reflections. Aside from those values, most pixels are far from the edges, so the image has low contrast without dark shadows or bright highlights.
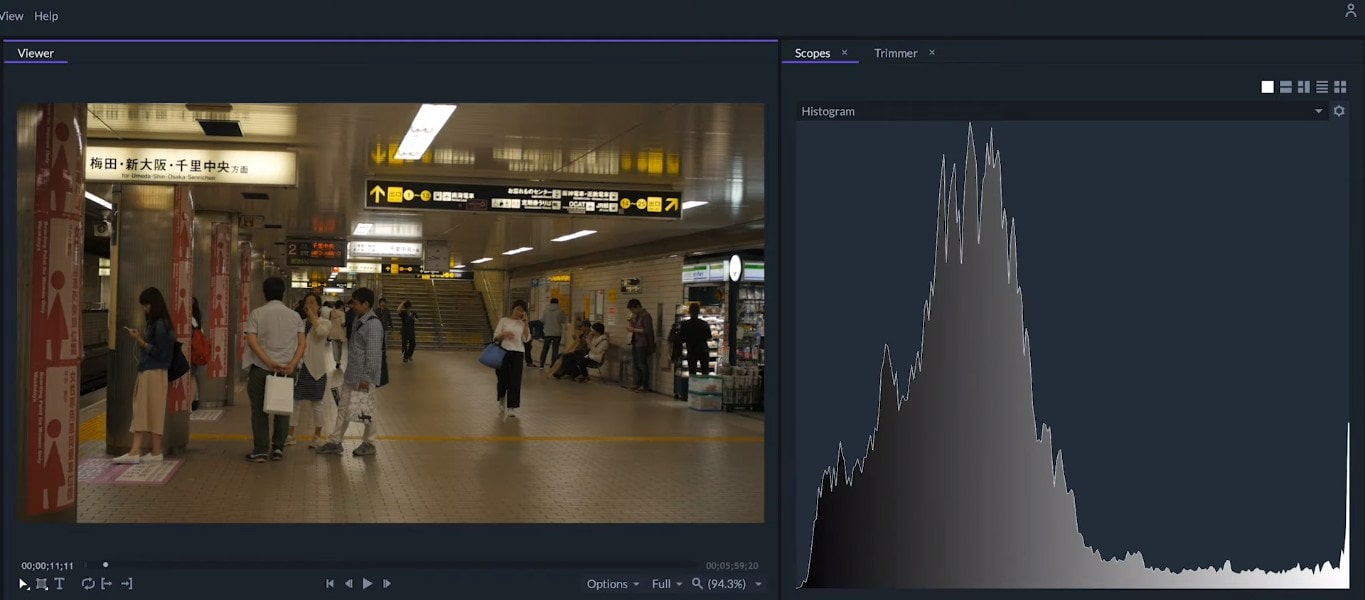
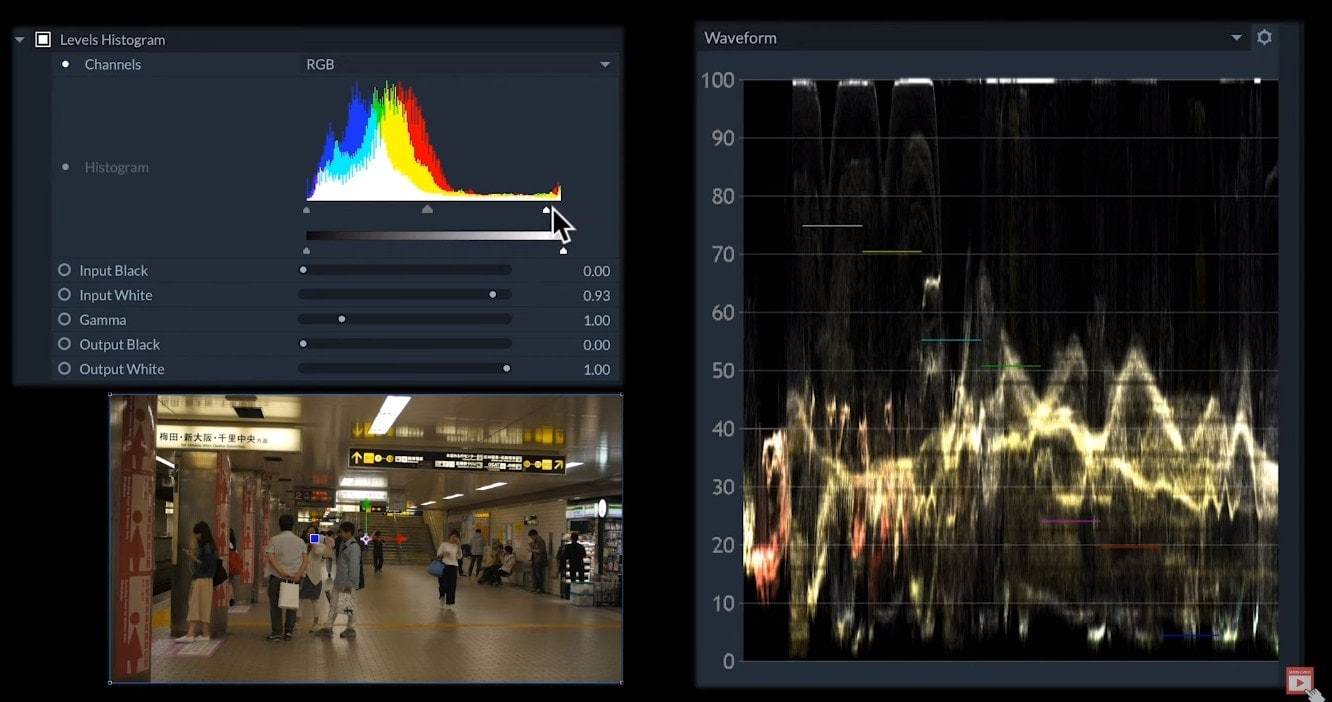
In the second clip, we can see that most of the pixels are around the left side of the histogram as the image is a little underexposed and dark. And there are some white pixels on the right edge which correspond to the lights and are losing detail.
The second scope for luminance is the waveform. This scope will show the luminance value on the vertical axis from 0% which is pure black to 100% which is pure white. The horizontal axis responds to the horizontal positions of the pixels.
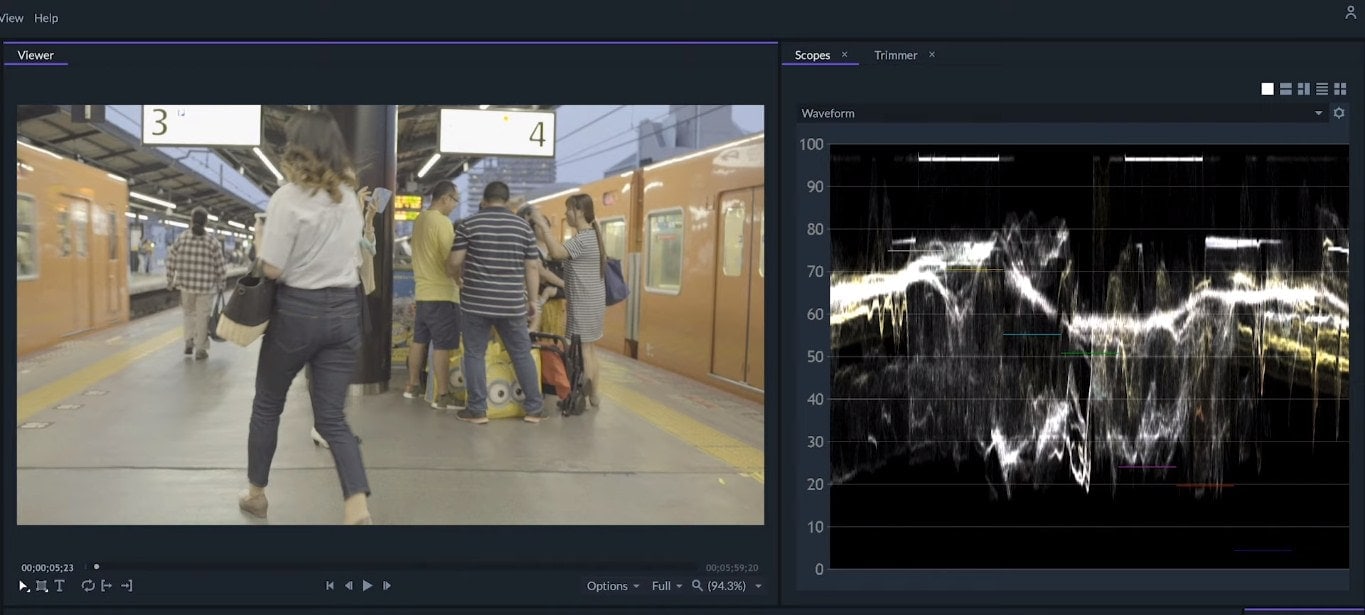
In the first clip, we can see that there are two big elements around 97% white which are indicated in the video. And a small number of pixels at the same level that corresponds to the lights & reflections. Most of the luminance information is between the 20 and 80% range. And there isn't much information between the 0 and 20% range.
In the second clip, the waveform shows that 100% of white spots are on the lights. There are some areas above 90% that correspond to the white signs. But most of the pixels are between 0 and 50%.
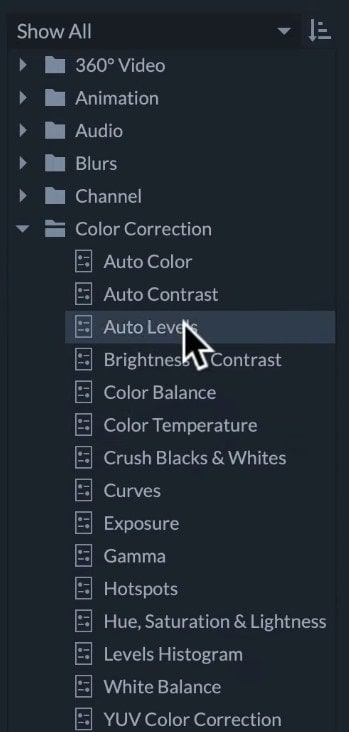
Effects for Color Correction
On the Effects panel, we can see in the Color Correction folder that there are lots of tools for color correcting. The two main effects for color correcting the luminance are the Curves and the Levels, which are essentially the same tool but for a different approach.
- The Levels are more intuitive and will let us be more precise with numbers.
- The Curves are more advanced and flexible to use.
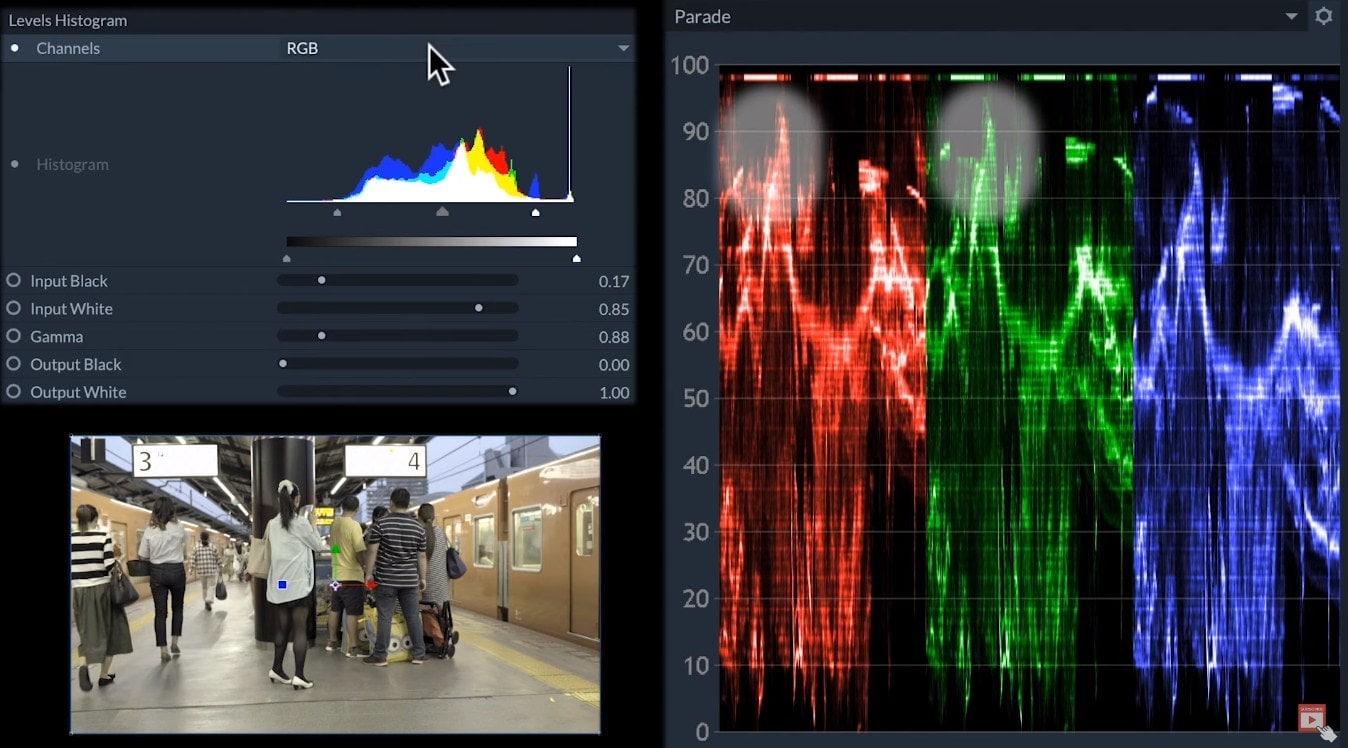
So, for this tutorial, we will use the Levels Histogram Effect. In the Control Panel, we will expand the effect to adjust its options. Here, we'll have the histogram scope as a reference.
First, we'll move the input black point to the right. This will make every value darer than that point black. So, let's move it until some pixels start touching the zero percent line on the waveform. This way, we'll have some pure black spots. On the white input, we will sacrifice the minimal amount of detail on the white signs since it's not really that relevant. And we will move the white input until we have some other pixels approaching the 100% level.

For the second clip, we'll leave the black input where it is as it has enough information close to the black point already. We'll move the white input to fill the upper part of the waveform until we have more pixels next to 100%. Some details will be lost on the highlights, but the overall image will look brighter.
On both clips, we'll tweak the Gamma value a little bit until we have the intermediate pixels distributed more evenly in the waveform.
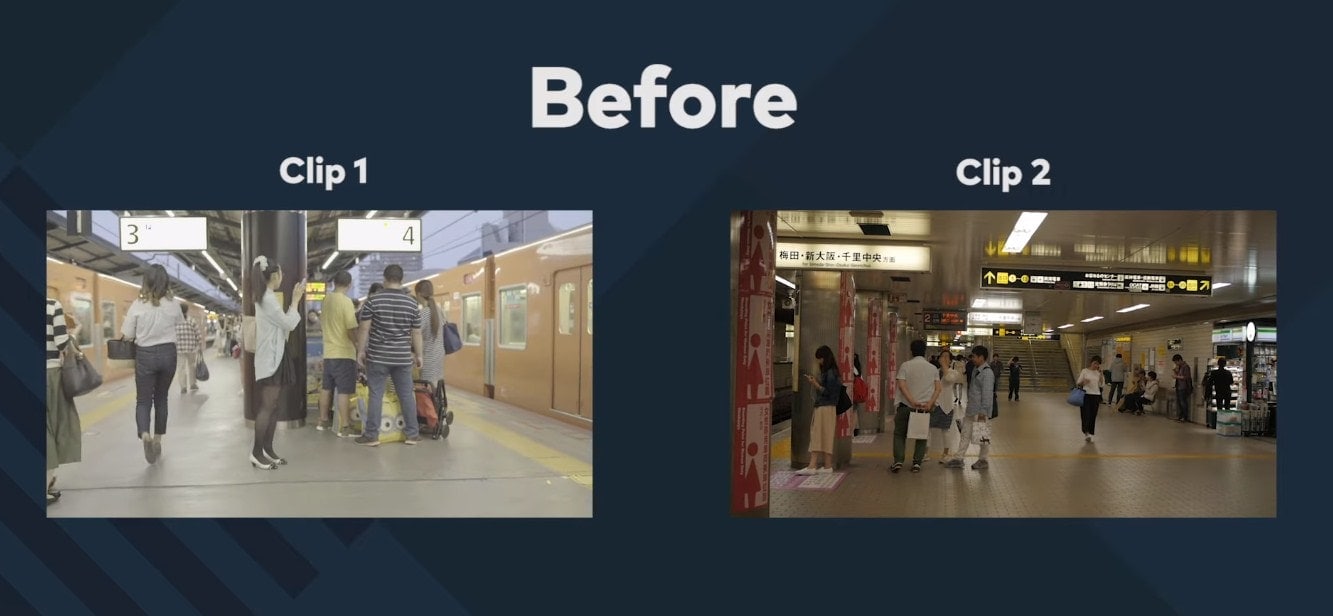
If we compare the before and after clips, we'll see that the luminance of the two clips is matching much better than in the beginning. But that’s not the same case with the colors. So, now we'll use the other Scopes to adjust our colors.
Match the Colors in Clips
The Parade works the same way as the waveform but it separates everything into the GRB channels. In most cases, to have a better white balance, the three values should be roughly similar. So, in the first clip, we can see that the highlights on the blue channels are not as close to 100% as the other channels.
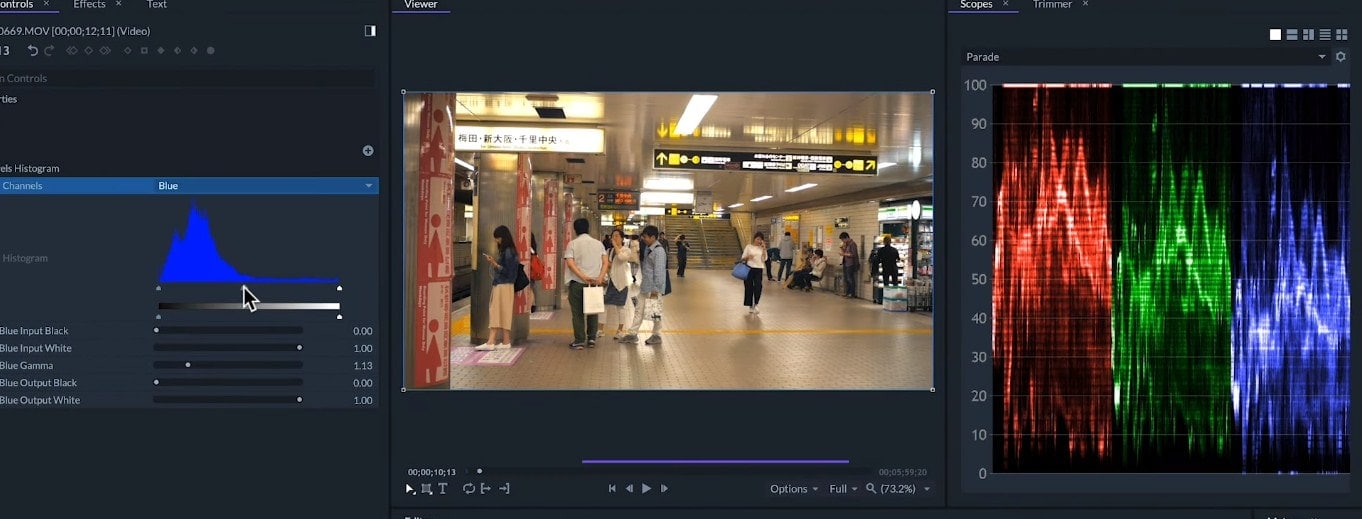
In the Levels Effect, we'll see the Blue Channel and lower the blue input, white, and some of the blue gamma. Now, the image white balance looks more neutral. We'll work the same way on the second clip adjusting the levels back and forward.
To Fix Color Saturation & Tone
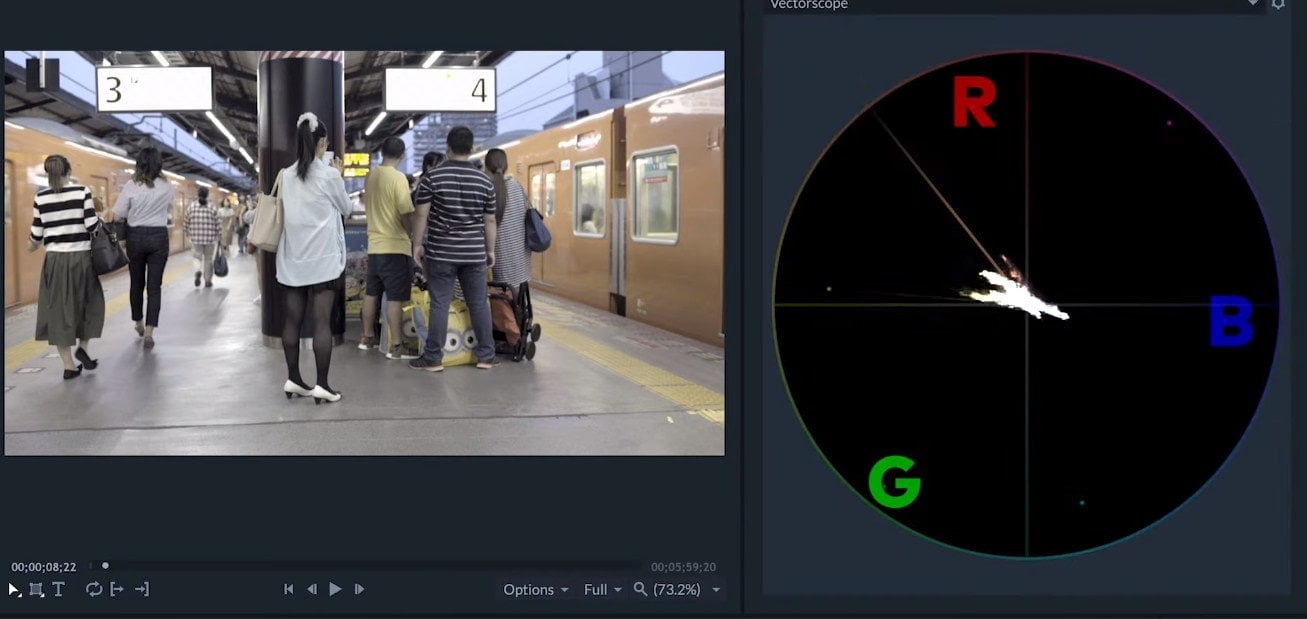
Now that the colors are neutral, we can see that some of the colors are a bit different and the first clip is less saturated. So, to correct the color Saturation and tone, we'll use the Vector Scope. It is a color wheel where we have primary and secondary colors. The further the pixels are from the center, the more intense these colors will be. If we turn on and off the effect of the level, we can see how the overall colors are much more centered now that the white balance is corrected.
But the second clip's values are much more expanded on the Vector Scope than the values of the first one. To correct this, we'll work with the HSL method. So, let's apply the hue saturation and lightness event. With this effect, we can adjust the HSL values for the overall image. And for the primary & secondary colors, let's increase the master saturation in the first clip and decrease it in the second clip.

Now, if we compare the vector scope on both clips, we can see that both have the most saturated intense colors in a pretty similar pattern and they are matching pretty well. But if we want to be even more precise with the white balance, we can use another technique.
Give Some Final Touches
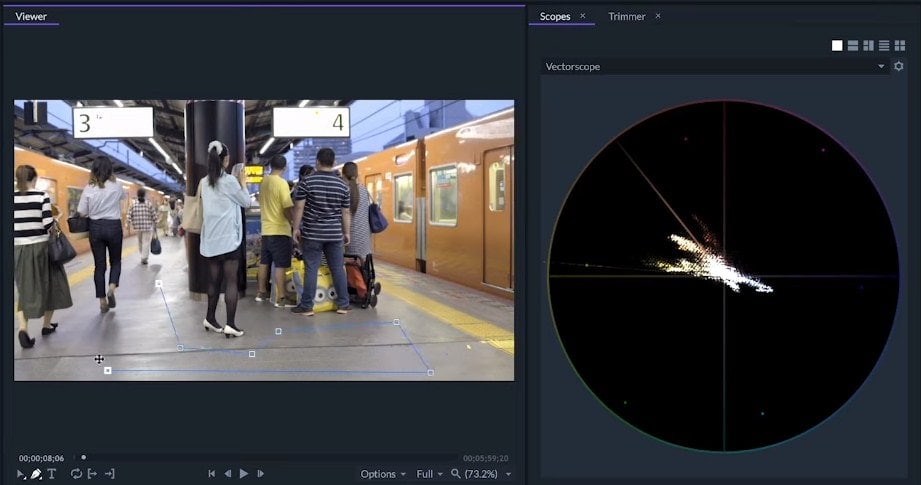
As the scopes only show data for what's visible in the viewer, we can mask out some neutral colors and make sure to center them in the vector scope. Luckily, these two clips have a lot of gray concrete on the floor. After masking the first clip, we can see that it is pretty much centered.
We can tell that there is a color cast on the second clip because the pixels in the scope are centered. So, we'll adjust the gamma on the Red & Blue channel until the pixels in the scope are centered. That way, there should be no cast and the white balance will be more accurate.

Now, we can be sure that these clips are matching with a neutral color balance, correct contrast, and luminance. There's a chance you might experience some lag while playing back your video and also looking at your scopes at the same time. If this is the case, you can avoid this by lowering the quality of the video in the Viewer Panel. Or we can click on the Gear icon on the scopes to open its Settings and then lowering the analysis down.
So, that’s how to do the color correction with FilmoraPro. To learn more about editing, make sure to check our other tutorials.