

Here in this tutorial, we'll get to know how to use Scopes. We'll learn some color theory and how to use the histogram, waveform, parade, and vector scope. Color Correction will be the final step in editing. It will strongly affect the final results of our video, but it requires some knowledge to be understood.
Why we need Scopes
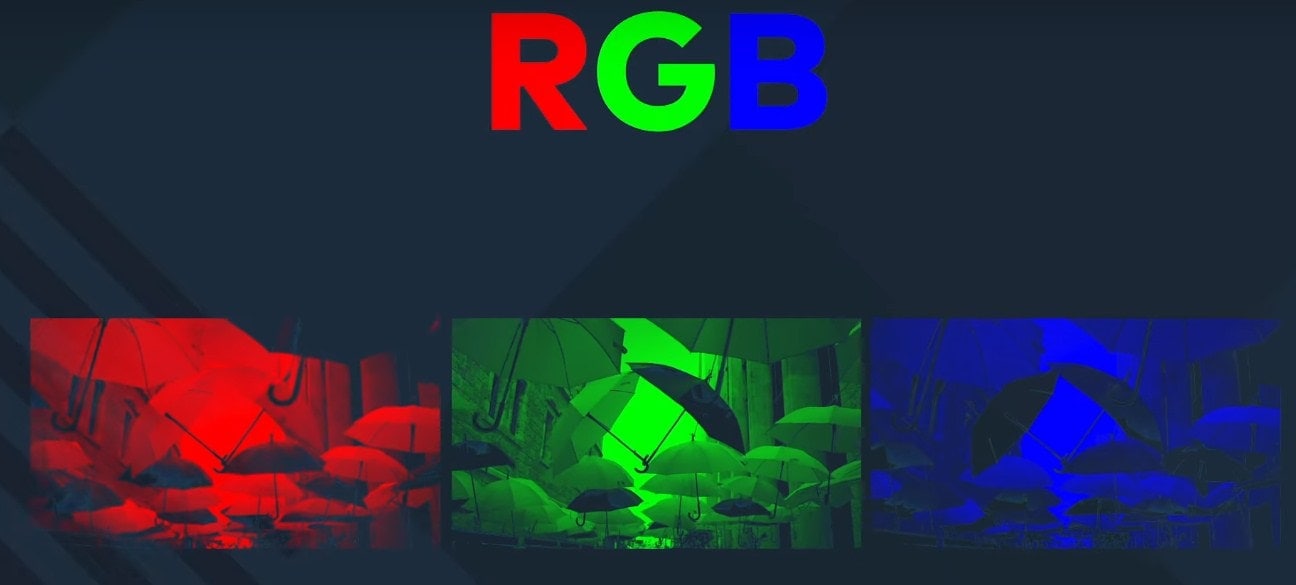
So, we are going to help you understand how to work with colors. Electronic devices such as monitors and cameras work with the RGB color system. So, digital images are composed of a Red, Green, and Blue channel.
These channels combine can create all of our colors. Red, Green, and Blue are the primary colors. The results of combining two of these are secondary colors like Cyan, magenta, yellow, etc. And combining all three of these colors will give us white.
This color wheel can help us understand how color works. For example, if we increase the value of the blue channel, the overall image will look a lot more Blue. But if we decrease it, our image will go more towards yellow which is the opposite side of the wheel. The same thing will happen if we increase or decrease another channel. If we decrease the value of all three channels, the image will look darker.
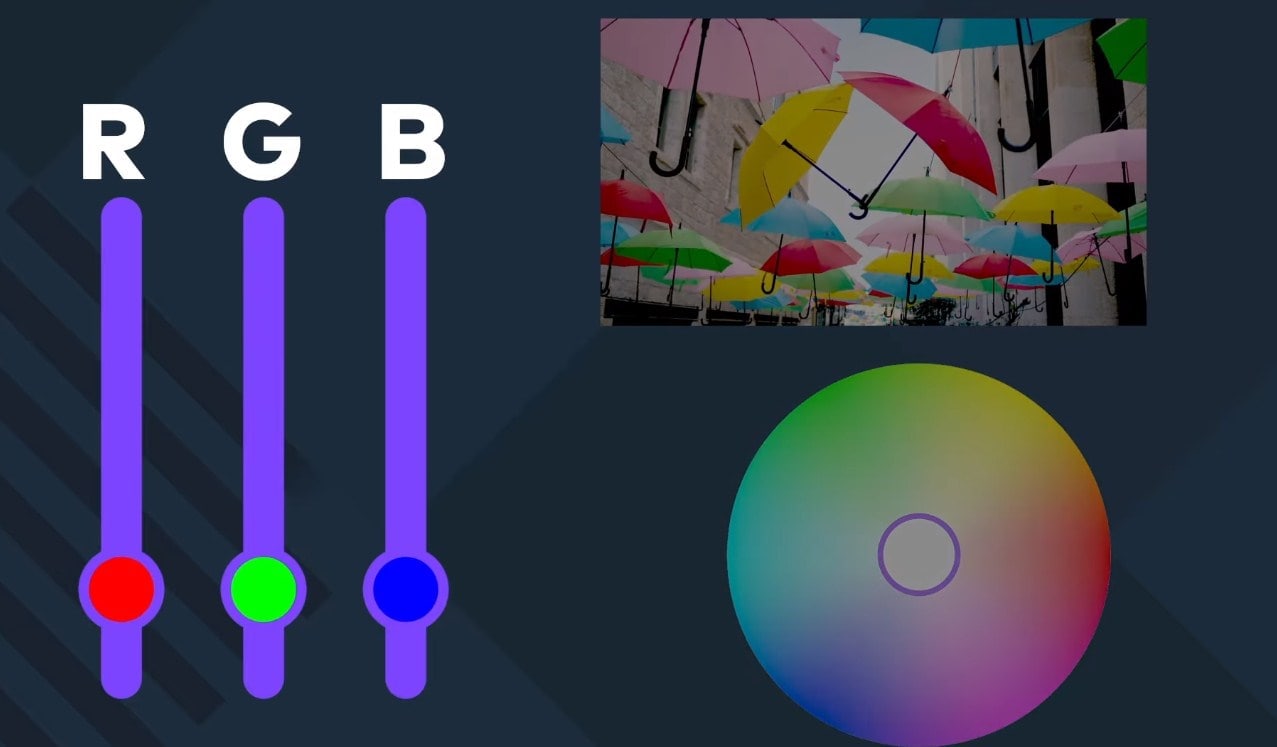
And if we increase it, the image will look brighter. Using the numerical values of RGB, we can identify a precise color or just existing colors.
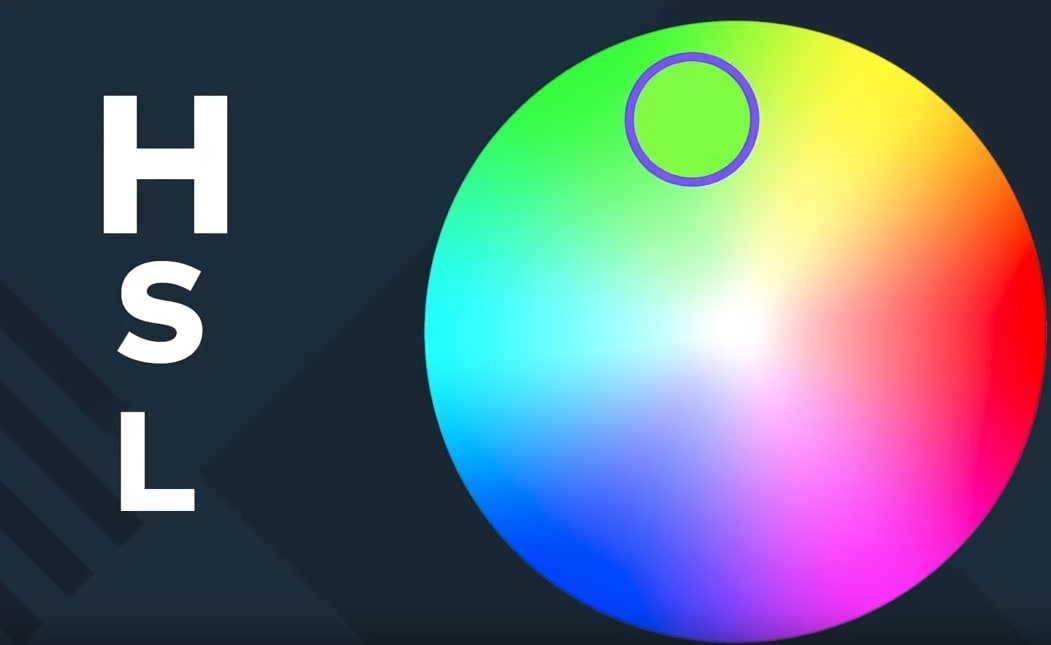
Another method is HSL, which means Hue, Saturation, and lightness. Hue is the first value of color around the center of the color wheel. This determines if it's more yellow or green or purple. Saturation is how vibrant or washed out our color looks. Its value affects the position of the colors closer to the center or the edges of the color wheel. And finally, we have lightness which is how bright or dark the color is.
By modifying these values, we'll be able to color correct the image. But for most of the correction to be accurate, we can't just eyeball it. Not to mention, most monitors are not calibrated. So, we can't fully trust the colors we see. That’s why we'll use Scopes.
What is Scopes
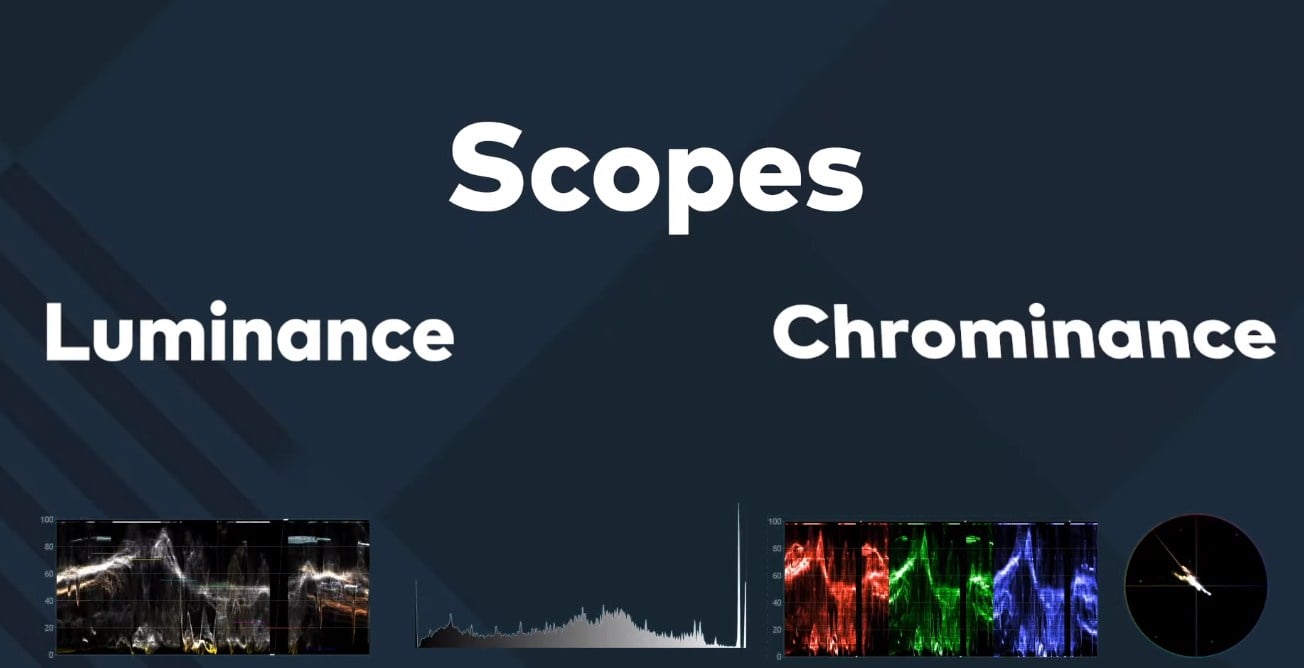
The Scopes are four different monitors that will show information about the luminance and chrominance. In other words, it shows us the brightness and color of the image displayed in the viewer. In the Scopes Panel, we can select from the top right corner of the panel how to layout the Scopes. And from the top of every scope, we can select which one we want to have shown there. Let's get to know how to use each one of them.
How to Use Scopes
Histogram
The histogram is a bars graphic which displays the amount of pixels that corresponds with every luminance value. The brightness levels are displayed on the horizontal axis from the black on the left to the brightest white on the right. The Vertical axis will show the amounted pixels on every brightness value. If our histogram value tends to the left side of the image that could mean it is underexposed. Or it can be correctly exposed but with a lot of dark information in the frame. But if a lot of pixels stick to the left edge that means we are losing lots of detailed information in the shadows.
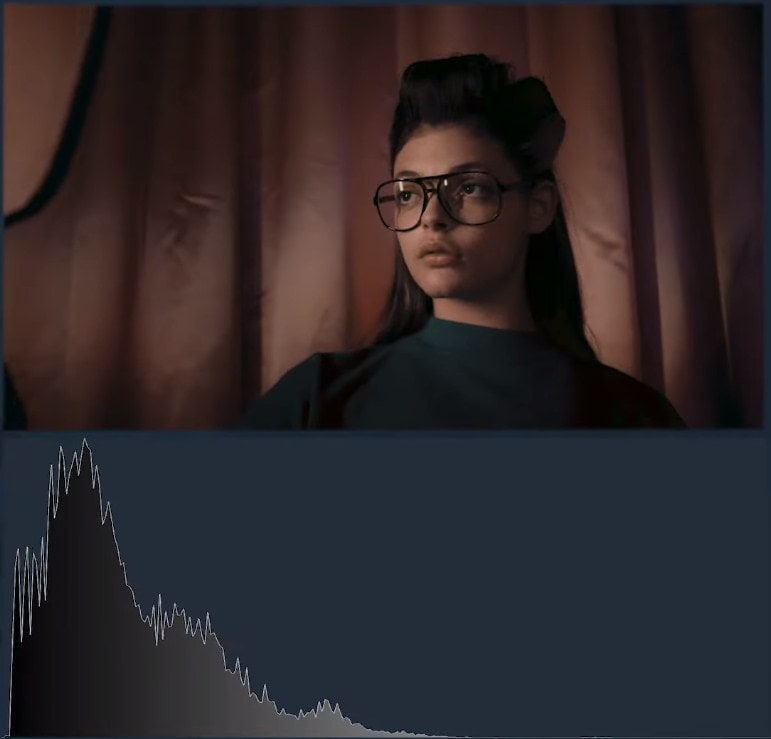
Conversely, if this happens on the right side, we have an overexposed image or with lots of light colors. And if a lot of pixels are on the right edge, we'll be losing a lot of details in our highlights.
Waveform
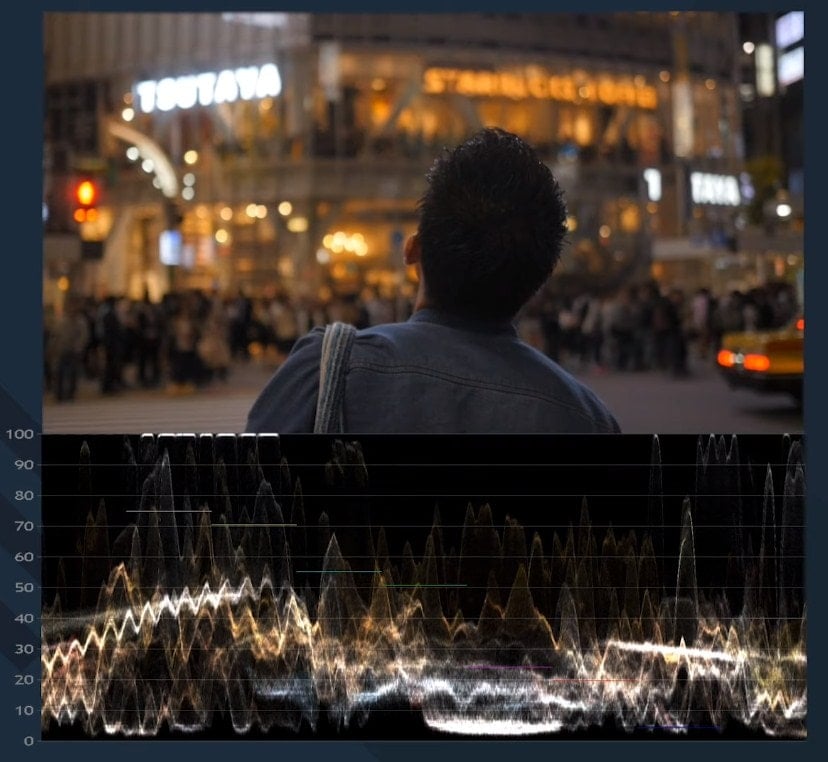
The second scope for luminance is the waveform. This scope will show the luminance values on the vertical axis from 0% which is pure black to 100% which is pure white. The horizontal axis corresponds to the horizontal position of the pixels in the frame. So, this scope will help us identify which objects in the frame are the ones that have brighter and darker values. The values on the top and bottom edges will be losing detail. So, we don’t want to have a lot of pixels on the edges.
Parade
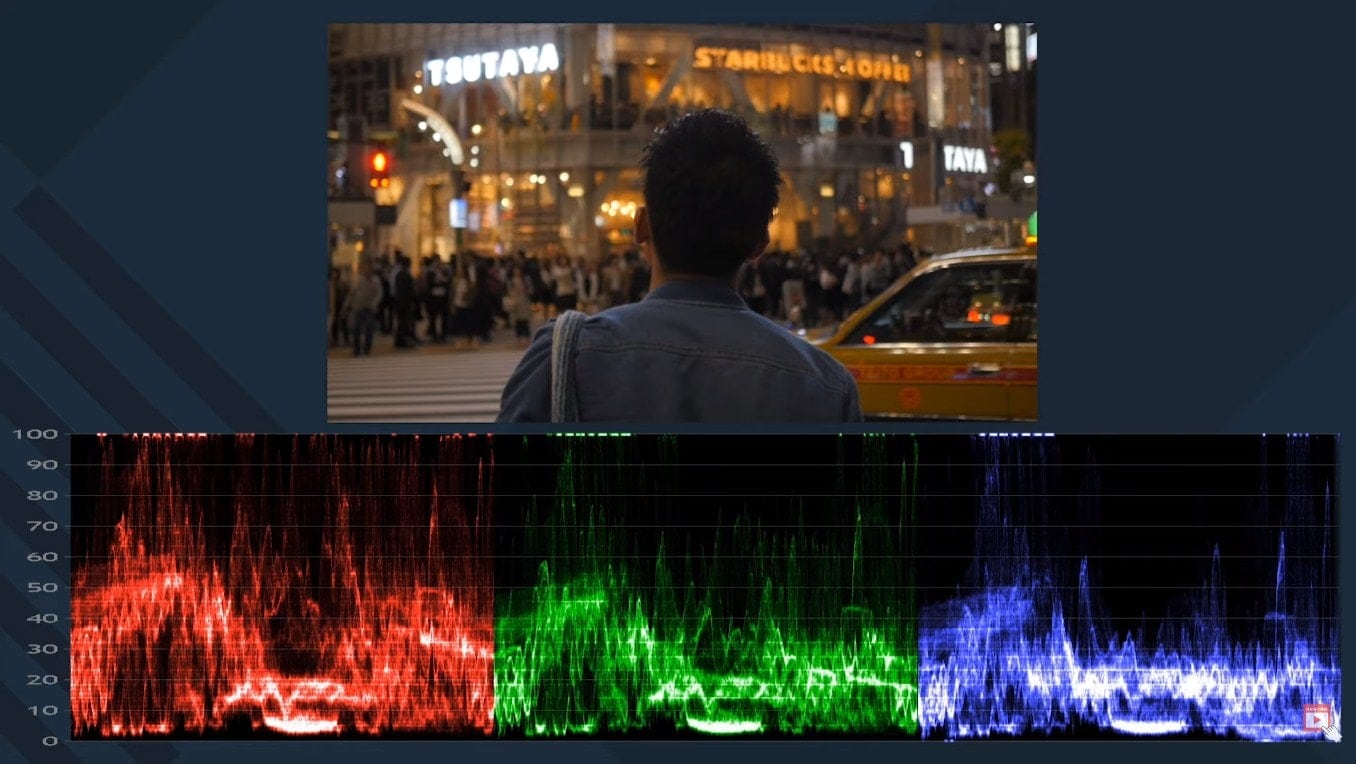
The other two scopes will help us more with Chrominance correction. The Parade is the same as the Waveform, but it is divided into RGB, one waveform for each channel. It will let us figure out which channel has more predominance in the scene. And if this is happening around the highlights shadows or mid-tones, to neutralize the white balance color, each channel should be roughly equal.
Vector
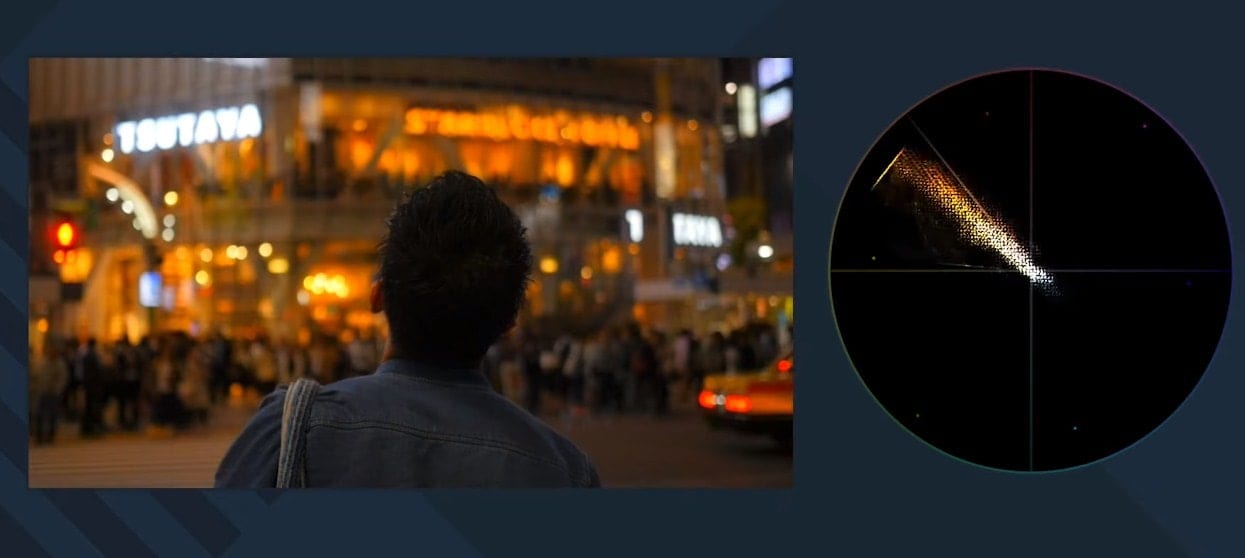
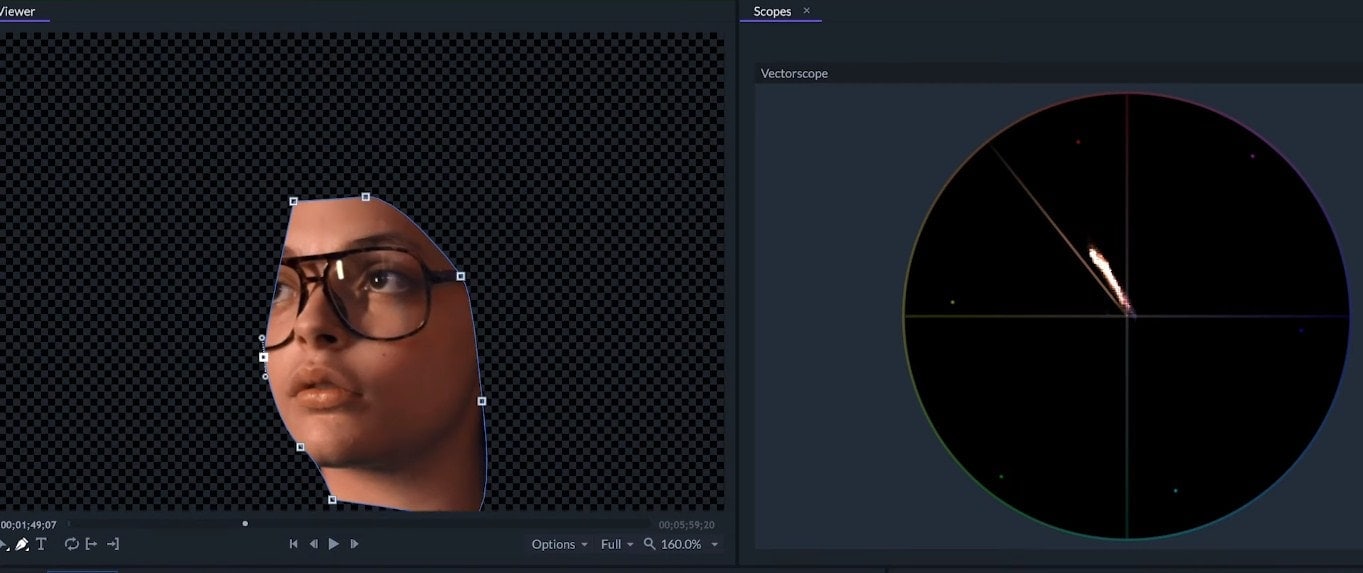
And finally, we have the Vector Scope. This scope is like a color wheel. Here we have the primary and secondary colors. The further out the pixels are from the center, the more saturated the colors are. These dot marks on each color represent 100% intensity. So, in most cases, we don’t want to take our colors that far. The diagonal line represents the skin tone color because most skin will look correct around those tones. Black, white, and neutral gray pixels will be in the center because they have no color. So, to neutralize the overall tone of the image, we should try to keep the pixels that correspond to neutral colors centered in the Vector Scope.
As the scopes are only analyzing what is visible in the viewer panel, we can use some tricks to isolate certain objects to correct them. For example, if we want to correct the skin tone for a clip, we can draw a mask around the subject and then correct the colors knowing which ones are the exact pixels that we are paying attention to. Or in the other scene, we can use a mask to identify which objects are the ones losing detail on the highlights.
So, those are the basics of Color Theory & Scopes. To learn more about editing with FilmoraPro, don’t forget to watch other videos in the series.