

In this tutorial, we are going to get familiar with the FilmoraPro interface. We will create a new project and get familiar with screens, containers, panels and works.
So, as soon as you open up the home screen, on the right side you will see the list of projects you’ve been working on. If this is your first time using FilmoraPro, you won’t see any projects here.
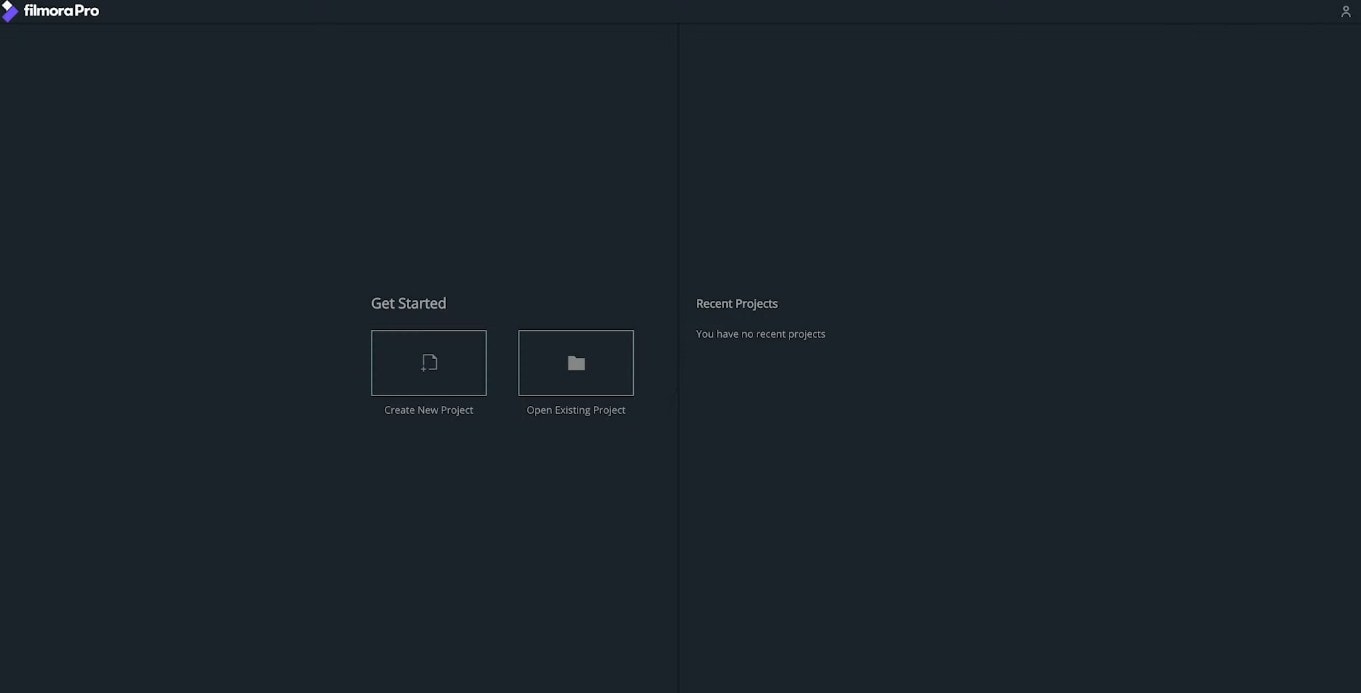
On the left side, we have two options to get started with we can create a new project or we can open an existing project that we have been working on before. And in this particular case, we are going to create a new project option.
Get to know FilmroaPro Interface
Once you click on the Create a New Project, you will be directed to the edit screen of FilmoraPro where we’ll be doing most of our work. The third and last screen is the render screen which we’ll talk about the later tutorial.
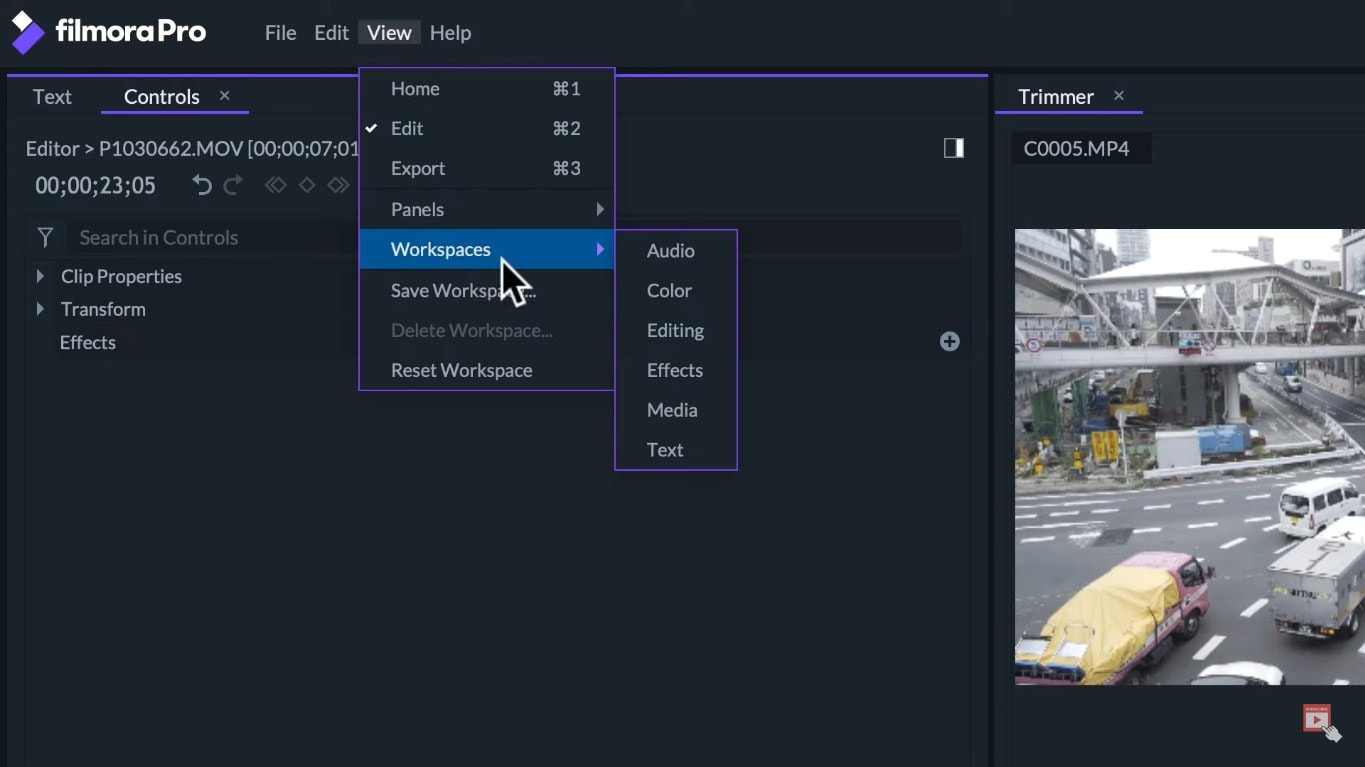
We can navigate between these three screens by going up to the menu bar and clicking on the View Option. Select the screen you want to work or you can hold Control or Command keys while pressing 1, 2, or 3 on the keyboard.
Let’s go back to the Edit Screen. As you can see, the Edit Screen is divided into rectangles. Each rectangle is a container and each container has at least one panel inside it. These panels have different uses and they can be identified by the name on the top left, i.e. Controls in FilmoraPro.
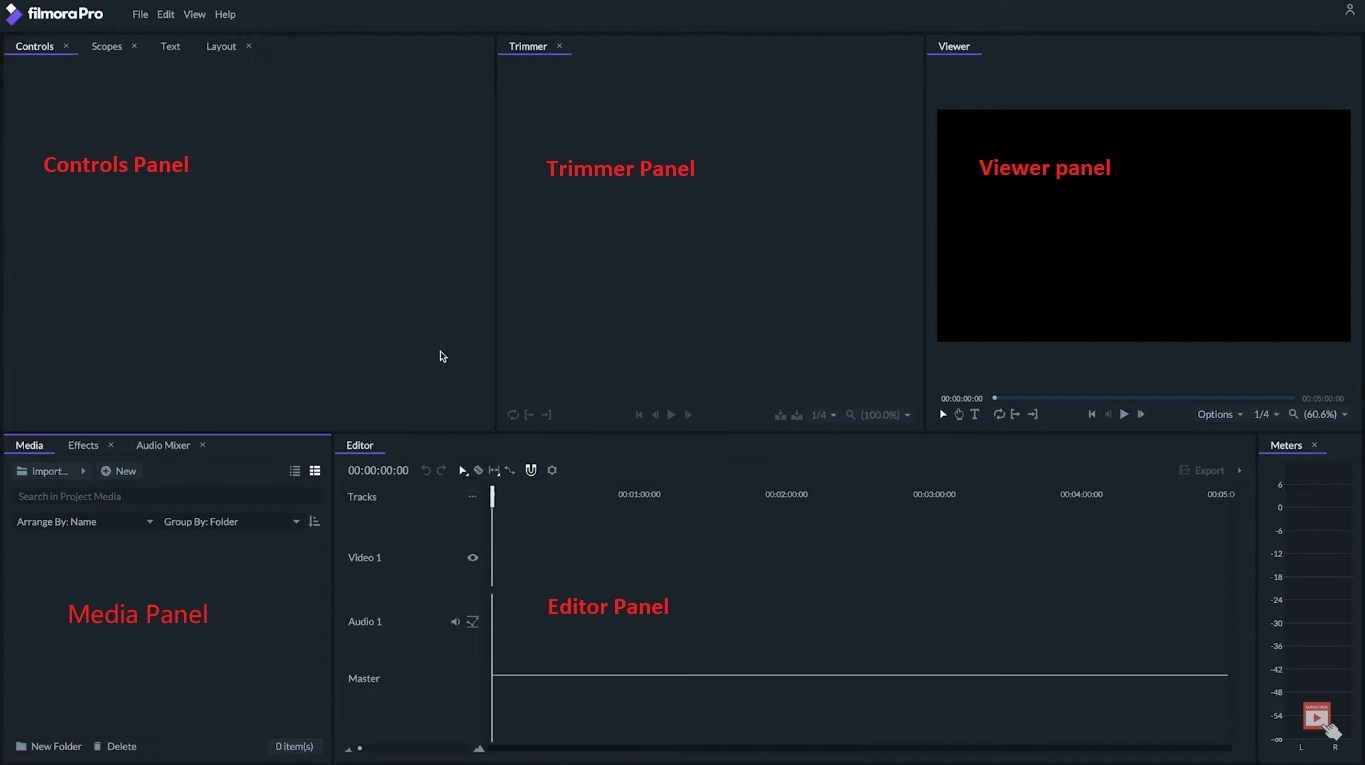
In the FilmoraPro, we have 11 different types of panels.
- The media panel where we will import and organize all of our footage.
- The trimmer panel is a monitor to preview and cut individual footage.
- The editor panel is the timeline where all the editing happens.
- The viewer panel is the monitor to see the results of our edit.
- The controls panel is where we’ll modify the properties, transformation, and the effects of our clips.
Learn Controls of the Panel
When a container is selected, it will show a purple line at the top. When a container has more than one panel in it, we can click on the panel’s name to select it. And we can only see the information of the selected panel in each container and some hotkeys are dependent on that selected container.
If we click and drag from the edges of these rectangles, then we will resize each container and the contents inside every container will auto-adapt to the new size. If we click and drag from of the top of the container then we can relocate it next to another container.
We can do the same with panels by clicking and dragging from the title name on the top. We can even drop the panel inside another container. You can also float the panels or containers by right-clicking on the space on the top of the container and clicking on the Float containers.
Or you can click on the title name to float the panel. This will release the container or panel free to be located anywhere, even on the second monitor if you have one connected.

If we click on the X mark next to the title name, we can close the panel. To bring back the panel that we’ve closed, we can go to the menu bar on the top, click on the Viewer panel, and then select the panels we have closed to bring them back.
Else you can unselect the ones that you want to close. We can choose from different workspaces or customize our workspace in the FilmoraPro.
Get the Workspace You Like
As we click on the Toolbar and go to the viewer workspace, here we can choose one of the FilmoraPro’s premade workspaces. These workspaces are optimized for specific tasks like Audio color editing, and much more.
We can also create a custom workspace by arranging every panel and container in the way that you want. Then go to the menu bar and select the Save Workspace option. Choose the name for your new personalized workspace.
Finally, press the OK button and the latest workspace will be available in the workspace menu.
So, that’s all for the introduction of FilmoraPro interface. To learn more about editing in FilmoraPro, check out our other articles in the series.