

In the previous guide, we’ve introduced you with FilmoraPro options and preferences. Now, you will get to know more about FilmoraPro preferences. In other words, we’ll be continuing to look at how you can personalize your experience and optimize overall workflow.
Render
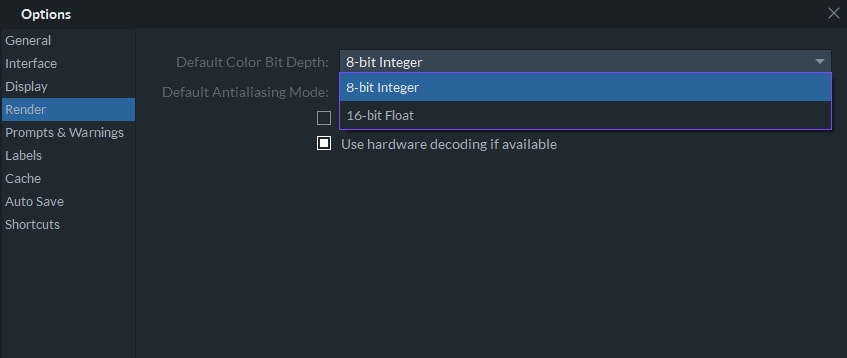
In order to access the Options window, hit Ctrl + comma or Command, and go to the render tab.
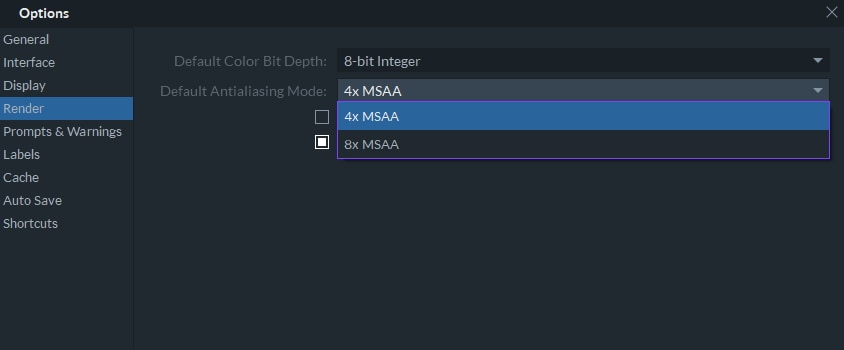
The render tab is advanced settings for color bit depth and anti-aliasing. These same settings can also be selected in the project settings.
Color Bit Depth: It refers to the possible number of color levels in an image. A higher bit depth will give us smother color changes and less stepping artifacts in gradients and chroma key composites in your final export.
Anti-aliasing: An anti-aliasing is the algorithm to reduce jagged looking edges. When creating texture titles you may see smoothing looking letters with higher anti-aliasing settings. This setting only affects your previews. Your export will always render text smoothly. Here, we can also lock the color depth to 8-bit ignoring if we change it on the render settings.
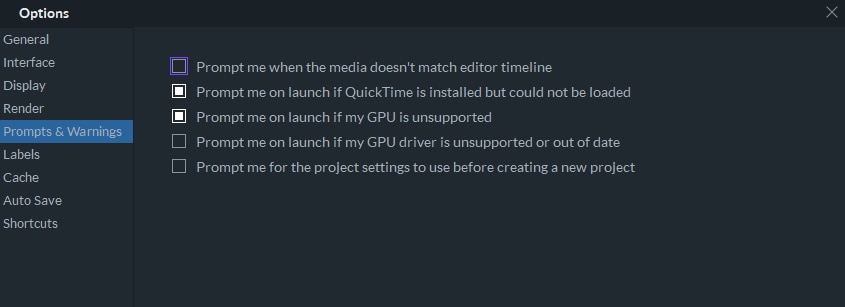
Prompts & Warning Tab
On the Prompts & Warning tab, we can choose to activate or deactivate each one of the warning pop-ups in the FilmoraPro.
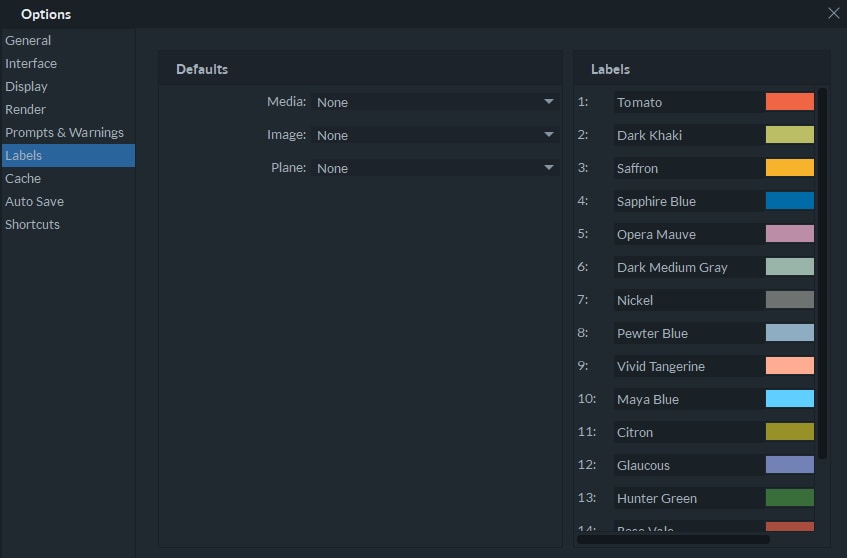
Labels Tab
Next, we have the Labels. On the Edit screen, we can change the color of the individual clip to the quickly identified, but on the Labels tab, we can choose to automatically label clips depending on its type. For instance, I’ll choose the tomato for media, sapphire blue for image and saffron for playing.
In the same tab, we can modify the color labels and their names. As an example, I will swap out this tomato red for FilmoraPro’s brand purple.
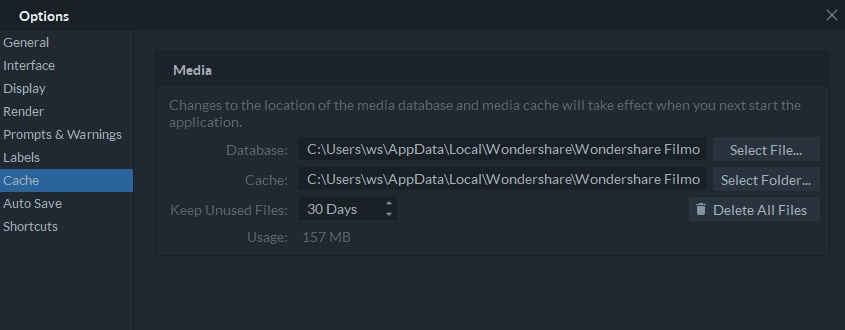
Cache Tab
Moving on we have the Cache tab. The Cache is where FilmoraPro stores data to reduce the amount of time necessary to provide this data in the future. It improves the software performance because it enables it to respond faster to our requests.
Here, we can choose where to save our cache and database as well as how many days FilmoraPro will keep the unused cache files before auto-erasing it.
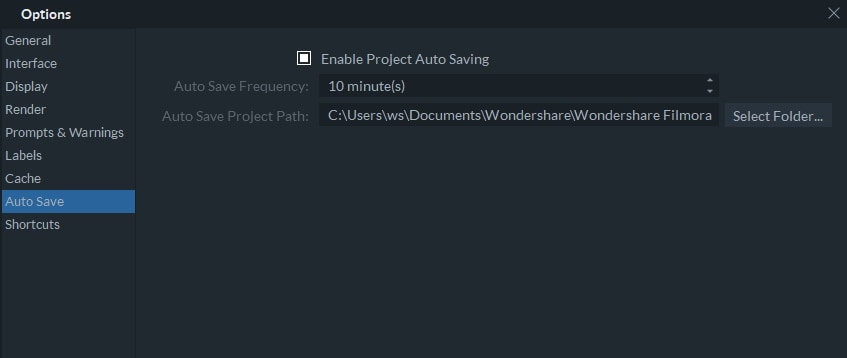
Auto-save Tab
Now, it comes to the Auto-save tab. By default, FilmoraPro will automatically save our progress on the project. This feature is super helpful to recover our project if our computer crashes and we’ve forgotten to save it manually. In this tab, we can deactivate this feature, but I highly recommended that you leave it on.
Here, we can also change how often it will save and if it saves more often the recovery can be more accurate. We can also change where FilmoraPro will auto-save the projects.
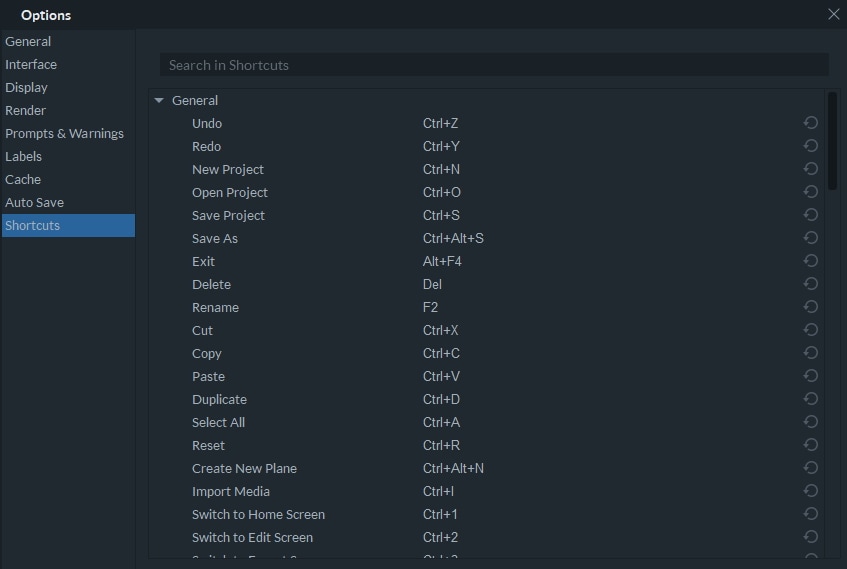
Shortcuts Tab
On the Shortcuts tab, we can see a complete list of hotkeys for FilmoraPro. Getting familiar with these can speed up your workflow a lot. We can search them here and even, modify most of them to adapt them to our preferences.
So, that’s an in-depth look at how you can modify or your preferences in FilmoraPro.