Basic Edit - Filmora
-
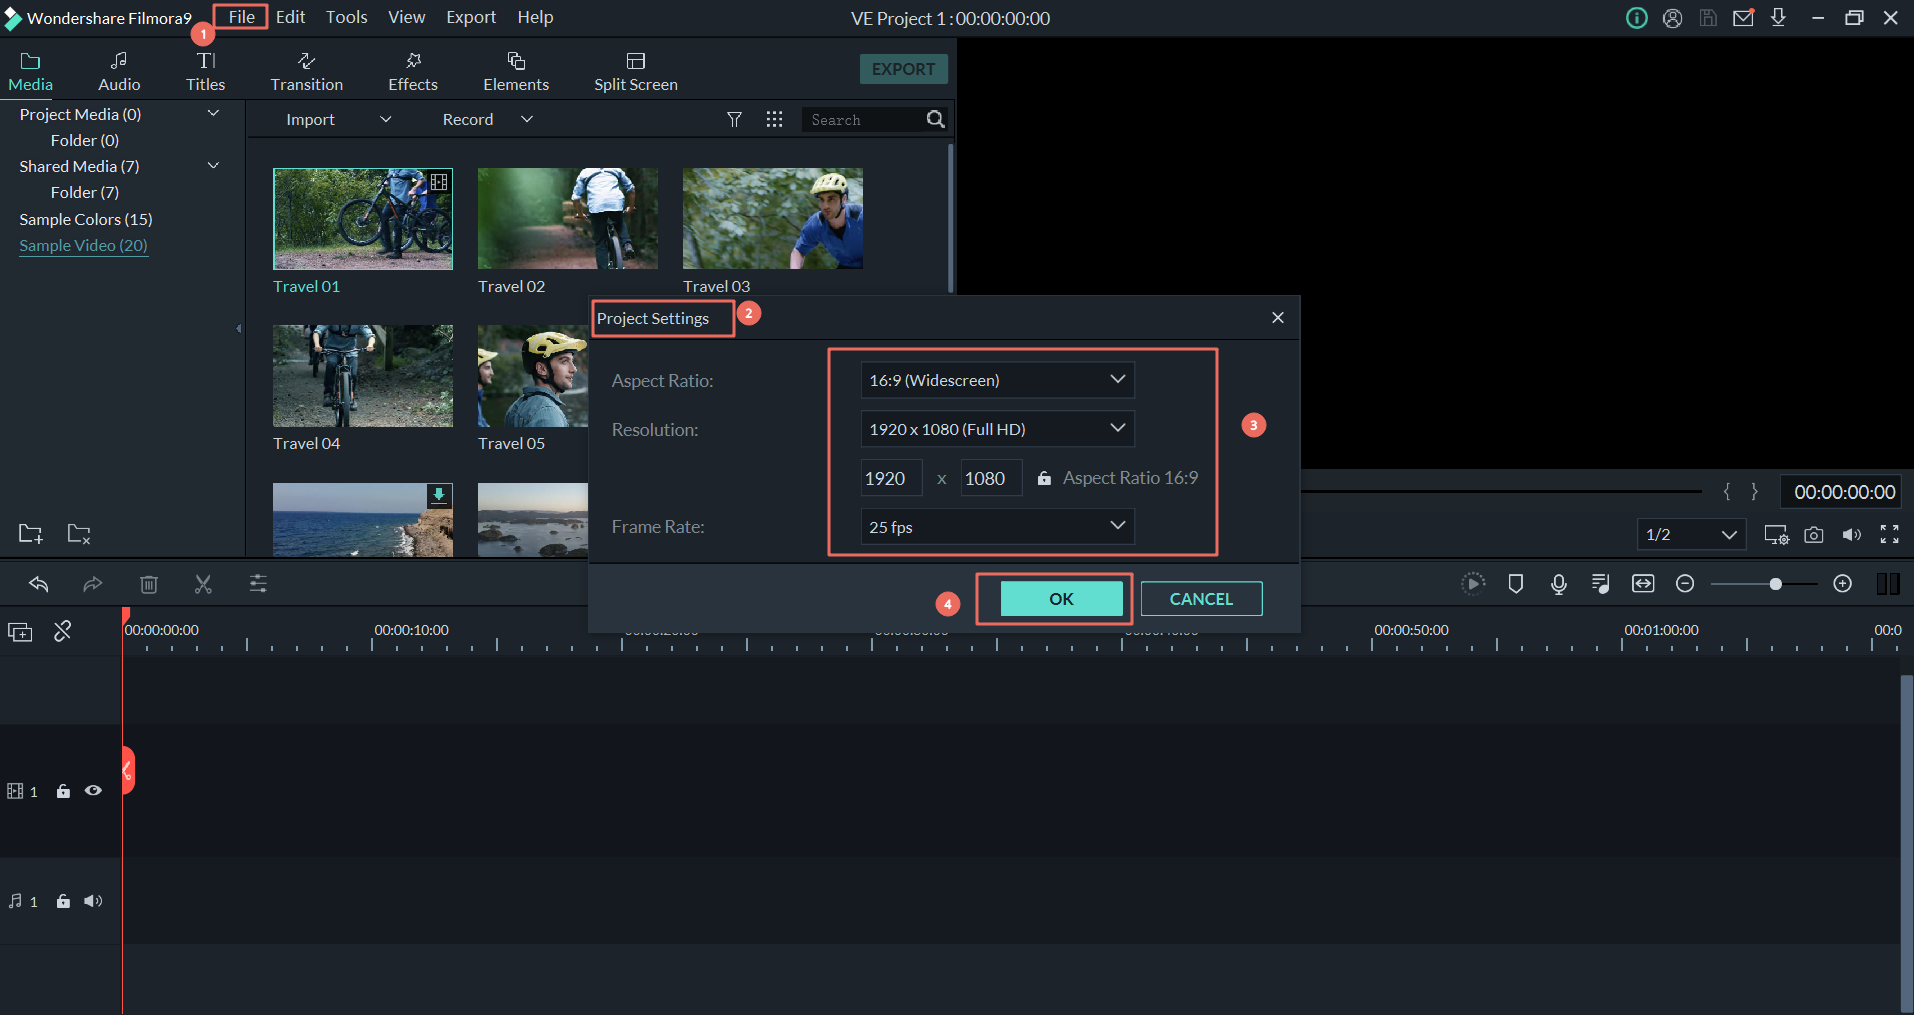
How can I adjust aspect ratio during editing with the Filmora9?
The default aspect ratio of Filmora9 is 16:9. But Filmora9 supports you to customize the resolution, aspect ratio, and frame rate of the project by going to File > Project Settings.
-
What can I do to get a snapshot with high quality?
To get the snapshot with high quality, it is suggested to take the snapshot during the preview in the media library.
Here are the steps to figure it out.
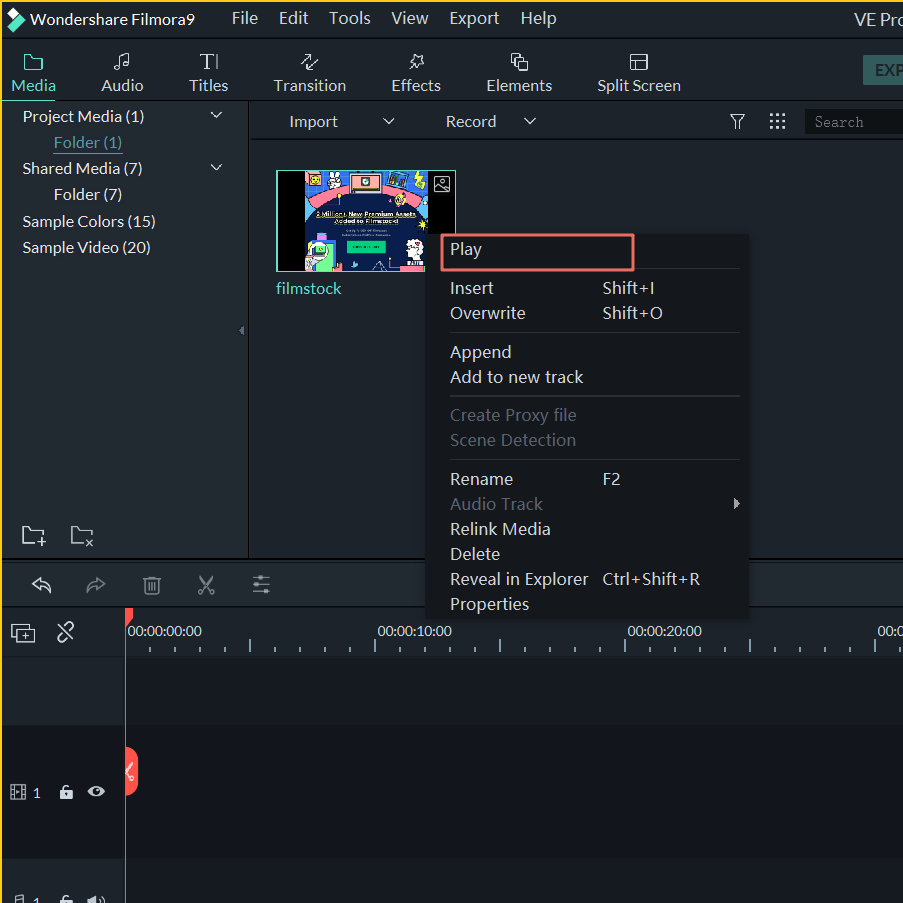
Step 1 Import the original file to the media library.
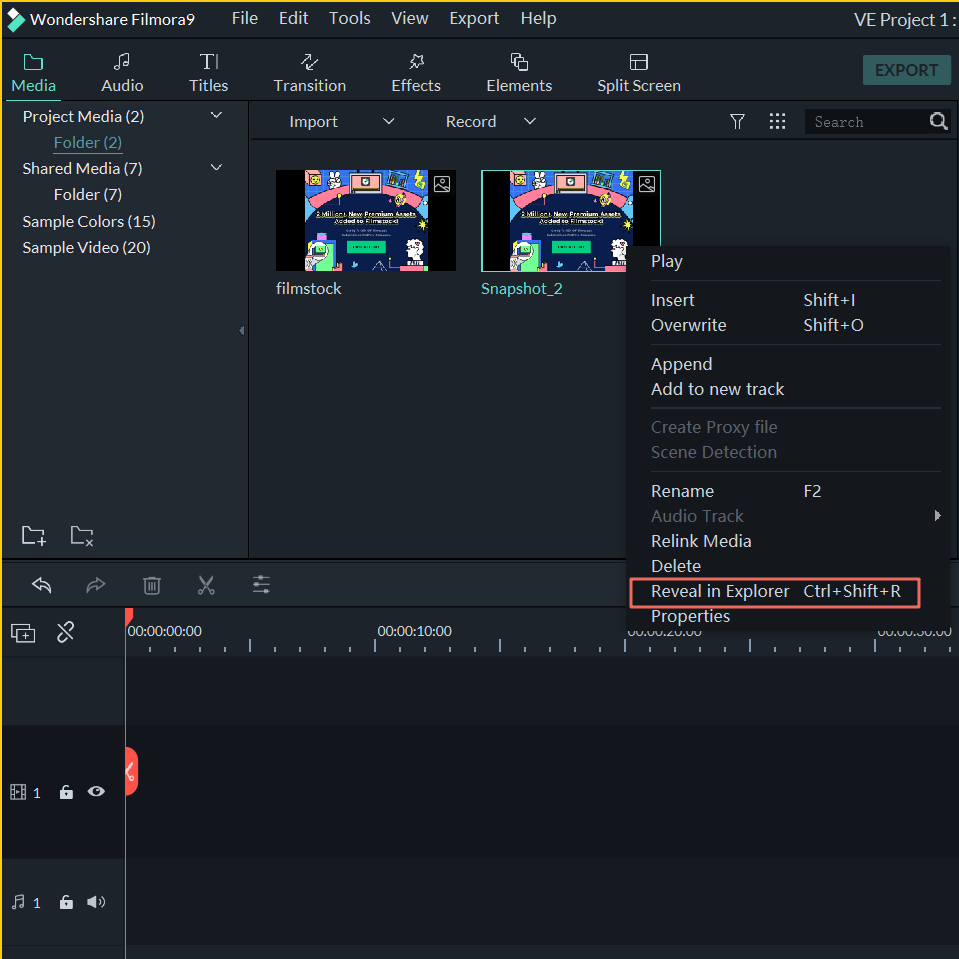
Step 2 Right-click on video in the media library then hit “play” to preview the window, as below.
Step 3 During the preview, you can take the snapshot as you want, see below.
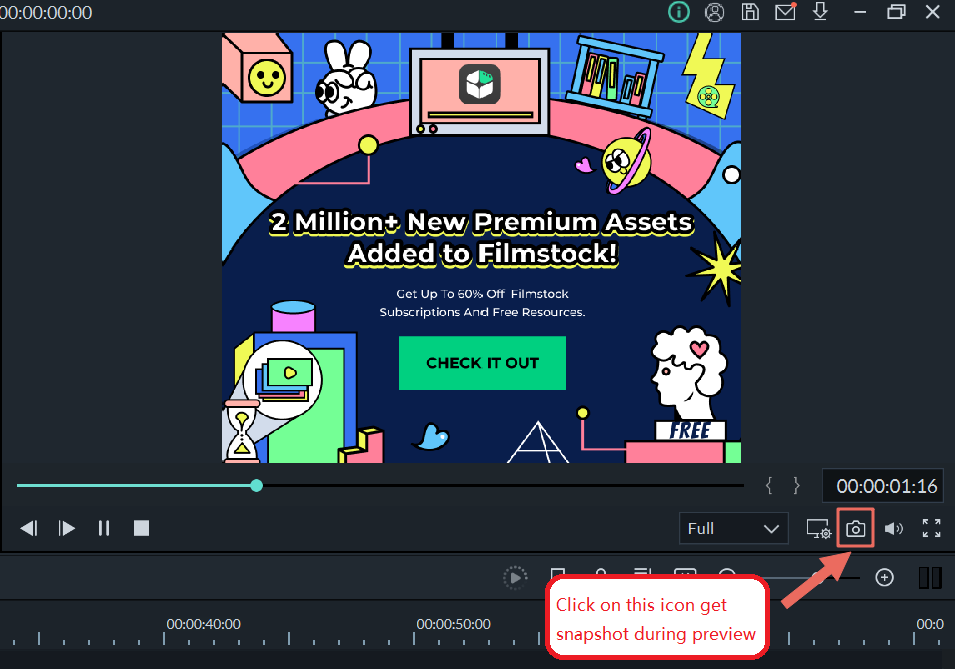
After that, the snapshot will be shown automatically in the media library.
You also can right-click on the snapshot then hit “Reveal in Explorer” to find the path where it is saved automatically on your pc, see below.
-
Why my video quality is so poor once added to timeline?
Filmora9 supports users to customize playback quality for a smoother editing experience. With different playback quality levels, Filmora9 can create render files for the original videos respectively. The render files are smaller in terms of data, this may result in loss of video quality.
So if your video quality is not good as the original file, you may need to check your Playback Quality setting.
1. Click the Preview Quality Settings icon, see below.
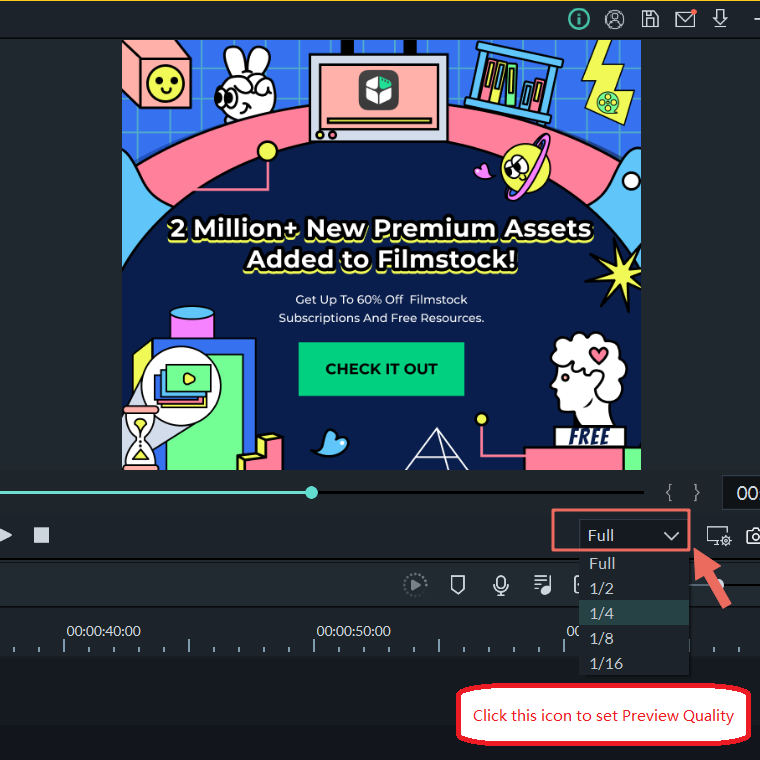
2. Set the quality as Full.
3. Play your video again, check if the video quality is better now.
-
Why the video is lagging in the timeline?
Regardless of what editing you made, such as split a video, to show you the prompt result in the preview window, our program has to render it first. It depends on not only the size, length of the source video, but also be affected by the performance of your computer. If your processing power is limited, playback lagging can make the editing process frustrating.
Here are two ways to reduce playback lag when editing your timeline.
1. Lower Playback Quality
You can lower the playback quality of the Preview window to get a smoother editing experience. Reducing your playback quality can greatly eliminate lags. Please click the drop-down icon in the lower-right corner of the preview window, then choose the lower setting, see below,
Note: the reduced playback resolution only applies to the video preview and will not affect the export settings.
2. Render Timeline
Preview rendering reduces the preview lag which can occur when editing complex or high-resolution projects. You can click the Render Button to render your timeline when you see a red line appears above the timeline.
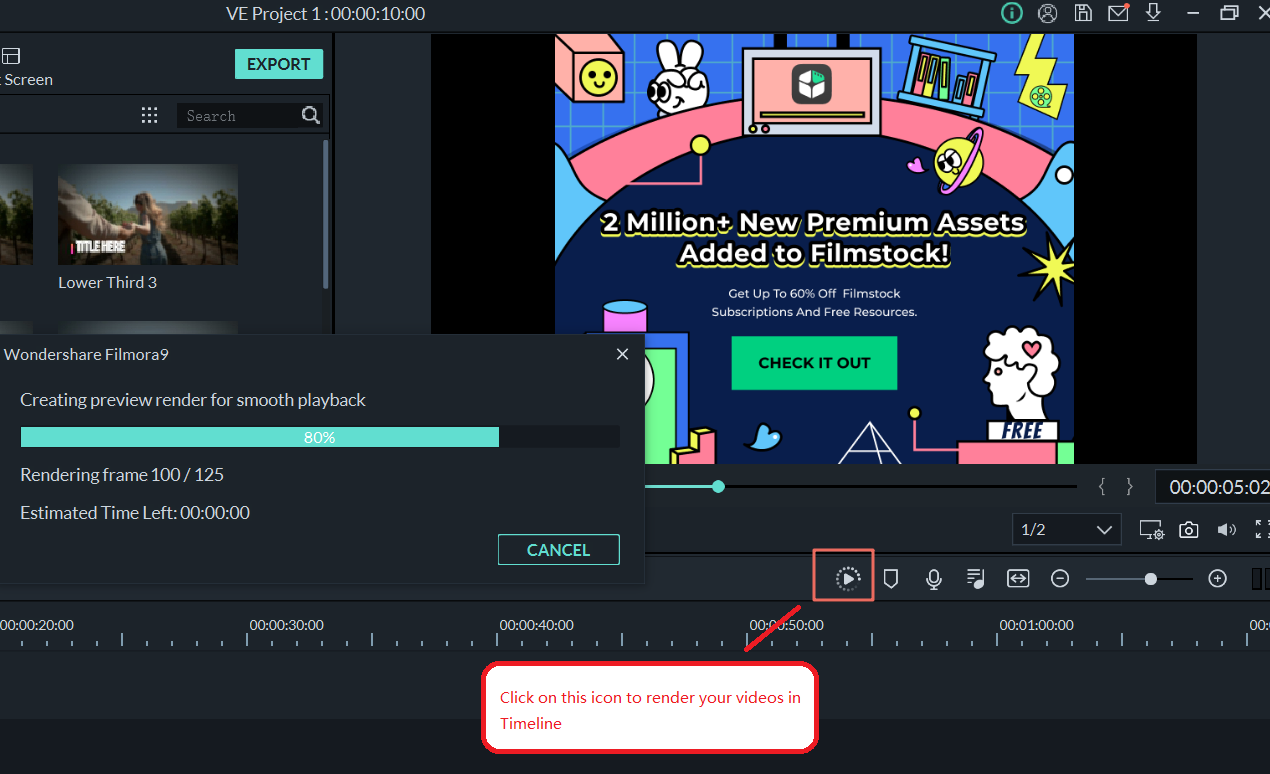
Note: Once the rendering is complete, the red line will turn green. You will need to wait until the rendering process is finished to continue editing.
-
What can I do if the text/element I applied is not showing up?
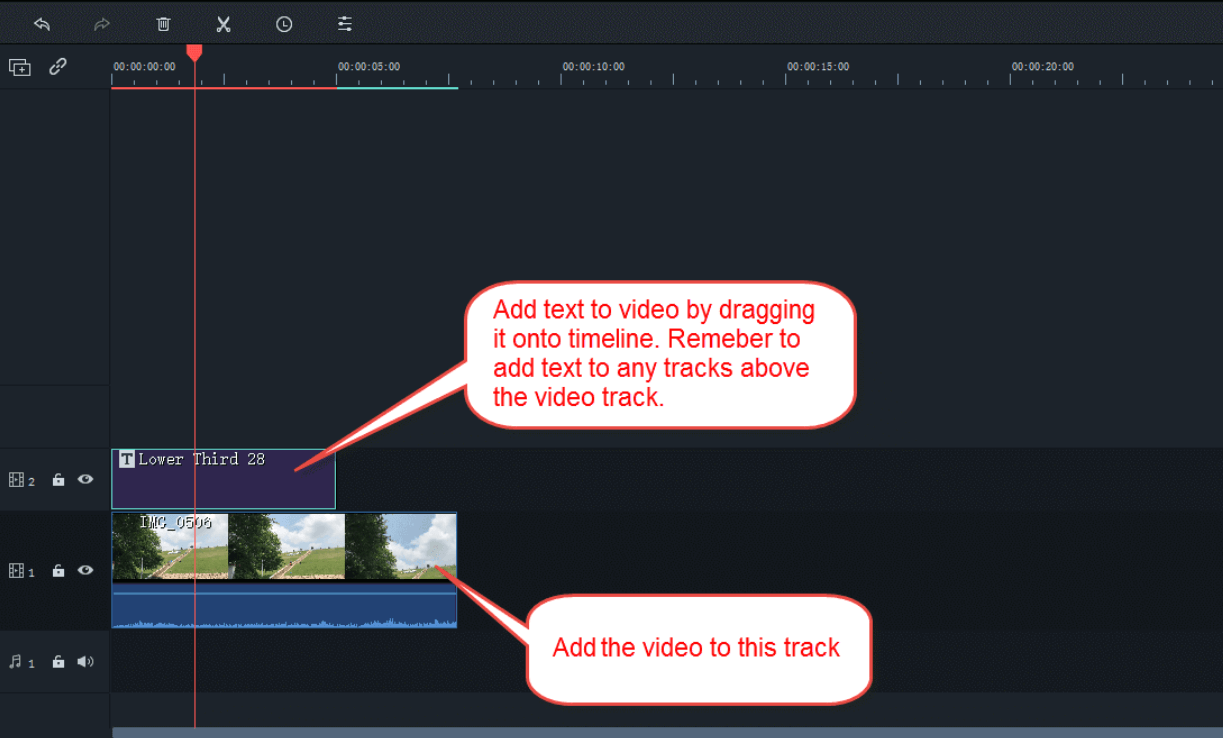
The Filmora9 update has a lot of changes. There is no track specializing in applying text in Filmora9. So basically you can add text to any tracks in timeline except the audio track at the bottom of the program. But, when you add text to timeline, remember to add your text to tracks above the video track. Otherwise, the text you added will be covered by the video, see below.
-
Why it is not working when I slow down a video
Usually, you can right-click one image/video in the timeline, select Speed and Duration, and then you will be able to slow down a video.
But please kindly note that, if you disable the Ripple Edit and there is also another image/video next to the previous image/video, the duration won't change. You can right-click the video, choose Speed and Duration, enable Ripple Edit, then you can slow down the video as you want.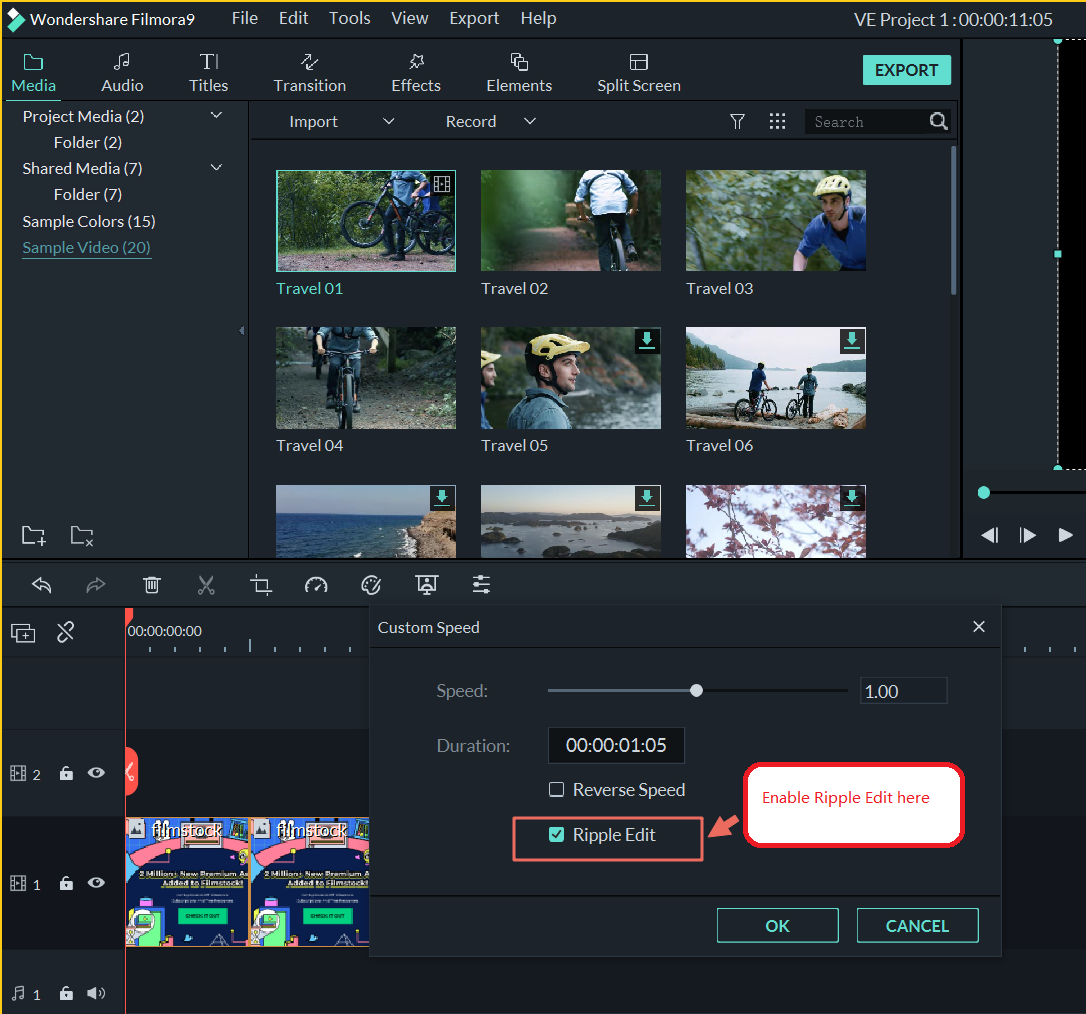
-
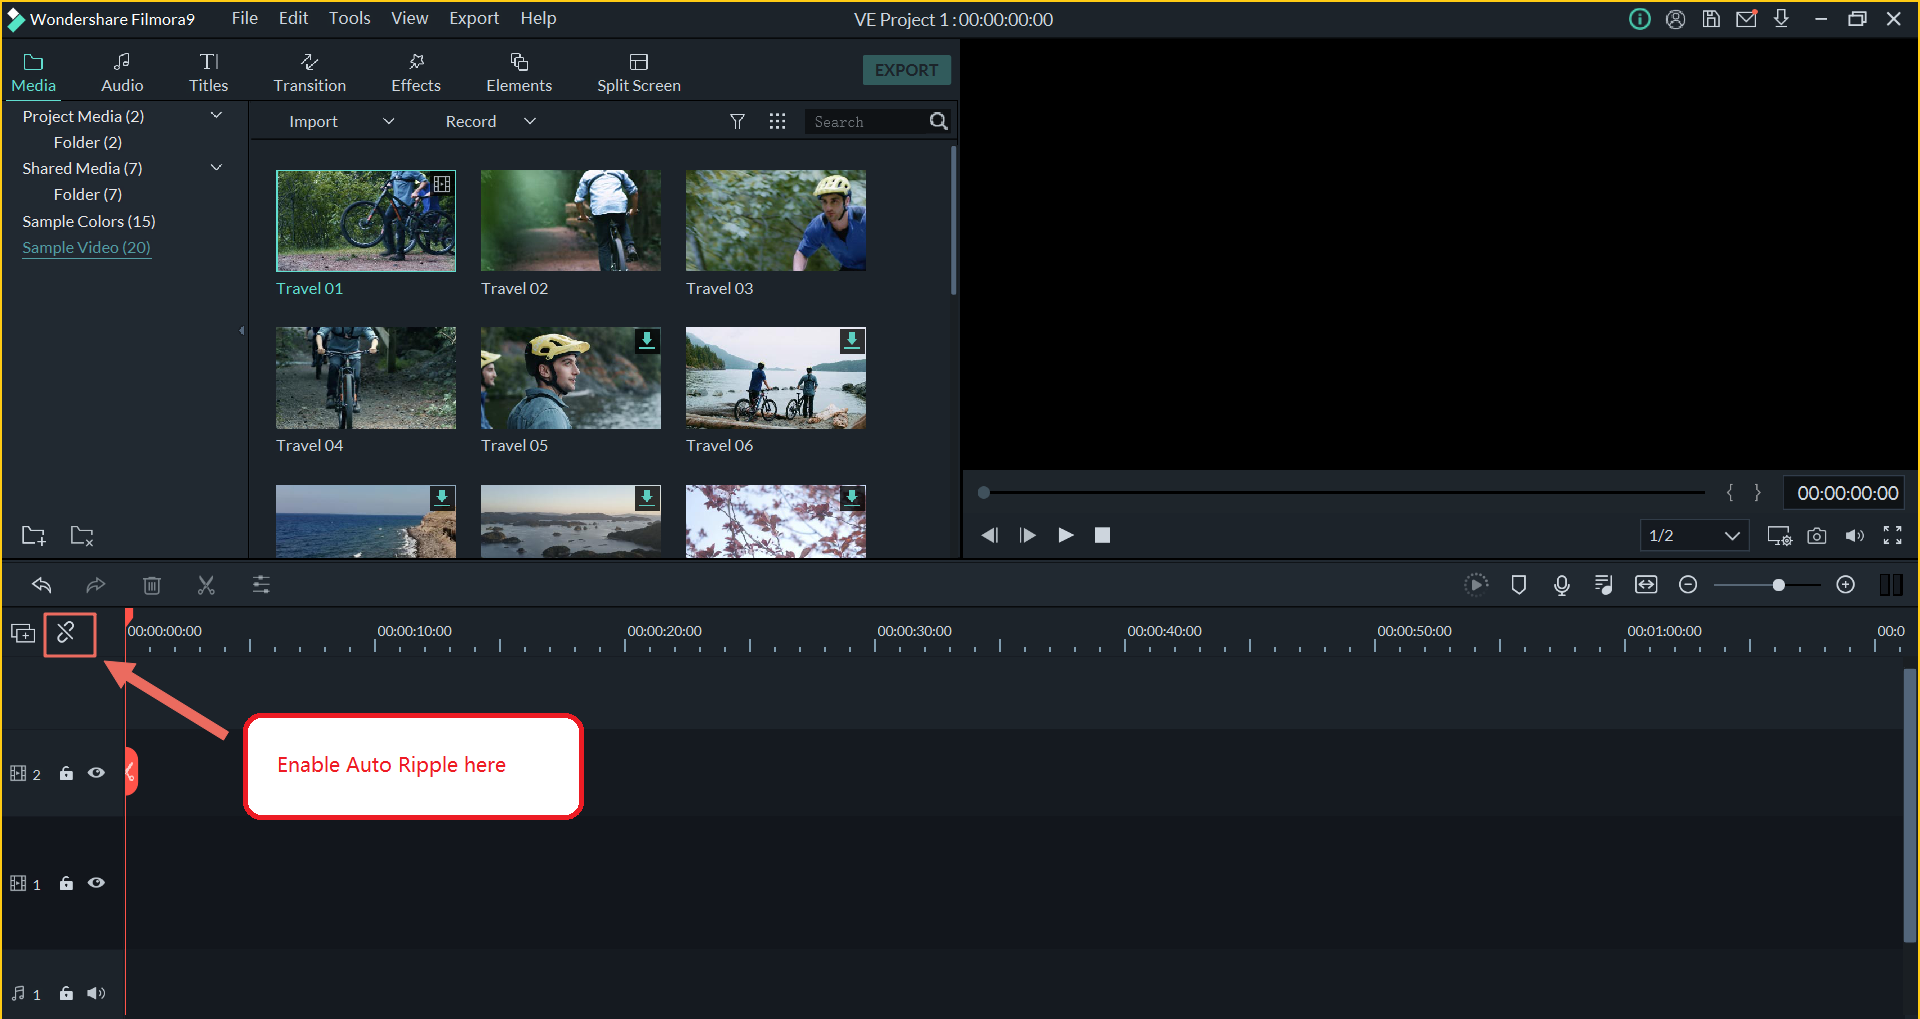
Why there is blank space left in the timeline after I cut/delete the video?
Basically, if you delete something from the middle of the track, all of the items which are placed on the right side are going to automatically move to the left in order to fill in the gap.
However, if you disabled the Auto Ripple Edit, then Filmora9 works the other way around. So if there is blank space left in the timeline after you cut/delete the video, you can toggle it on by clicking on its icon that is located next to the Manage Tracks icon in the upper left corner of the timeline, see below.