-
-
-
-
- Still have questions? Submit a ticket to our support team. Contact Us Or Call Us
-
-
-


How can I add a watermark/logo(PIP) to my video?
Sometimes you may need to add your own logo or watermark to your video. This also refers to overlay some smaller videos on a background clip, which enables you to simultaneously display two or more videos or images to on the screen.
You can follow the steps below to make it:
1. Open Filmora9, select Create New Project to start a project
2. Import both your background video as well as your logo image to the media library
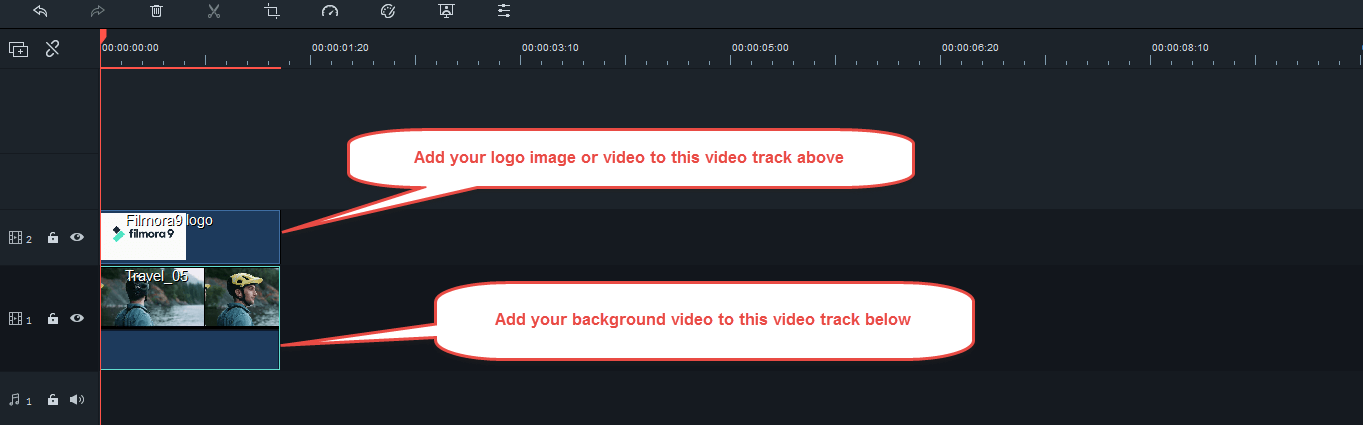
3. Drop and drag your background video to the video track
4. Then add your logo image or video to the track above the one that places your background video
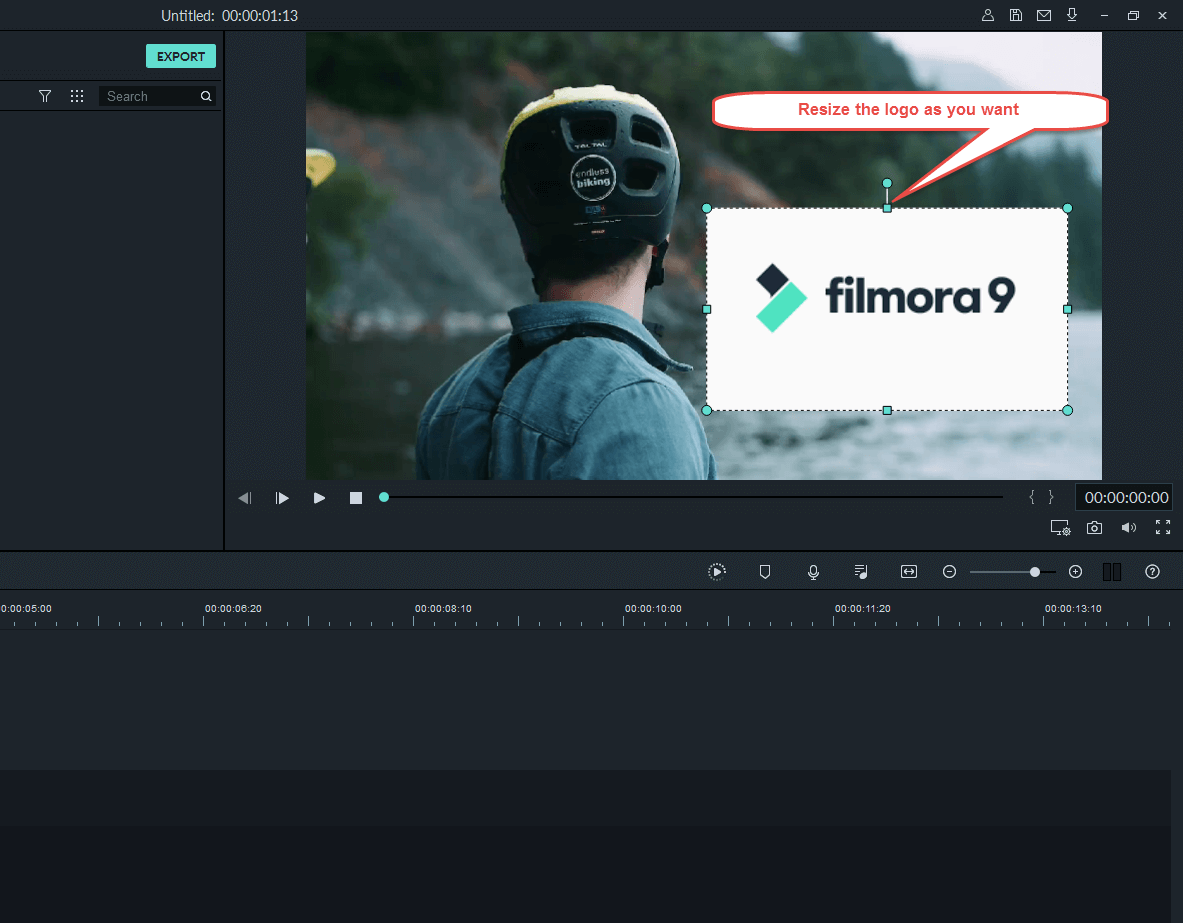
5. Resize and Reposition your logo: Click your logo on the video track, and you will be able to resize the clip by dragging the resizing handles on the clip in the preview window, or you can also drag it to any other place on the screen as you want.
How can I get a plain text in Filmora9?
Filmora9 is full of creative animated title, but what if all you want is a simple static text. No sweat, you can remove the animation and customize your titles easily. From changing the typeface to adjusting the color, you can do it all with a few short steps.
You can refer to the steps in the Youtube tutorial below to make basic text that you can use for any of your videos:
Click here to get the youtube tutorial.
How to create thumbnail for my video?
How to create thumbnail for my video?
Having a great thumbnail is just as important as having a great video, as it's the first thing your subscribers will see about your videos. So before learning how to create a thumbnail, make sure your youtube account is verified. If it isn't, you will not be able to create custom thumbnails.
Here are 3 tips on How to Make a YouTube Thumbnail:
1) Resolution: HD Video Sizing You can technically upload a thumbnail with any resolution. However, you could have issues with its appearance on YouTube. In order to prevent cropping or stretching you should make sure your thumbnail is size is 1920 x 1080 or a 16:9 ratio.
2) Consider Different Sized Devices A lot of people aren’t aware of this, but you should consider all the devices youtubers watch content. These devices range from desktop, laptop, tablet, or cell phone. Which all have drastically different screen sizes. So you need to make your thumbnail look great when viewed on all devices. Since most YouTubers are watching videos on their phone, make sure it looks great when its small, so that may mean making the text a little bit bigger or not overcrowding it with too many elements. A good way to test if your thumbnail looks good smaller is to zoom out, or look at your thumbnail from a feet away!
3) Make it stand out and be original Use bold colors, or unique designs to make your thumbnails stand out. Here are a few examples of different styles we have on various Filmora channels You dont necessarily need to use text in your thumbnail.
And here is a video tutorial you can check it out.
How to edit green screen video with Filmora9?
How to edit green screen video with Filmora9?
Green Screen effect is an advanced feature of Overlays. It makes a color range in the top layer of two overlay clips transparent, therefore the background video clip or image behind the top layer could show through. It's a special tool used during video making process so as to superimpose subjects onto an unlimited number of different virtual backgrounds, allowing you to make some really cool shots like creating a superhero flying through the sky. You can easily achieve this with the help of Filmora9 by using some green screen video footage clips or creating a pure green background when shooting your video footage.
Here are the steps you can refer to when edit green screen video with Filmora9.
1). Add Overlays to Video Clips
Please refer to this detailed guide on how to create video overlays with Filmora9.
2). Make a Green Screen
Launch Filmora9, and then hit Create New Project.
Import both your background videos/images and green screen clips to the media library.
Drag the background clip to the video track on the timeline, and green screen to the another track.
Move your cursor over to the green screen clip and double click to bring up the settings window at the left corner, and then just need to tick Chroma Key there. You will get the green screen effects automatically.
You also can refine video with tools like Tolerance, Offset and Alpha Channel to make background video clearer.
Once you are satisfied with the result, click OK at the lower right corner.
More details on how to edit green screen with Filmora9, you can check this video.
Use the free HTML editor or subscribe for a membership to have even more features. You can purchase a license at htmlg.com